What is a Landscape Bearing?
A landscape bearing is the direction from your location to a recognisable feature in the surrounding terrain. Unlike taking a bearing from the map, where you are planning a direction before or during your journey, a landscape bearing allows you to collect information from the terrain and transfer it back to your map or use it in the field for navigation to a feature.
You may use a landscape bearing to identify an unknown peak, confirm the identity of a distant feature, check your progress along a route, or determine your location using resection. It is one of the most valuable techniques for understanding the relationship between the map and the landscape.
Section 6. Taking a bearing from the landscape
Choosing a Suitable Feature
The accuracy of a landscape bearing depends largely on selecting a feature that can be confidently identified both in the landscape and on the map if required.
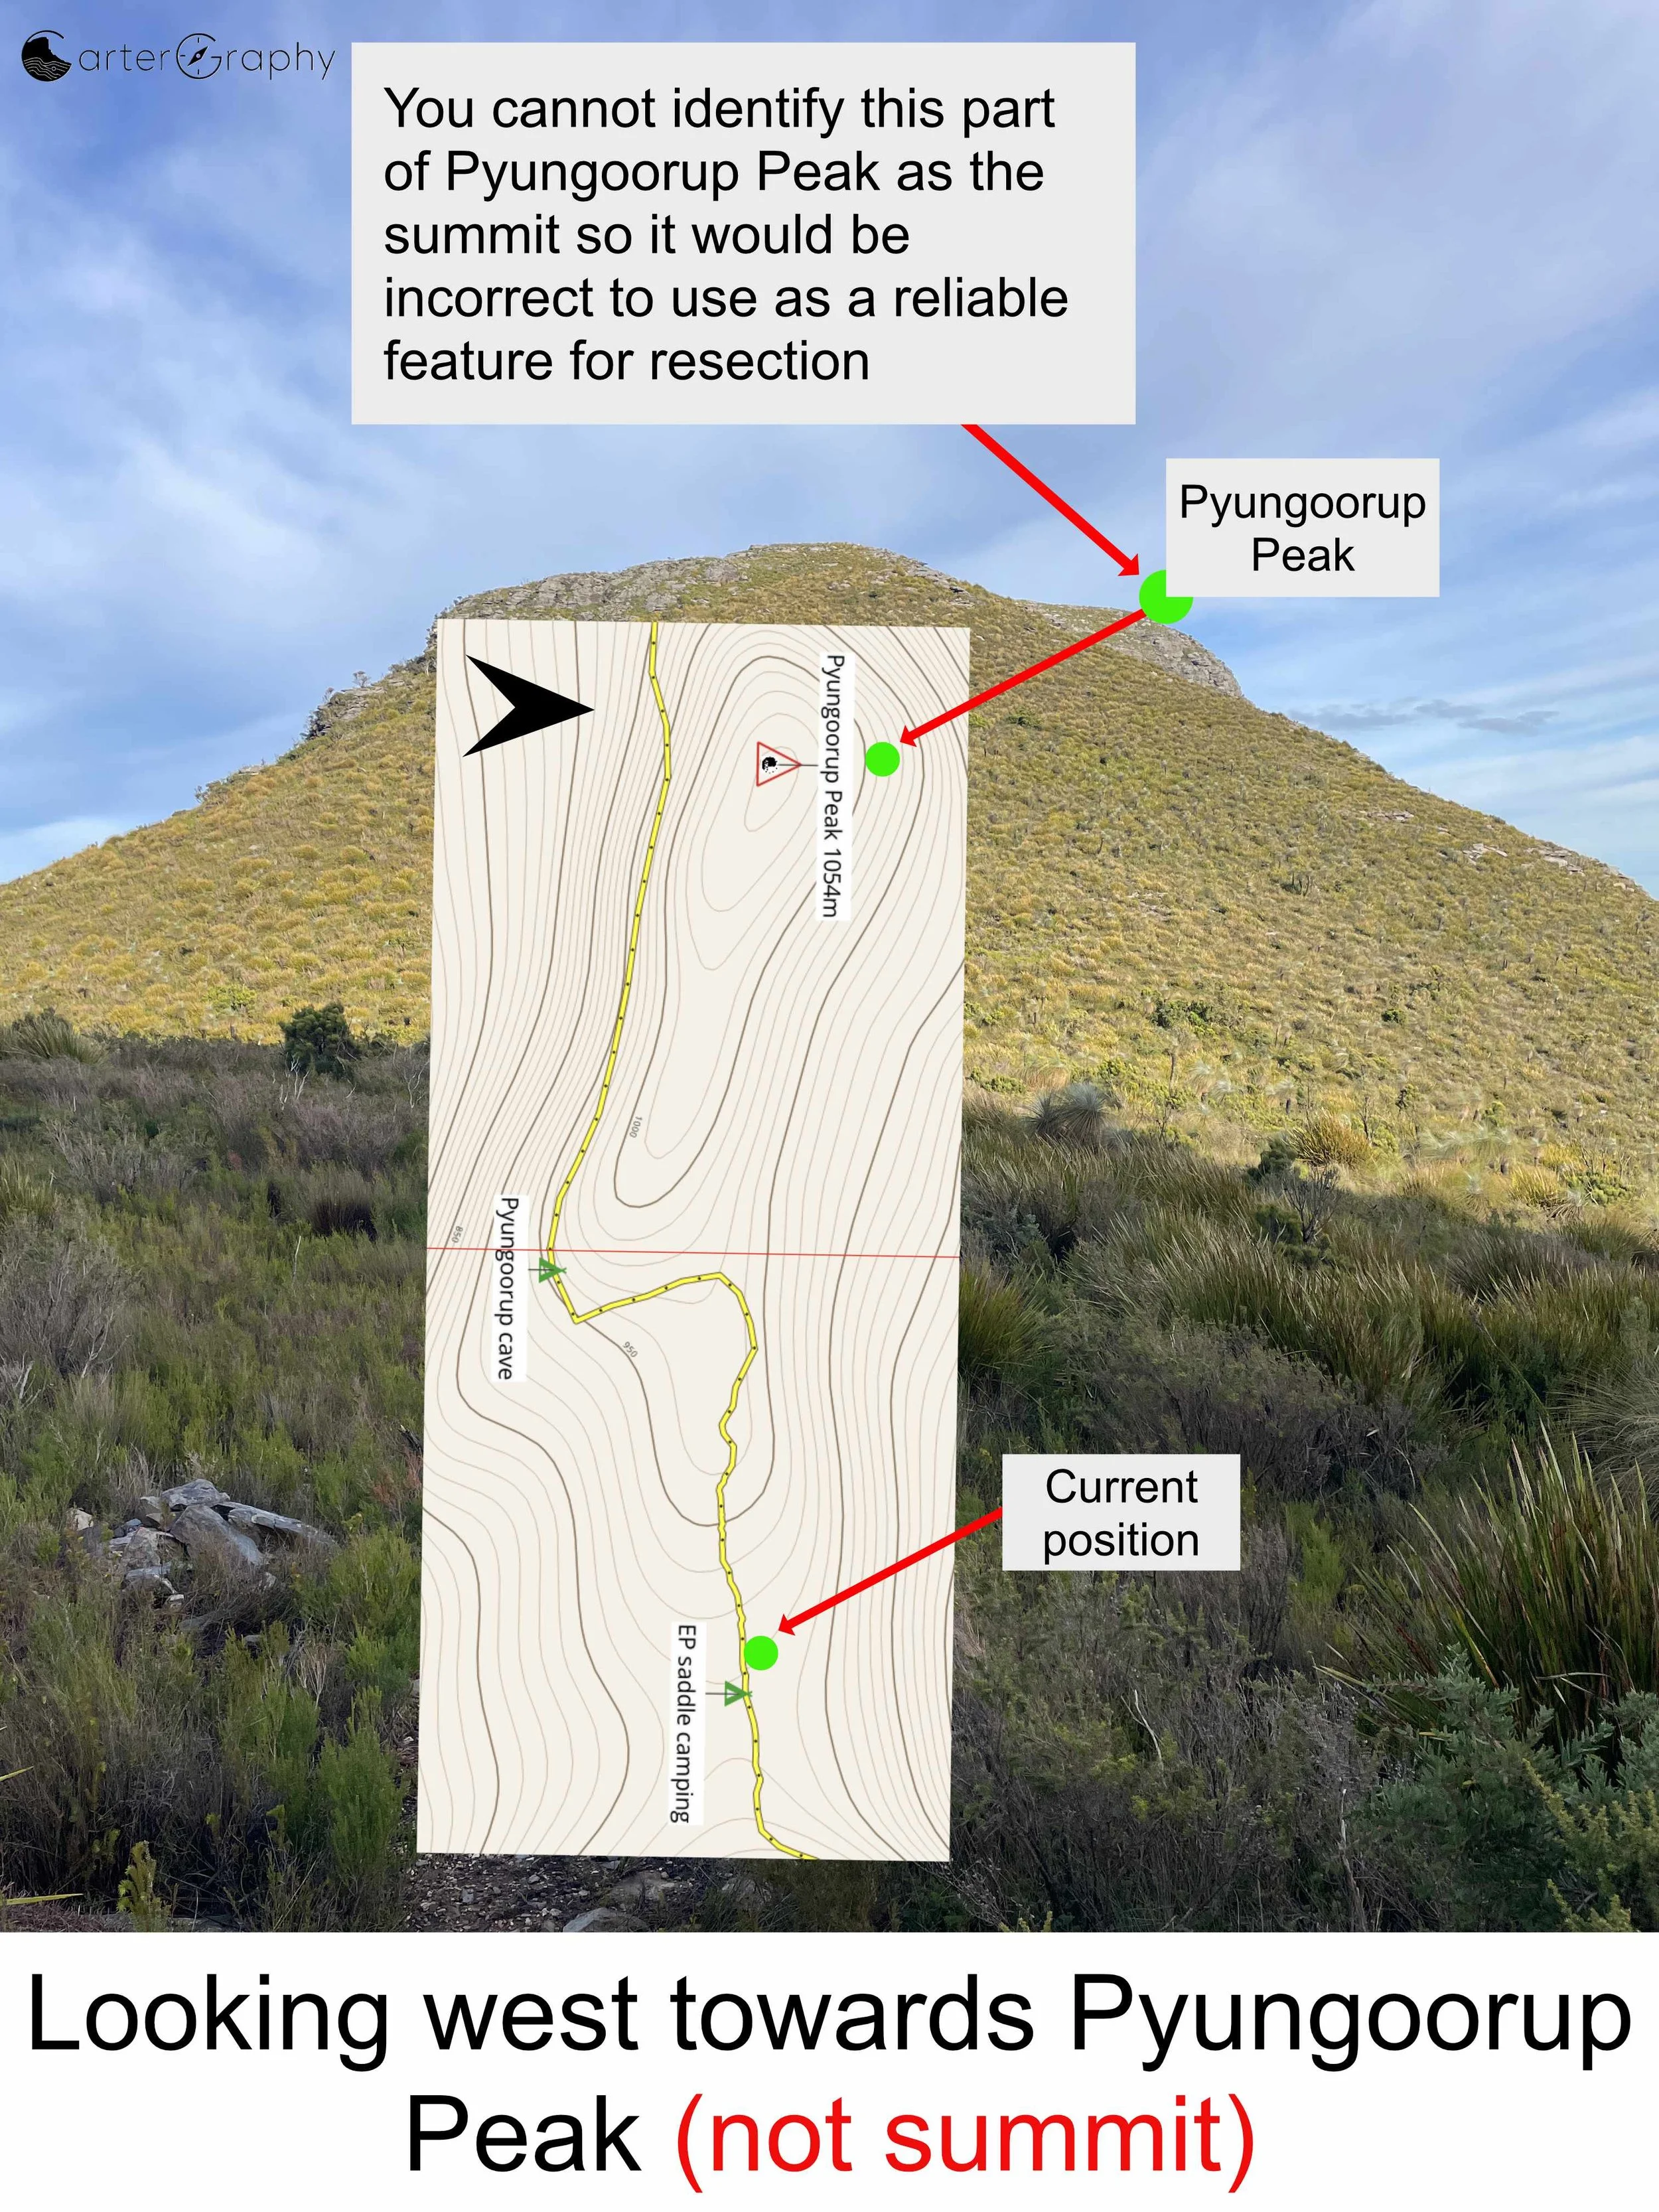
Good features include isolated summits, prominent rock outcrops, saddles, towers, cliffs and other distinct landmarks with a clearly defined position. Avoid taking bearings to broad ridgelines, dense vegetation or features with poorly defined edges, as they are much more difficult to identify accurately on the map.
On the Stirling Ridge Walk Overview Map 1 (Scale 1:25,000), all of the major peaks along the route are named. As you progress through this guide, the accompanying photographs will help you recognise and identify these peaks from different viewpoints throughout the walk. Becoming familiar with these landmarks will make it much easier to identify features in the landscape and confidently transfer bearings to the map.
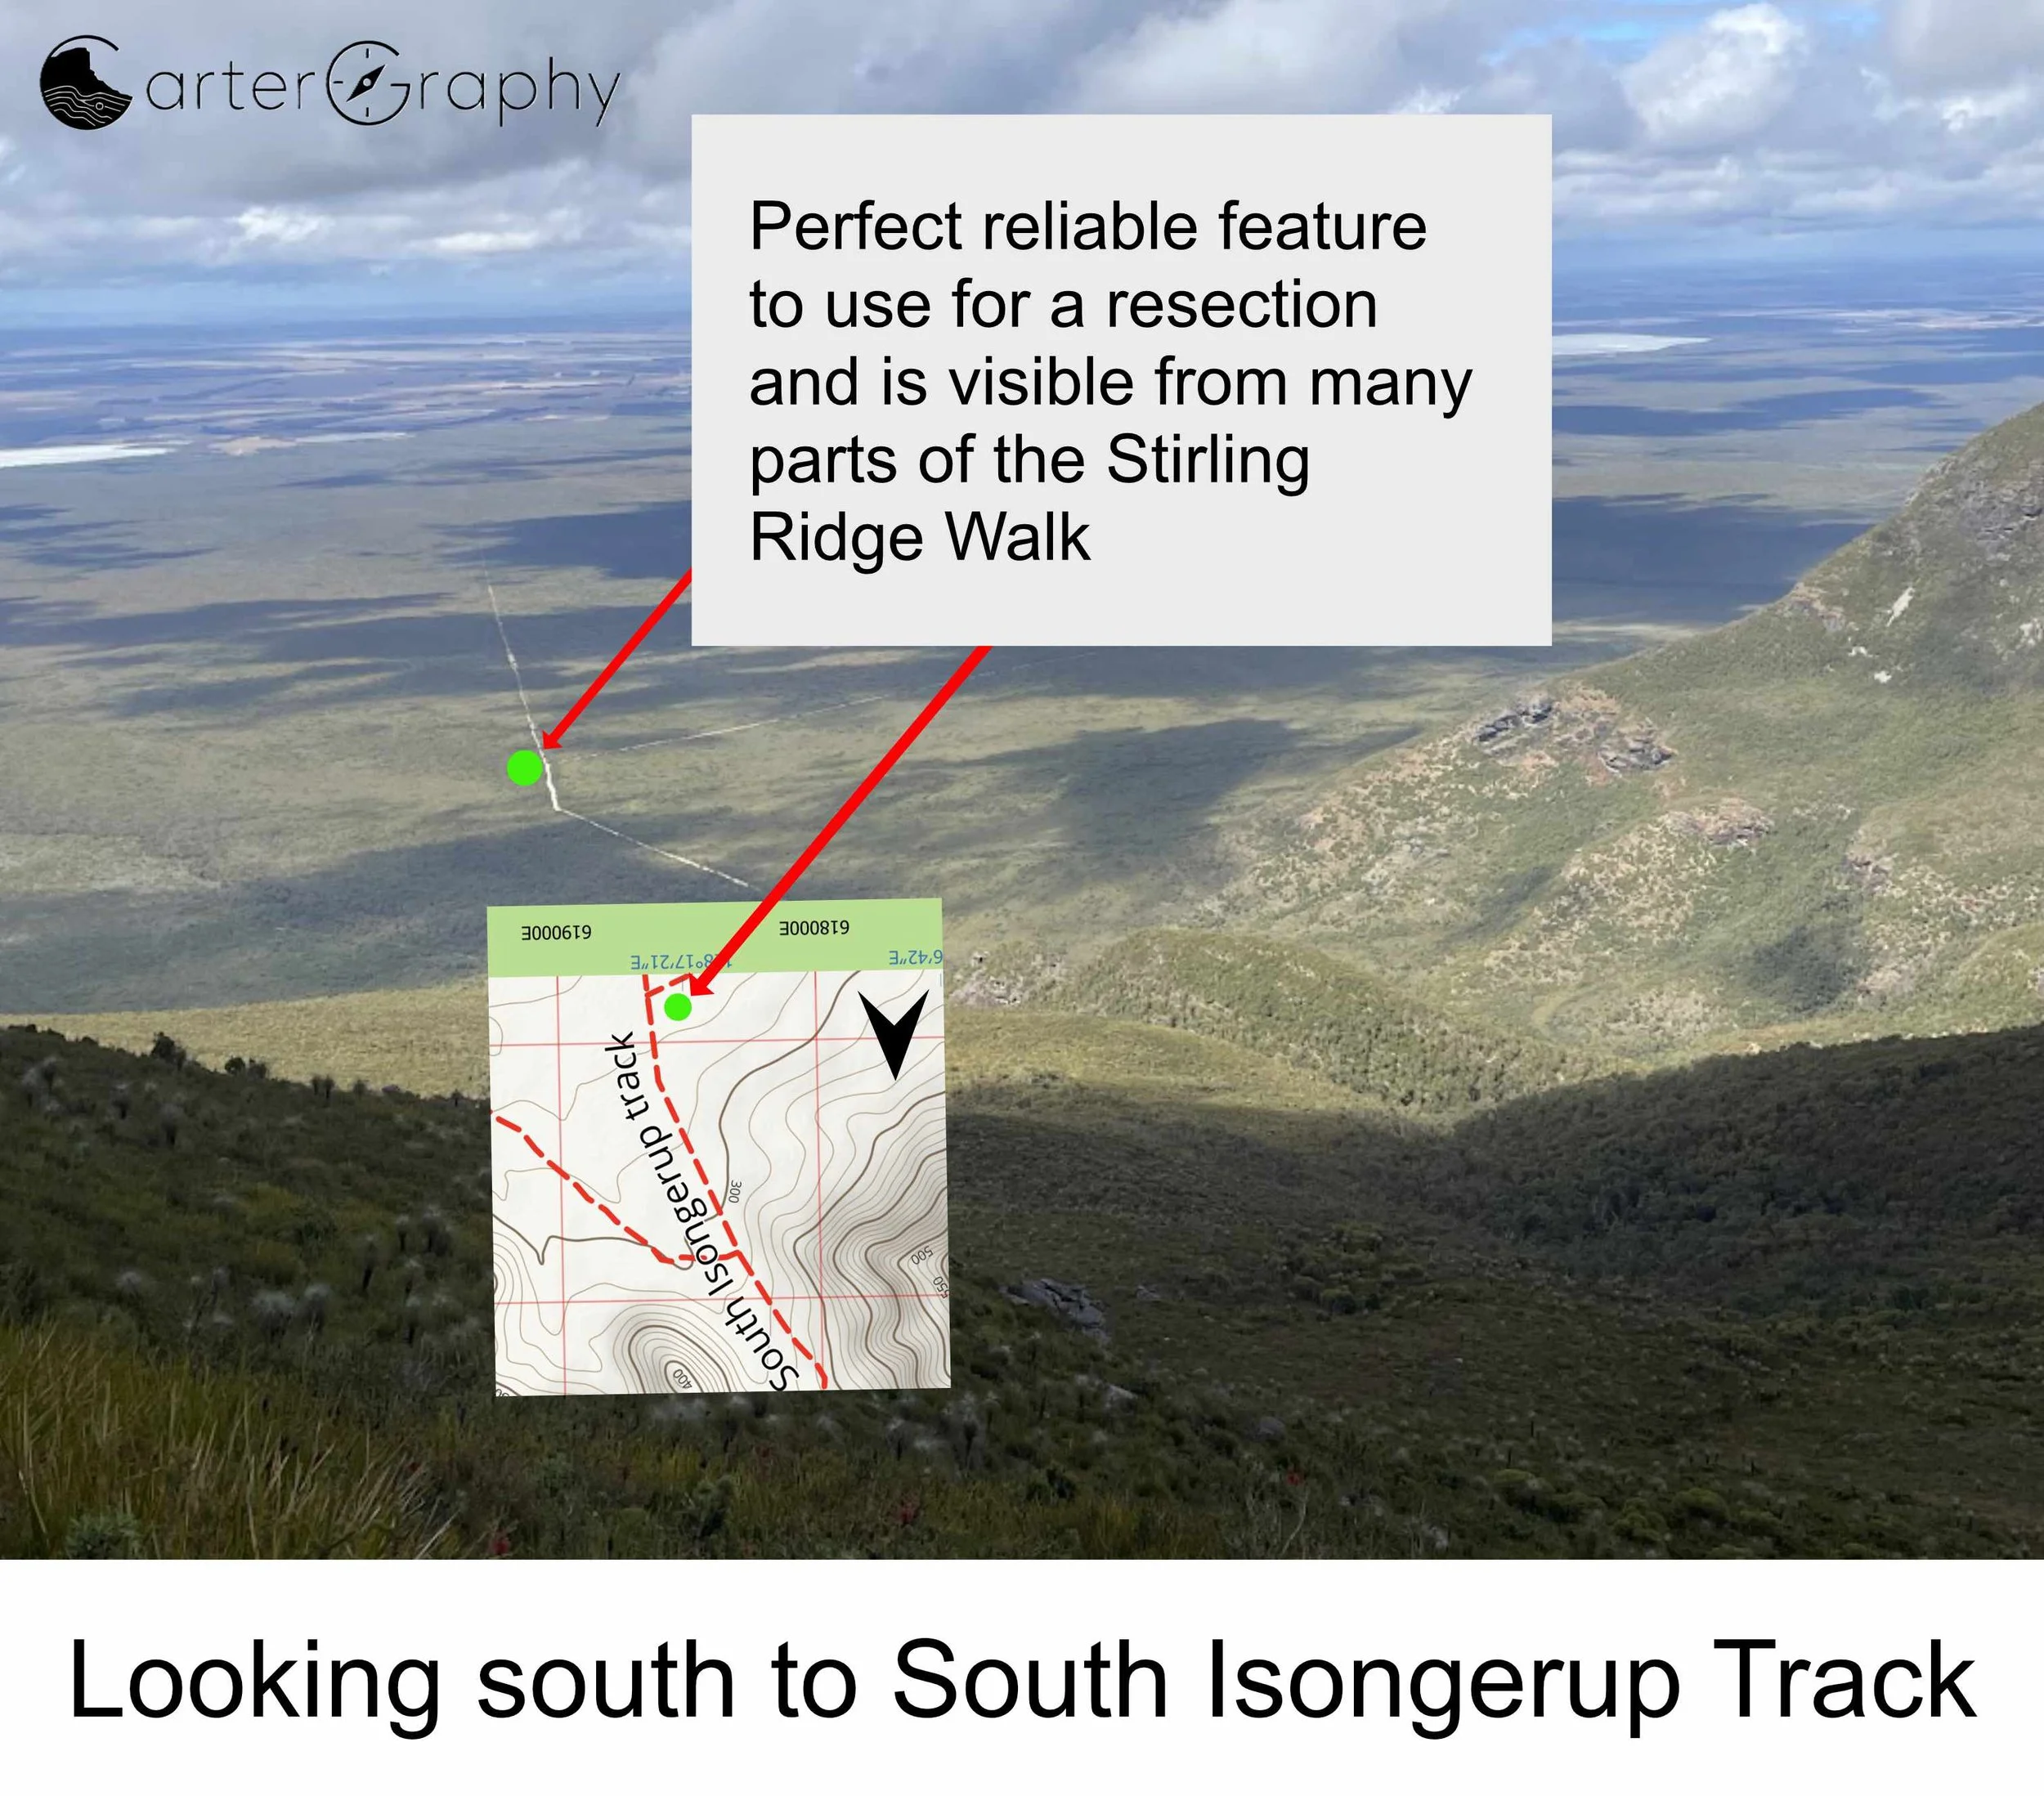
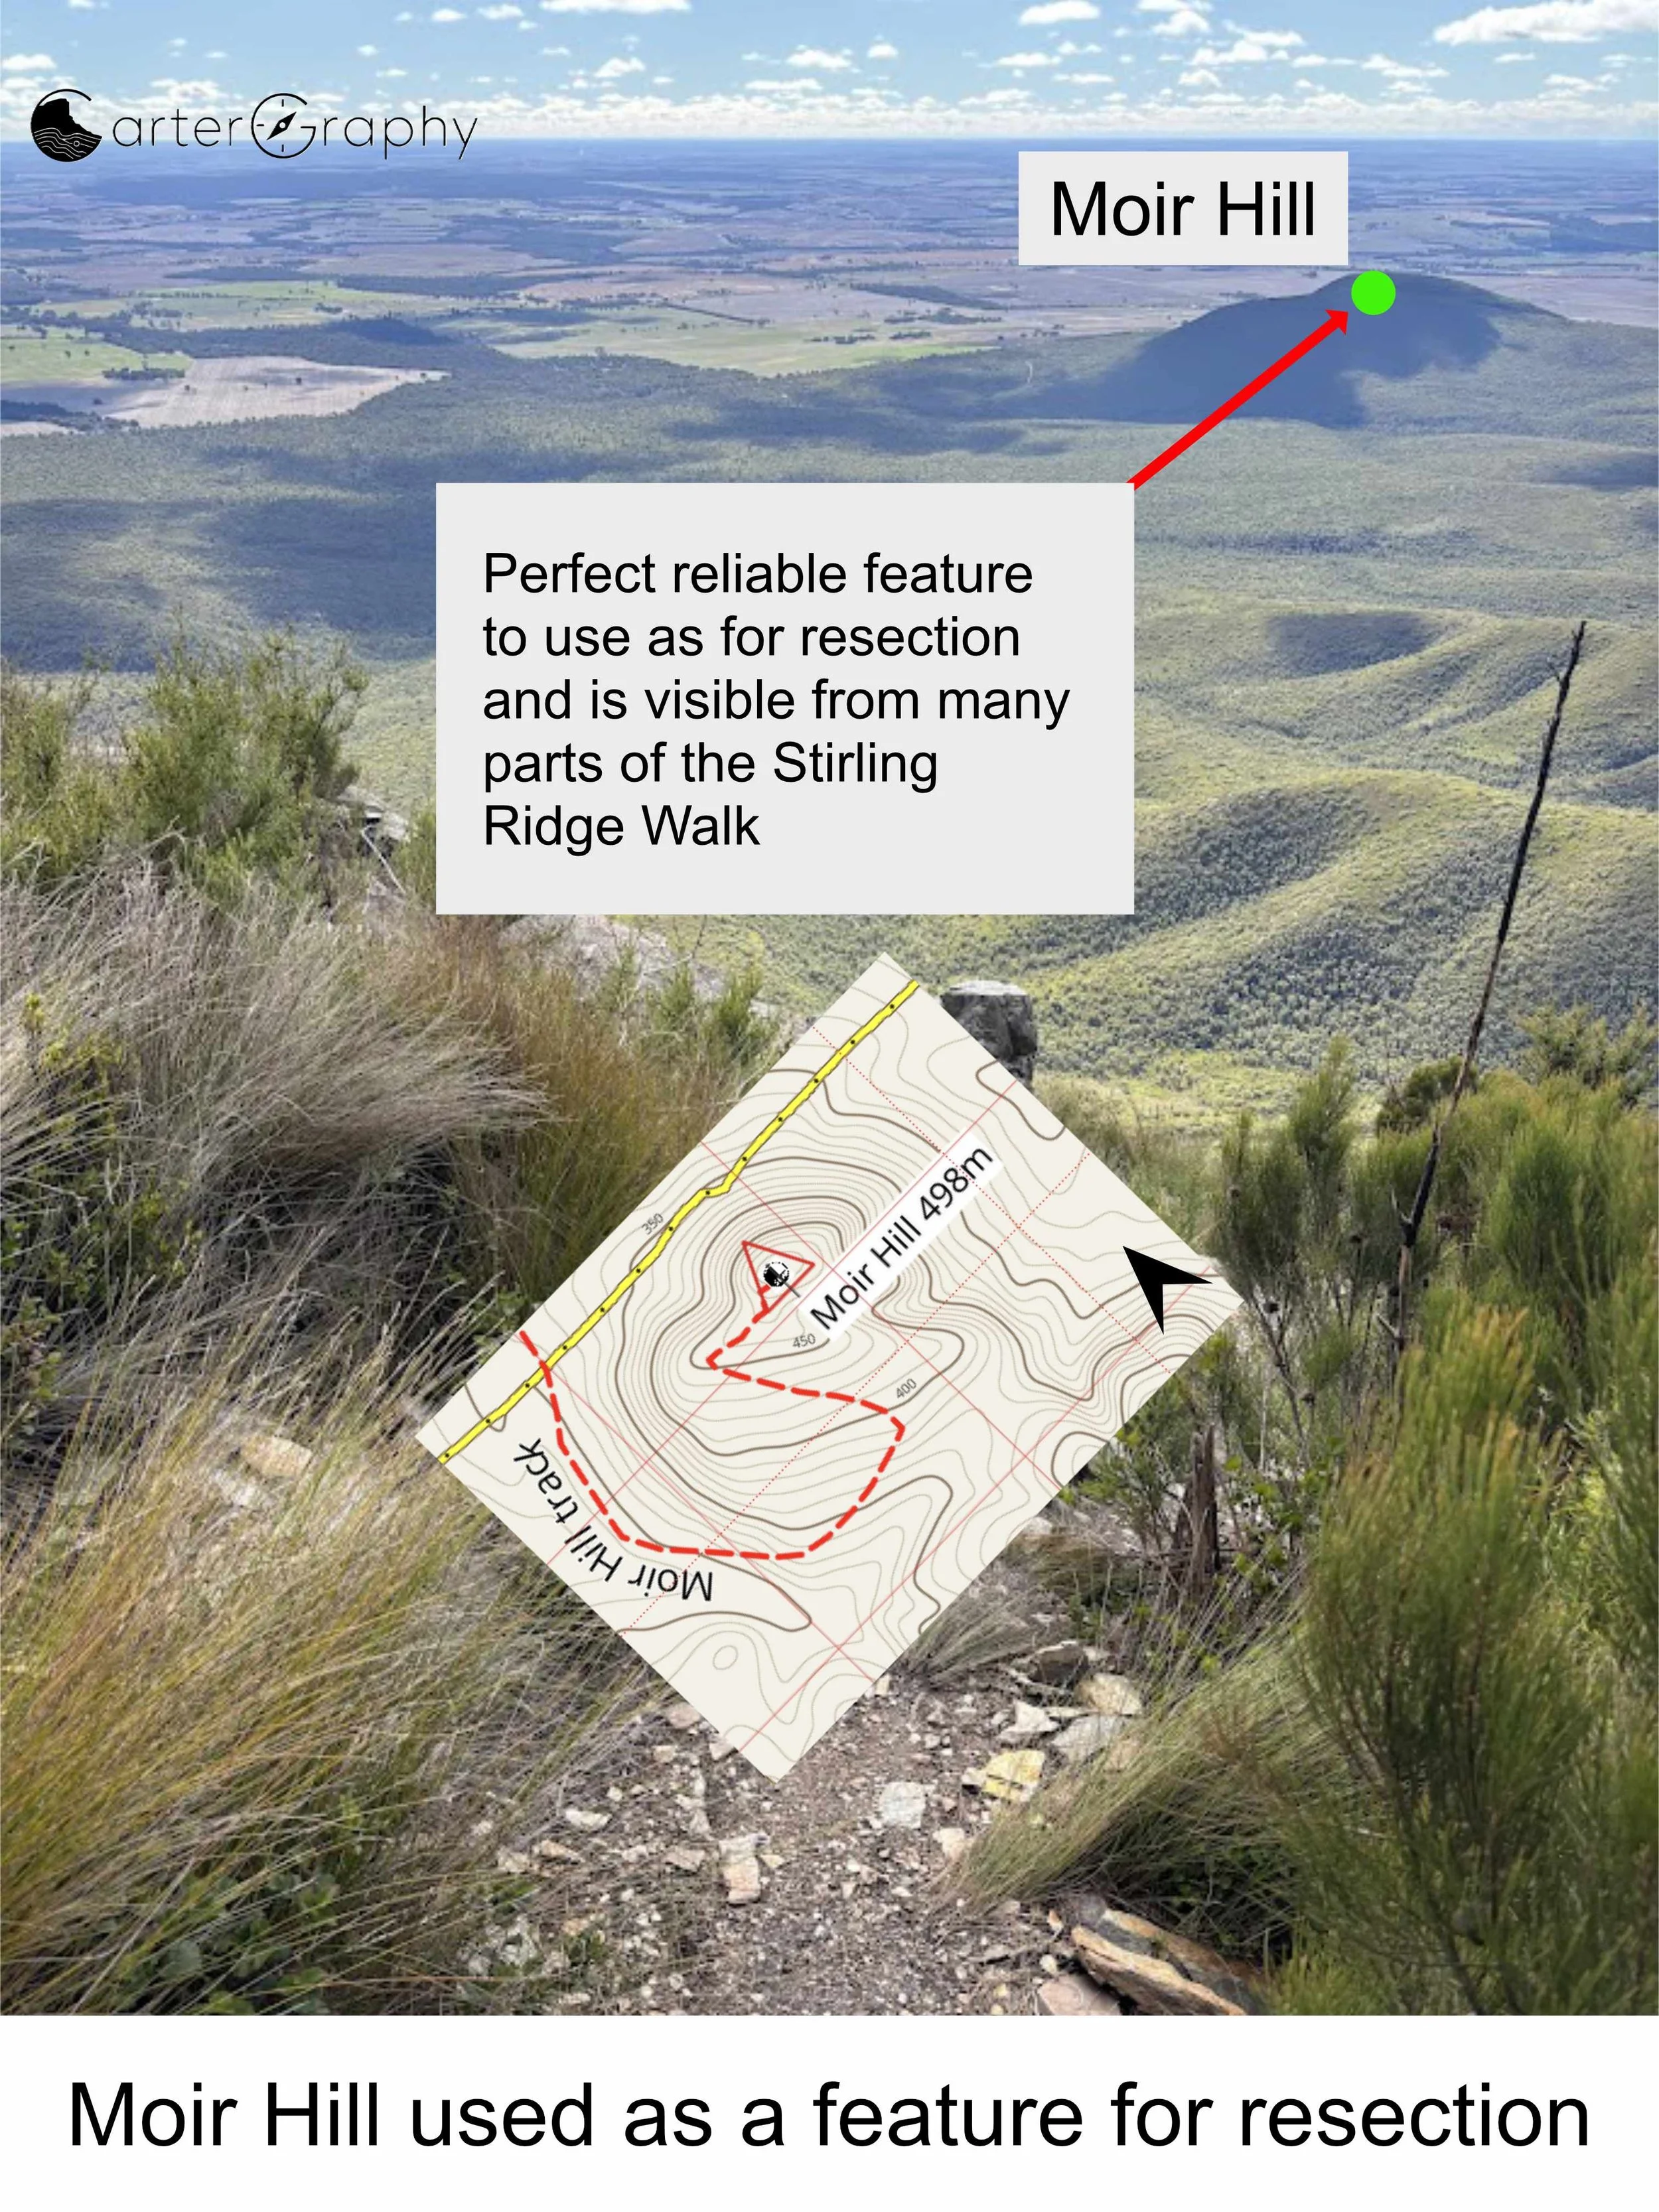
From many locations along the ridge, you can also look down and identify important navigation features such as Moir Hill, the North Mirlpunda Track, South Isongerup Track, and South Mirlpunda Track. Learning to recognise both prominent peaks and key track junctions will greatly improve your situational awareness and help you relate what you see on the ground to what is shown on the map.
Note: Common Pitfalls
Before taking a bearing, positively identify the feature you are aiming at in the landscape. When you transfer that bearing onto the map, you must then locate and use that same feature on the map.
For example, if you take a bearing to Isongerup North Peak in the field, the bearing must be plotted from Isongerup North Peak on the map, not from a neighbouring summit or similar looking feature such as Isongerup Main Peak.
Misidentifying the feature at either stage will result in the bearing being plotted from the wrong location and can produce a misleading resection.
Likewise, avoid using broad ridgelines, patches of vegetation or indistinct terrain features as your target. Always choose the most distinctive landmark available. A correctly measured bearing to the wrong feature is of little value and can result in significant navigation errors.
Take your time selecting the feature before worrying about the compass. An accurately identified landmark is far more valuable than a perfectly read bearing to the wrong feature.
If possible, support your elbows against your body or another stable object while taking the bearing. This reduces unnecessary movement and makes it easier to keep the Direction of Travel arrow precisely aligned with the selected feature.
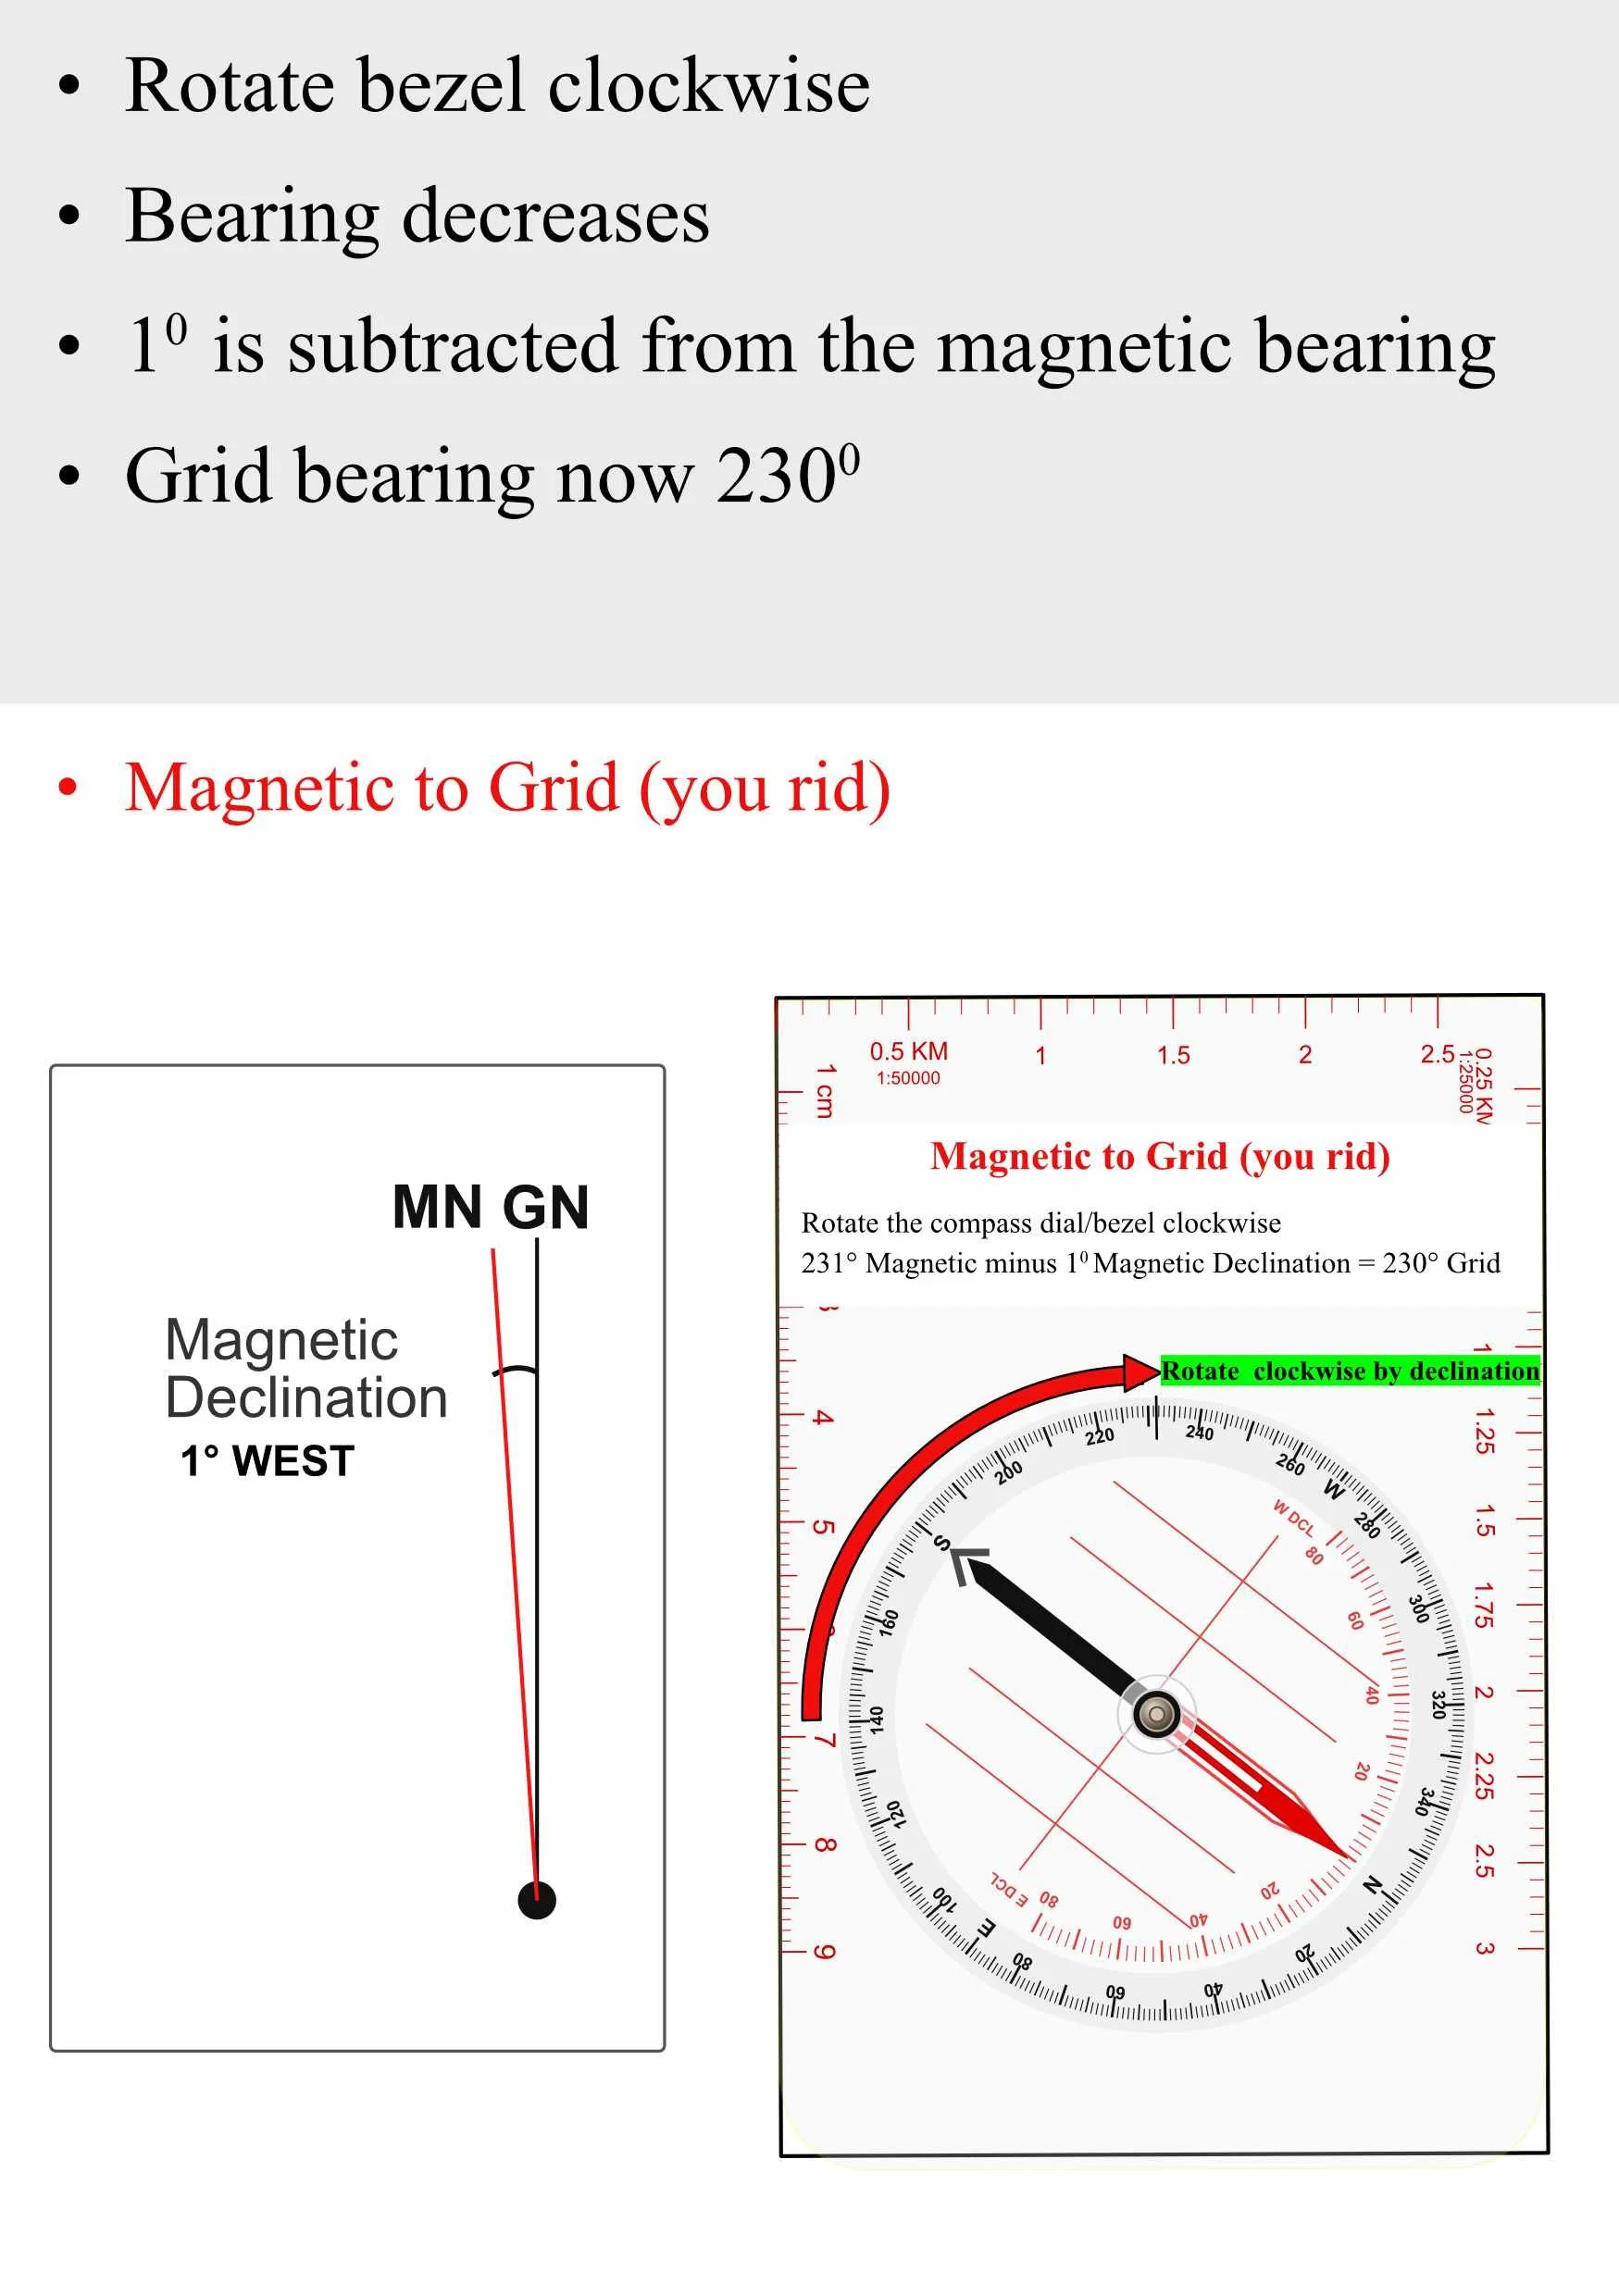
Remember that this bearing is only the first part of the process. To plot it on a map for resection, you may need to allow for any Magnetic Declination, which is explained in the next section.
Taking a Bearing from the Landscape
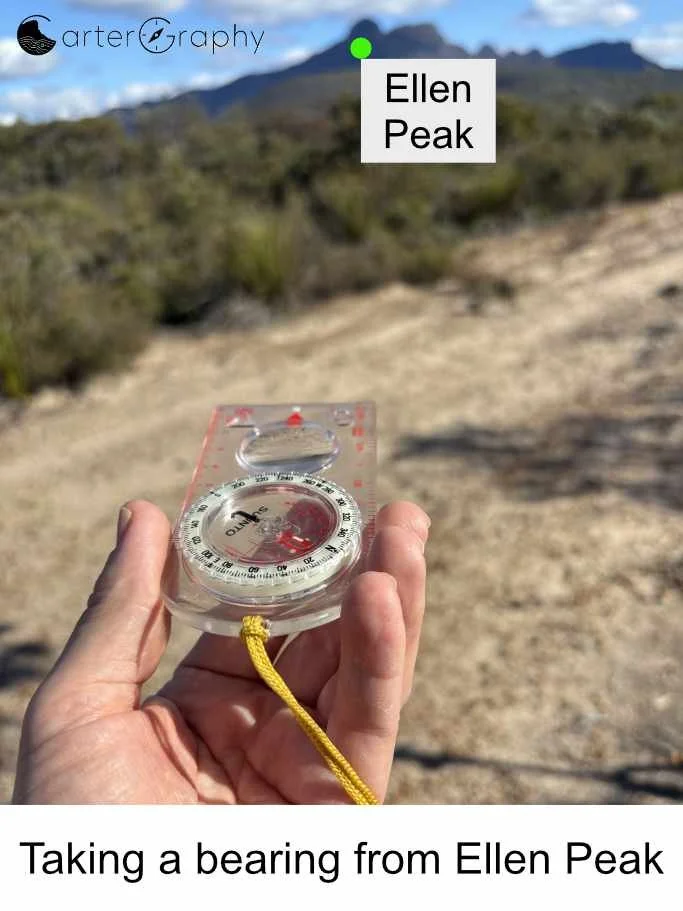
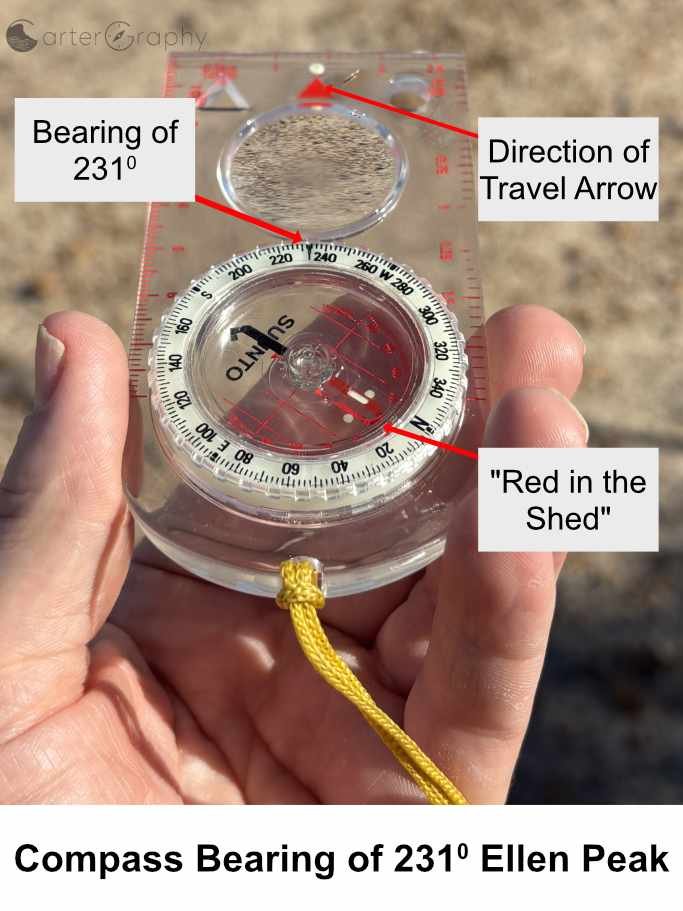
Taking an accurate bearing involves sighting a clearly identifiable feature while keeping the compass level and steady. Point the Direction of Travel arrow directly at the feature, then rotate the bezel until the magnetic needle is correctly aligned with the orienting arrow, (Red in the Shed)
Before reading the bearing, check both alignments again: the Direction of Travel arrow should still point precisely at the feature, and the magnetic needle should remain correctly aligned. Once satisfied, read and record the bearing at the bearing index.
If the bearing will later be plotted on a map, ensure that you can positively identify the same feature on the map and apply the appropriate magnetic declination before plotting it, unless your compass is already adjusted for declination.
Step 1:
Select a clearly identifiable feature in the landscape.
Hold the compass at about eye level and point the Direction of Travel arrow directly at the selected feature.
Step 2:
Keeping the compass as steady as possible, rotate the compass housing (bezel) until the red end of the magnetic needle sits inside the orienting arrow (Red in the Shed).
Check that the Direction of Travel arrow is still pointing precisely at the selected feature. It is common for the compass to move slightly while rotating the bezel. If necessary, realign the compass with the feature and repeat the process until both the feature and the magnetic needle remain correctly aligned. Read the bearing at the bearing index.
Step 3:
Record the bearing if you intend to transfer it to the map later.
If you intend to transfer the bearing onto your map for resection or other navigation purposes, remember to apply the correct magnetic declination before plotting the bearing, unless your compass has already been adjusted for the local magnetic declination.