
Section 1:What this map is designed to do
The Stirling Ridge Walk Map is a purpose built field map designed specifically for the full Stirling Ridge Walk. Printed on A1, double sided, waterproof, and folded to pocket size, it has been created to be carried, read, and used on the ridge itself rather than treated as a large reference sheet.
Its design combines a 1:25,000 overall view of the route with detailed overlay panels and enlarged mapping for key sections where closer terrain reading is more useful. This allows the map to show both the broader structure of the traverse and the finer detail needed in more complex parts of the ridge.
That matters because the Stirling Ridge Walk is not a route where every section demands the same type of map reading. Some parts are easier to understand in their broader setting, while others need much more detailed treatment. Areas such as the Ellen Peak summit, the track through 3rd Arrow, and navigation through the 1st Arrow are examples of places where the terrain, route, and decision points benefit from enlarged mapping and closer visual interpretation. Other parts of the map help users identify the location of campsites, caves, escape routes, major saddles, and key transitions along the ridge.
Rather than functioning only as a general topographic map, it is designed to help users understand how the route is laid out, where the more demanding sections sit, and how practical features along the way relate to the terrain around them. That includes not just the main line of travel, but also the broader context of the ridge, the relationship between one section and the next, and the location of important features that may matter for planning, pacing, relocation, or safety.
It is also designed with practical field use in mind. On a route like this, a printed map is not just a planning aid. It can be an important safety tool if visibility drops, if you drift from the track, or if a phone or electronic app is no longer useful. Being able to identify where you are in relation to known features such as summits, arrows, caves, campsites, or escape routes can make a significant difference when relocating yourself or communicating your position clearly.
The aim of this map is not simply to show where the walk goes. It is to make the Stirling Ridge Walk easier to understand, easier to use, and more reliable to work with in real conditions. By combining overall ridge context with enlarged detail where it is needed most, the map is designed to support better planning, clearer terrain interpretation, and safer decision making on the route itself.
Section 2. Getting the most from your map
The Stirling Ridge Walk Map is designed to be used at more than one level. The overview map provides the broader structure of the route, the numbered sectional maps allow more detailed navigation across the ridge, and the enlarged inlays provide closer interpretation where terrain and route finding become more intricate. Used together, these components allow the user to move logically from broad context to fine detail.
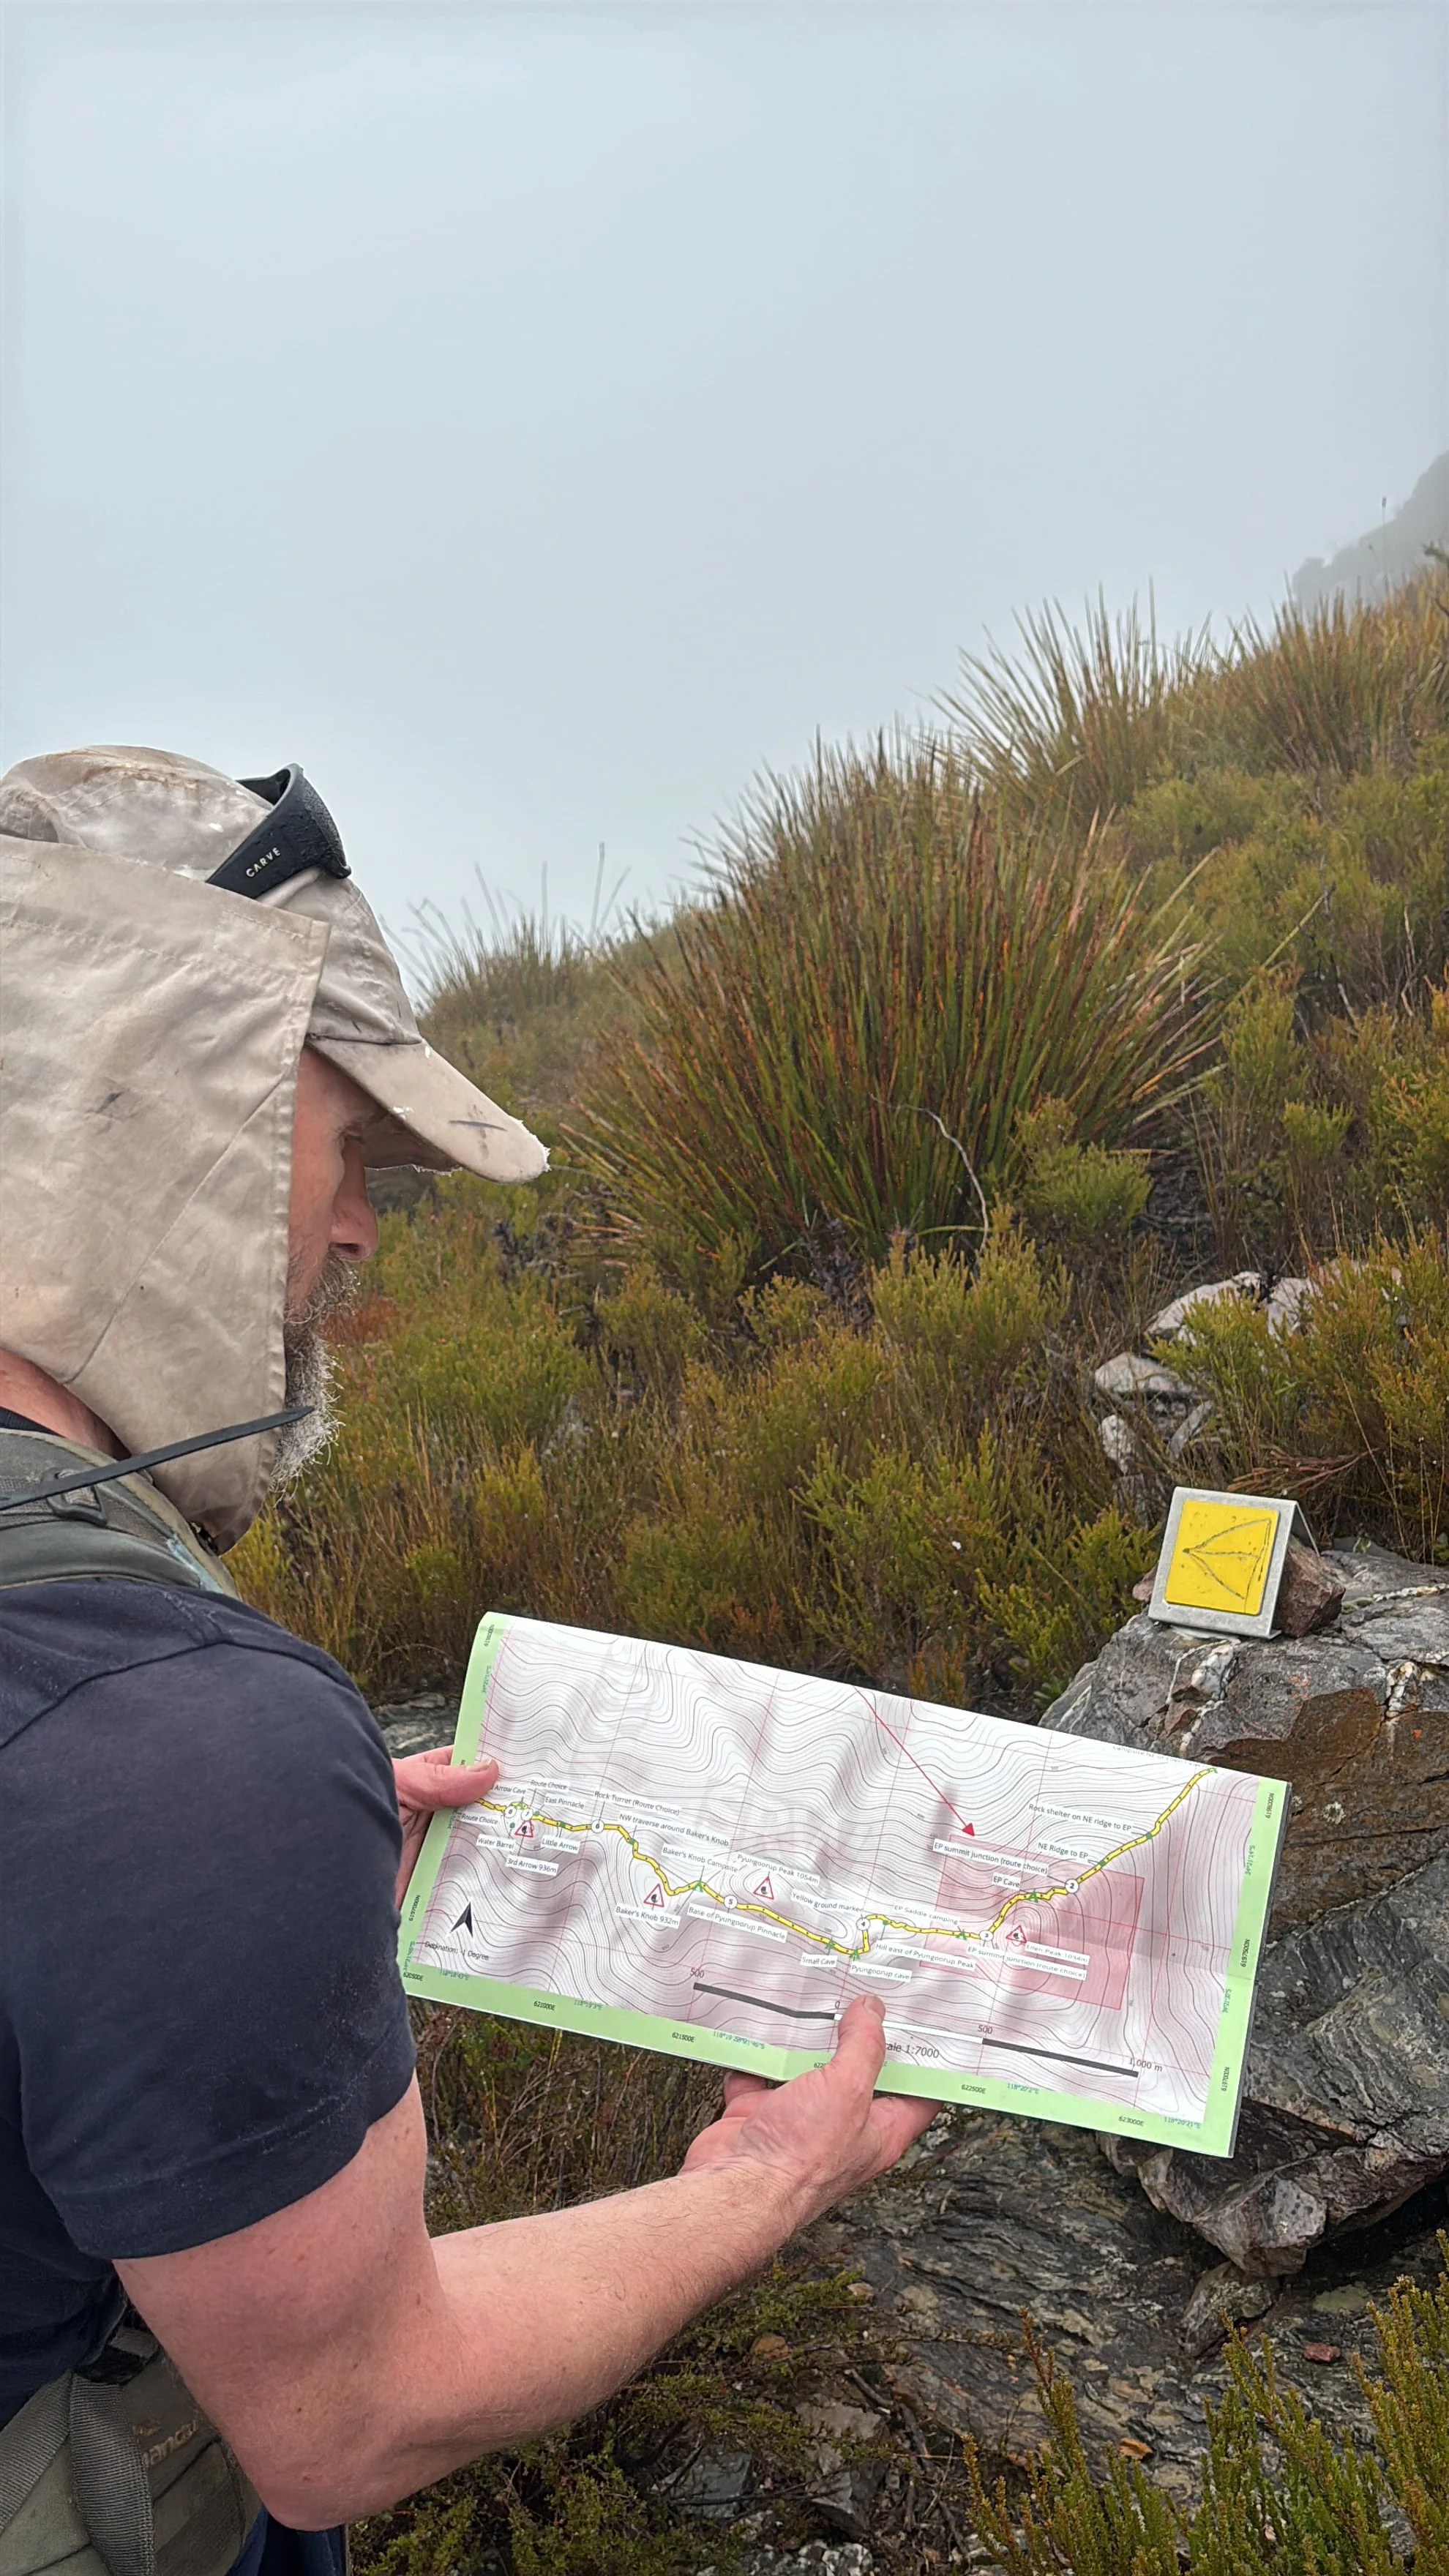
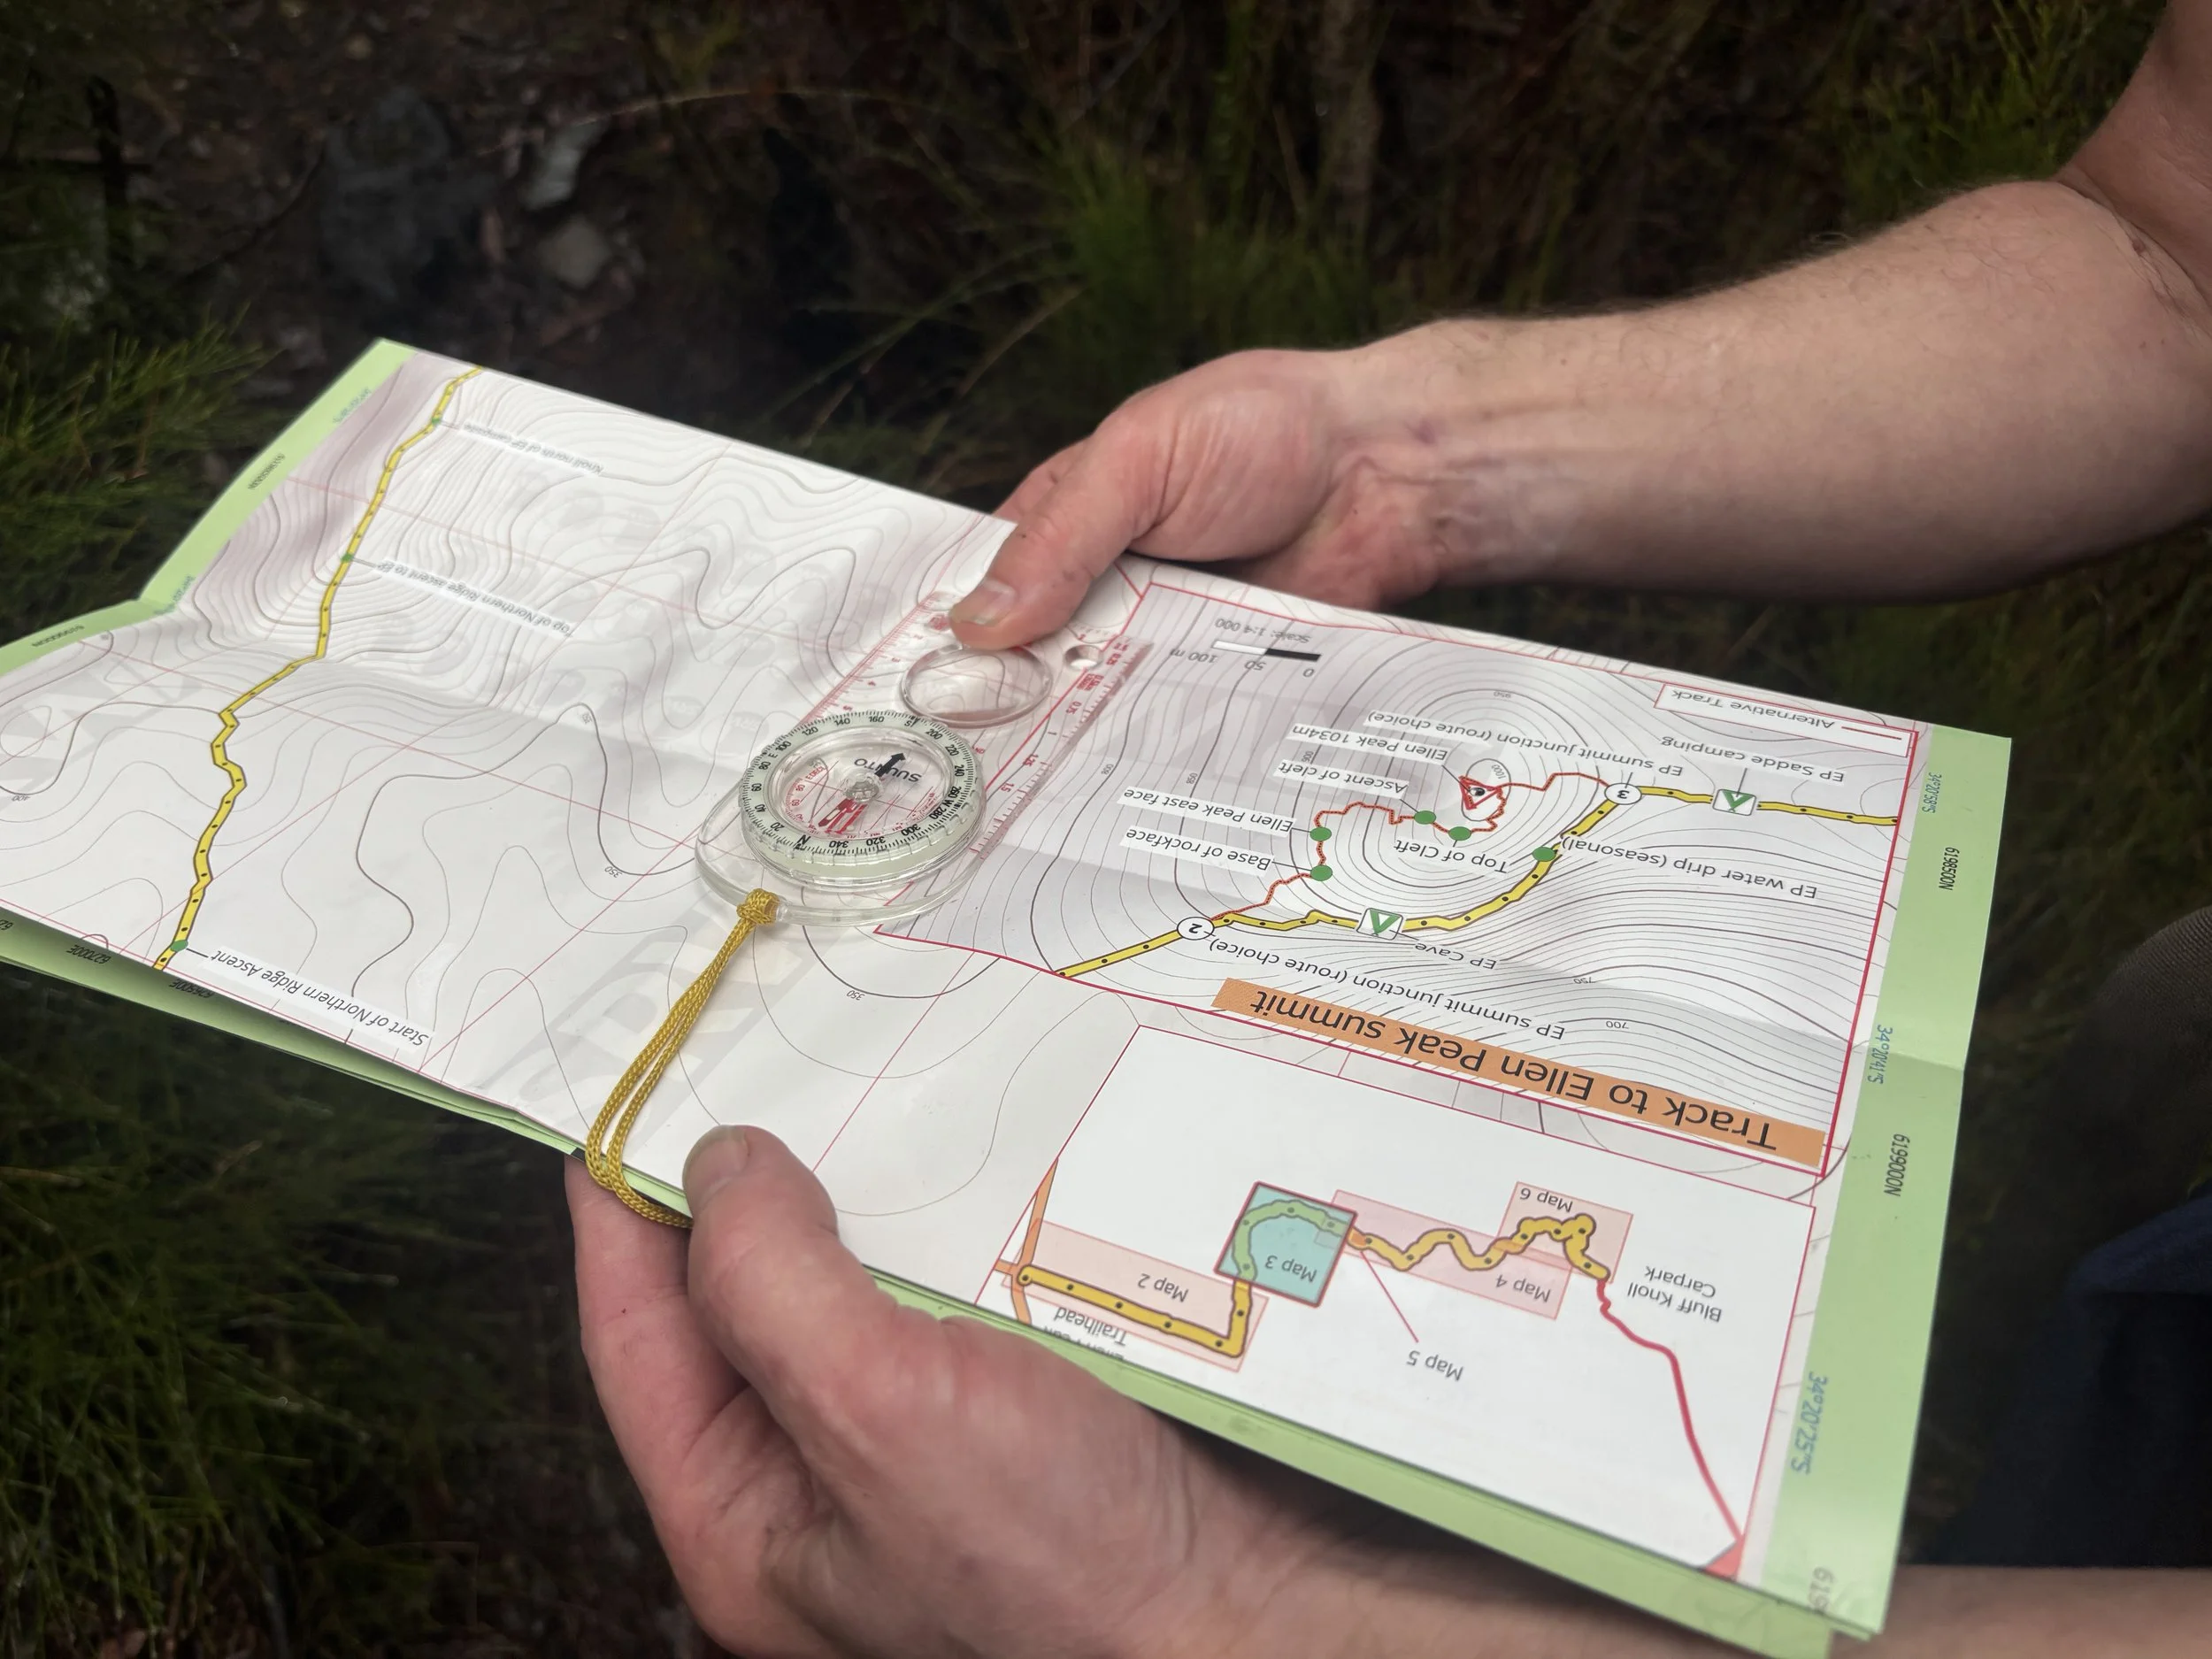
To gain the greatest benefit from the map, it should be used in conjunction with a compass. Simply carrying the map is not enough. A map only becomes an effective navigation tool when it is correctly orientated to the surrounding terrain. By aligning the map with the landscape using a compass, the relationship between the map and the features around you becomes much easier to understand. This makes it far easier to confirm your position and make sound navigation decisions. Throughout this guidebook, the map and compass should be regarded as a single navigation system rather than two separate tools.
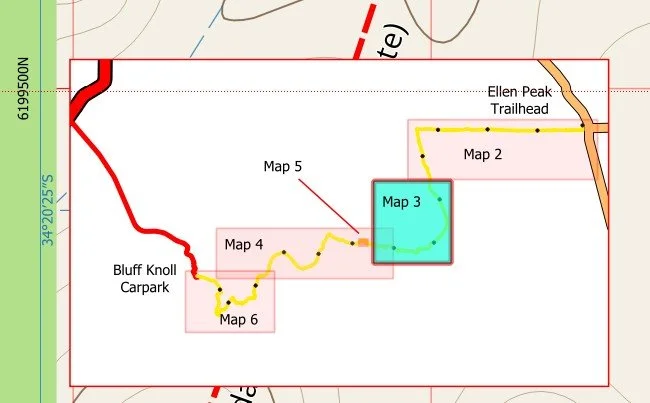
A good starting point is Map 1. This provides an overview of the entire traverse and helps place each section within the broader route. From there, Maps 2 to 6 can be followed in sequence from the Ellen Peak Trailhead towards the Bluff Knoll Carpark. Walkers travelling in the opposite direction will normally read the maps in reverse order.
The overlay boxes show where each detailed panel fits within the overall route, while the enlarged inlays provide a further level of detail where terrain interpretation requires a closer look. Waypoints and labels should also be viewed in this layered way. The overview map presents the principal features of the Stirling Ridge Walk, while the enlarged panels include additional labels where greater precision is needed.
The legend is another important part of using the map effectively. Different colours, symbols and line styles distinguish the main walking route from management tracks, boundary access routes and other reference features. Taking a few minutes to become familiar with the legend before setting out will make the map much easier to interpret during the walk.
Grid references, contour lines, scale bars and waypoint names all contribute to understanding the map. When used together with a compass, they allow you to relate the map to the terrain, judge distance more accurately and maintain your awareness of where you are along the route.
Although GPS devices and smartphone applications are valuable navigation aids, they should be regarded as supplementary to good map and compass skills, not as complete replacements. Electronic navigation has limitations and should never be relied upon as your sole means of navigation. A compass never runs out of battery power and, when combined with a well-prepared map, provides a dependable means of navigation regardless of the technology you carry.
The purpose of this map is not simply to show where the route goes. It is designed to help users understand the landscape and navigate it with confidence. Used correctly, and in conjunction with a compass, it becomes far more than a route map. It becomes a practical navigation tool that supports safer travel throughout the Stirling Ridge Walk.

Section 3. Understanding the map layout
The Stirling Ridge Walk Map is structured across two sides, with each side serving a different purpose.
One side provides the full route overview at 1:25,000 scale. This is the broad planning and orientation side of the map. It shows the full traverse in one continuous view, allowing users to understand how the major peaks, saddles, campsites, caves, access points, and escape options relate to one another across the ridge as a whole. This overview is useful for seeing the bigger picture, understanding where different sections sit within the full walk, and keeping the full traverse in mind while planning or navigating.
The other side is devoted to more detailed sectional mapping. Instead of treating the entire ridge at one single scale, the route has been broken into a number of larger scale map panels, each focused on a specific part of the walk. These detailed panels allow more complex terrain and route sections to be shown more clearly than would be possible on the overview alone.
This two sided structure is deliberate. The overview side helps users understand the walk as a whole, while the detailed side allows closer reading of sections where terrain, track position, or route interpretation matter more. Areas such as the Ellen Peak summit zone, the line through the Third Arrows, and navigation through the First Arrow benefit from this enlarged treatment, as do places where campsites, caves, saddles, and escape routes need to be understood in closer relation to the ground around them.
The map is therefore designed to work at two levels at once. It gives users a broad sense of the ridge from end to end, while also providing enlarged sections for more detailed interpretation where that is most useful. Rather than asking one map scale to do everything, the structure allows the overview and the detailed panels to support each other.
Because the map is printed double sided on A1 and folded to pocket size, this structure also makes practical sense in the field. The full overview can be used for broad planning, stage awareness, and overall route context, while the detailed side can be used when more careful reading of a specific section is needed. The result is a map layout designed not just to display the ridge, but to help users understand it more clearly and use it more effectively.

Section 4. Understanding the overview side and the detailed Side
The map is structured to work across several levels of detail.
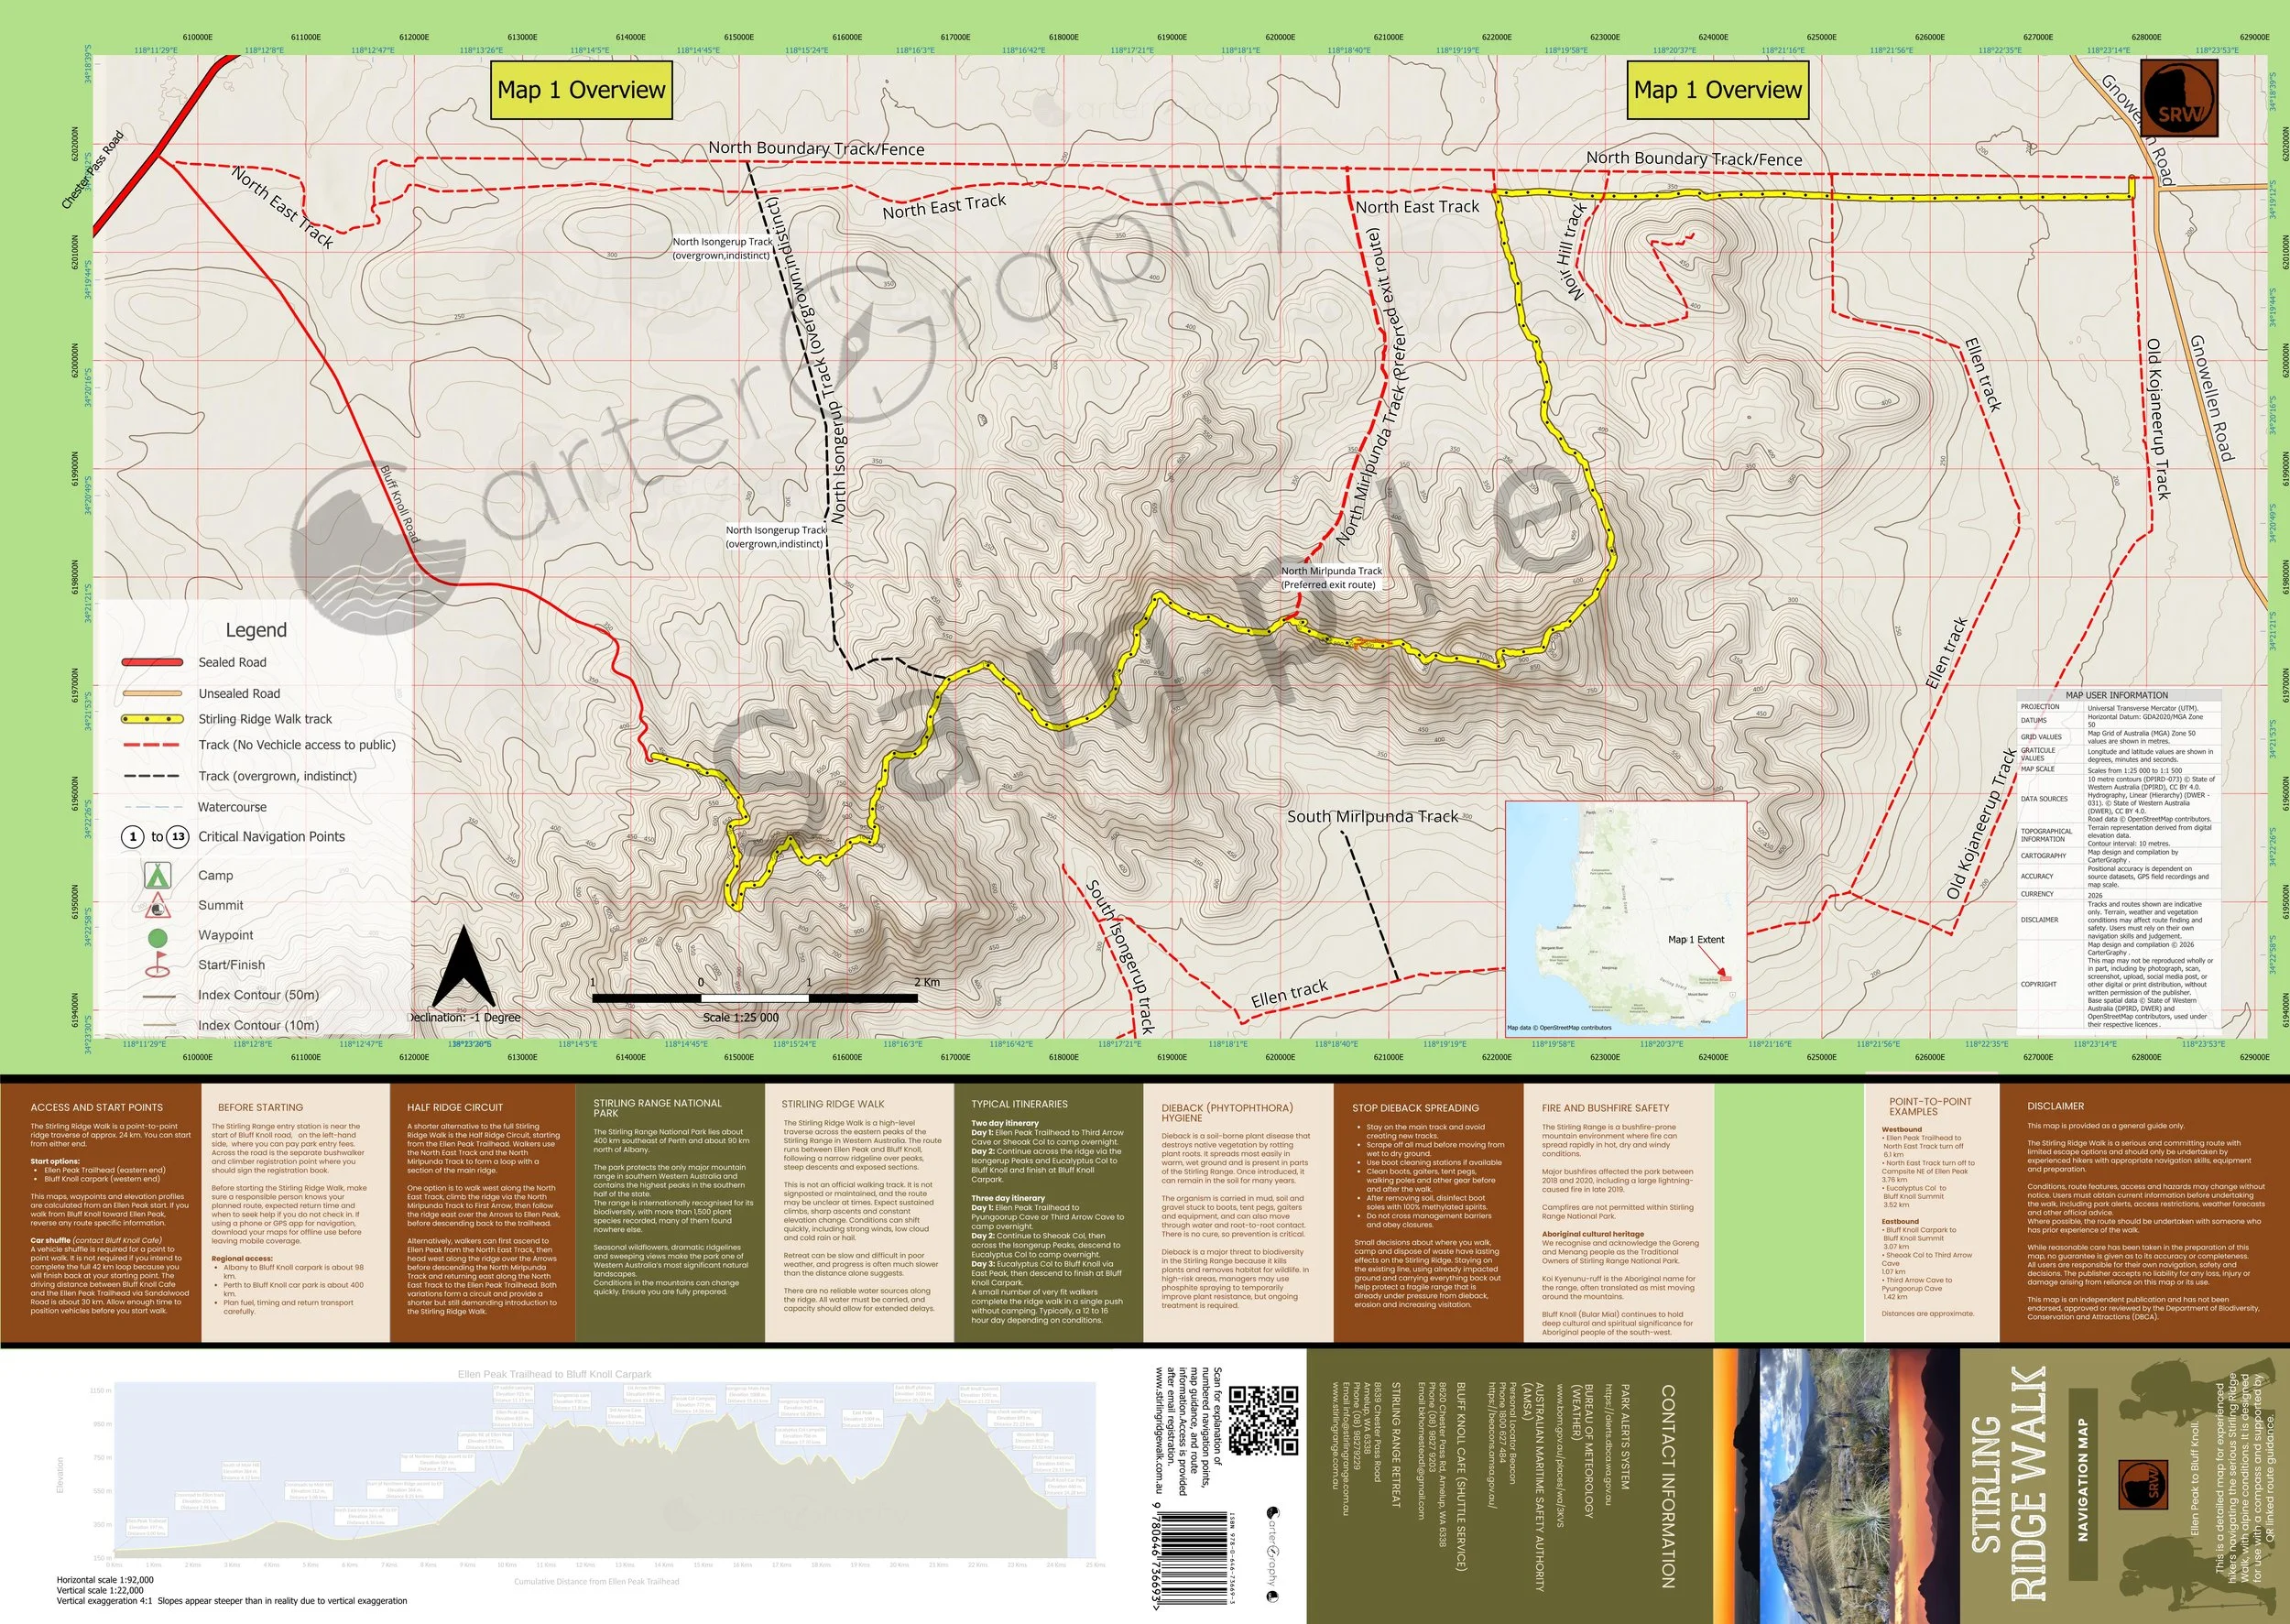
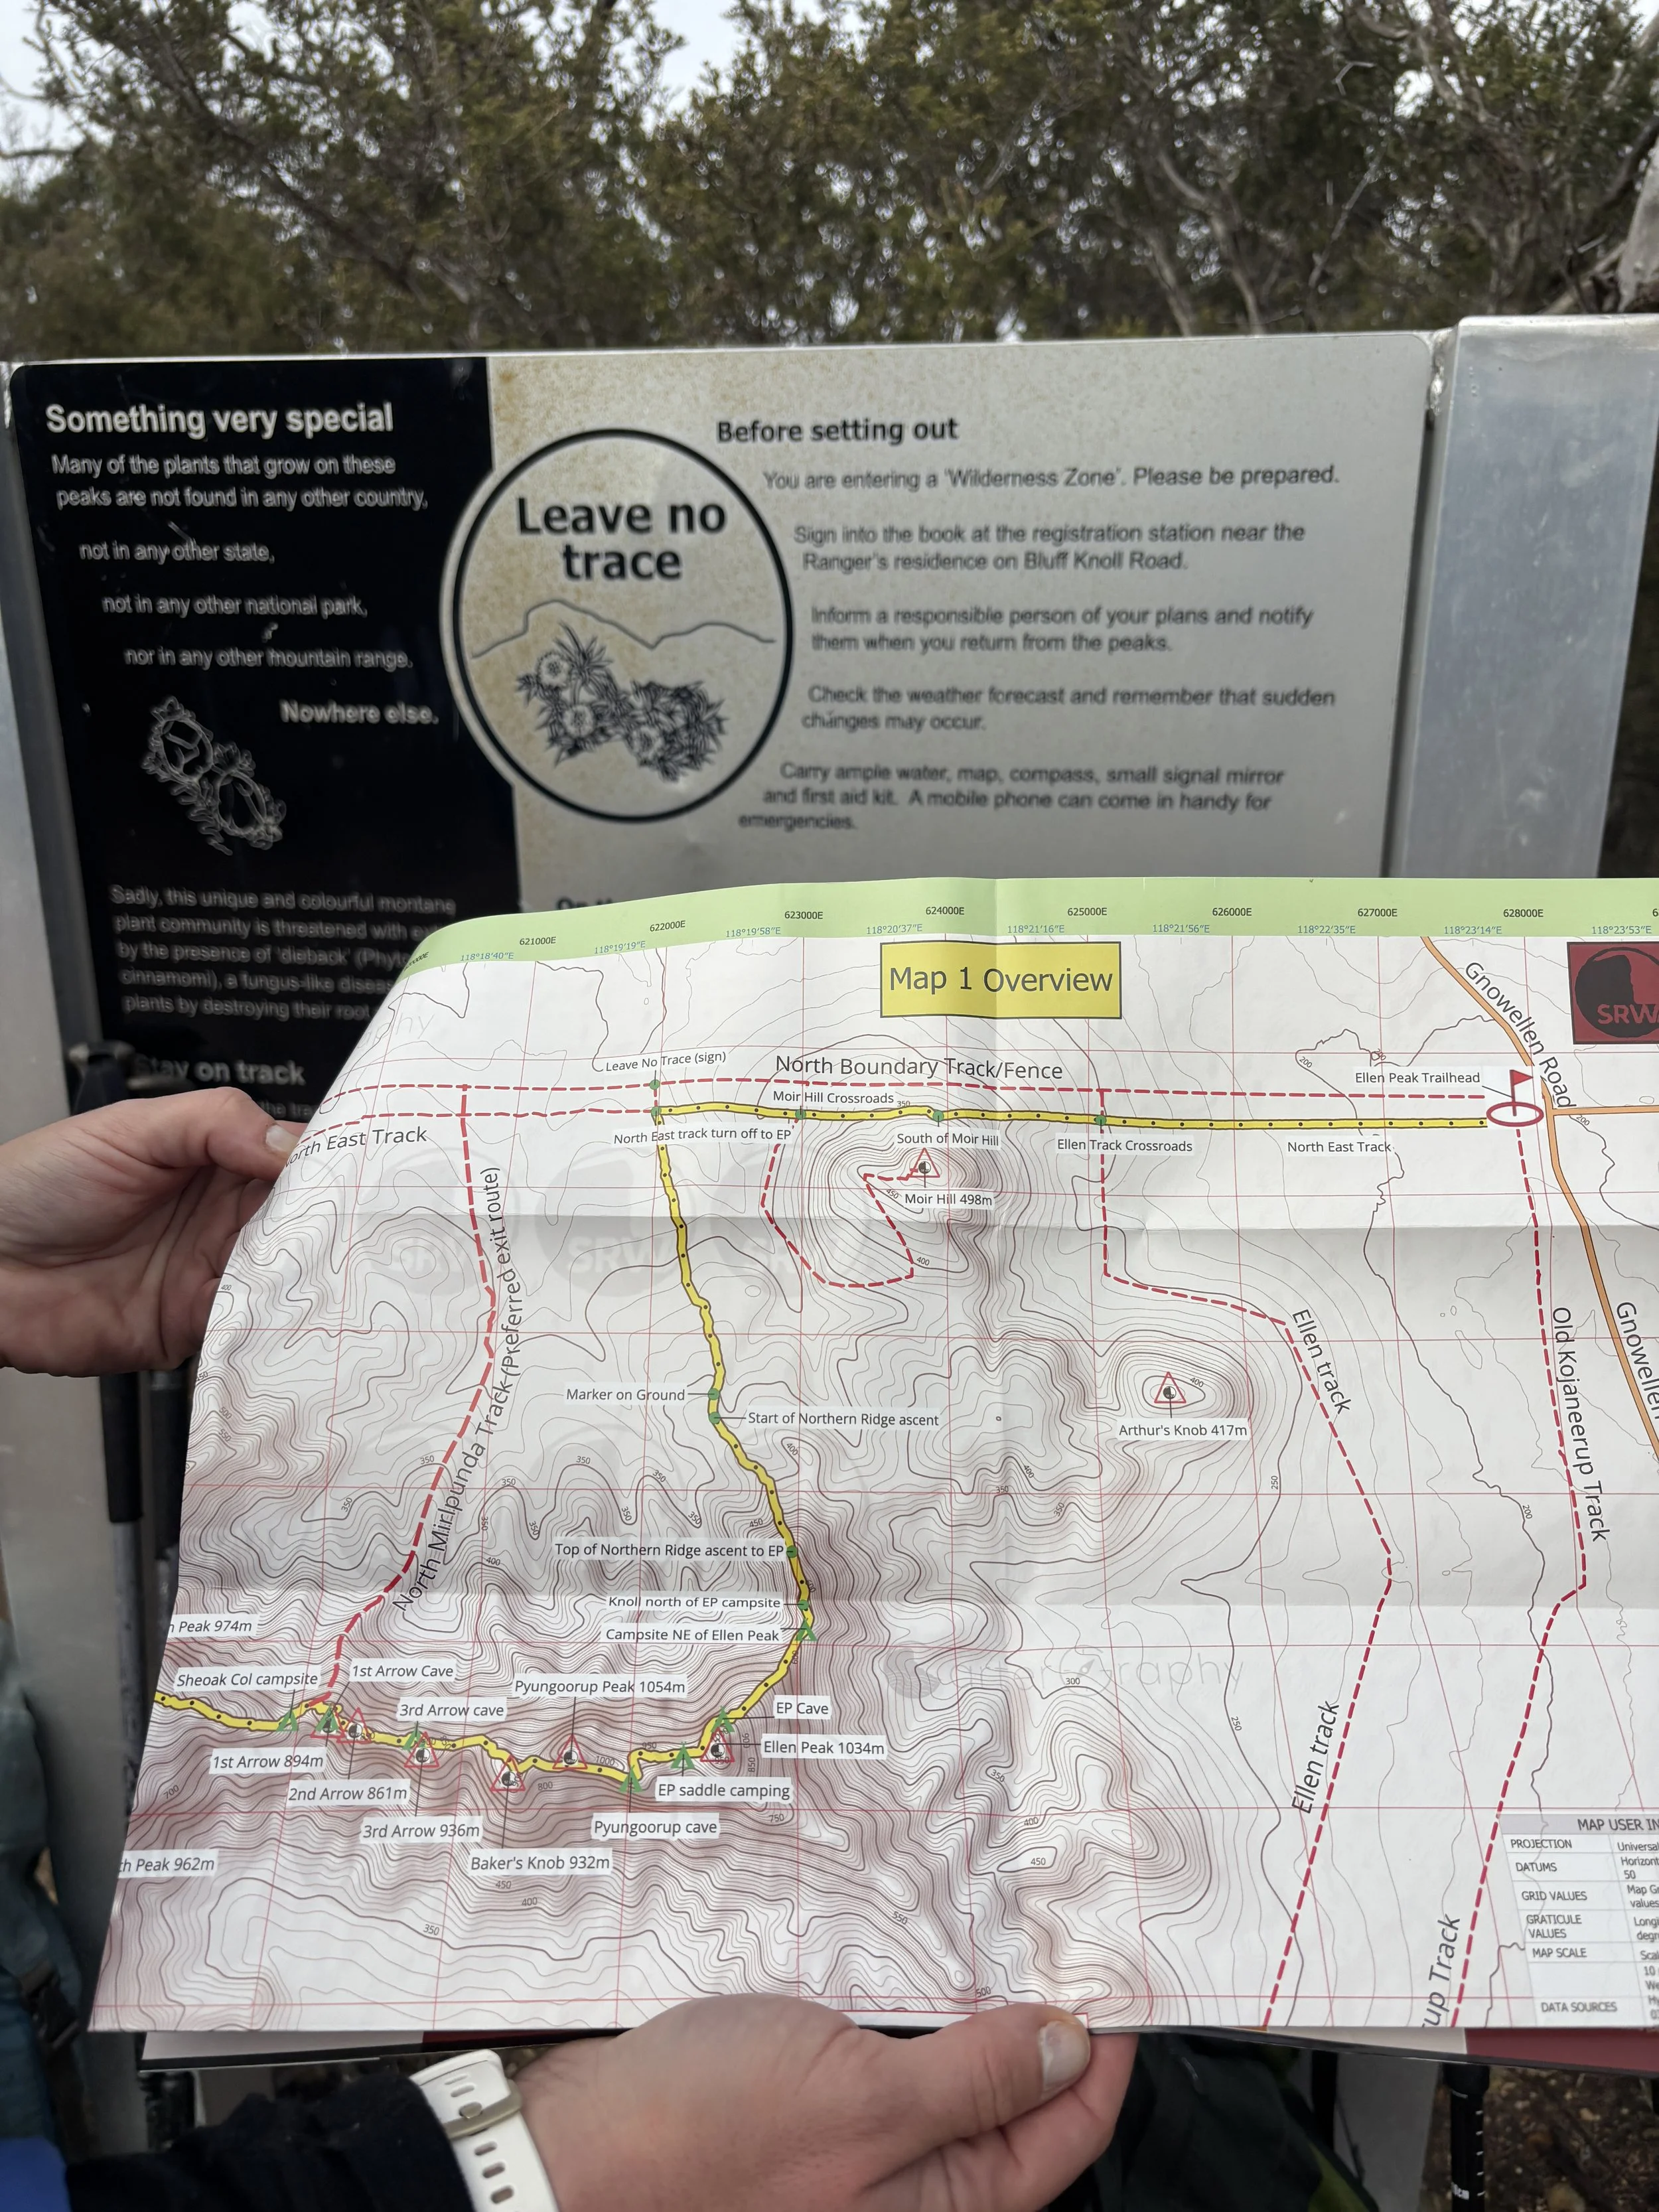
Map 1 is the full 1:25,000 overview of the Stirling Ridge Walk, showing the broader structure of the traverse from end to end.
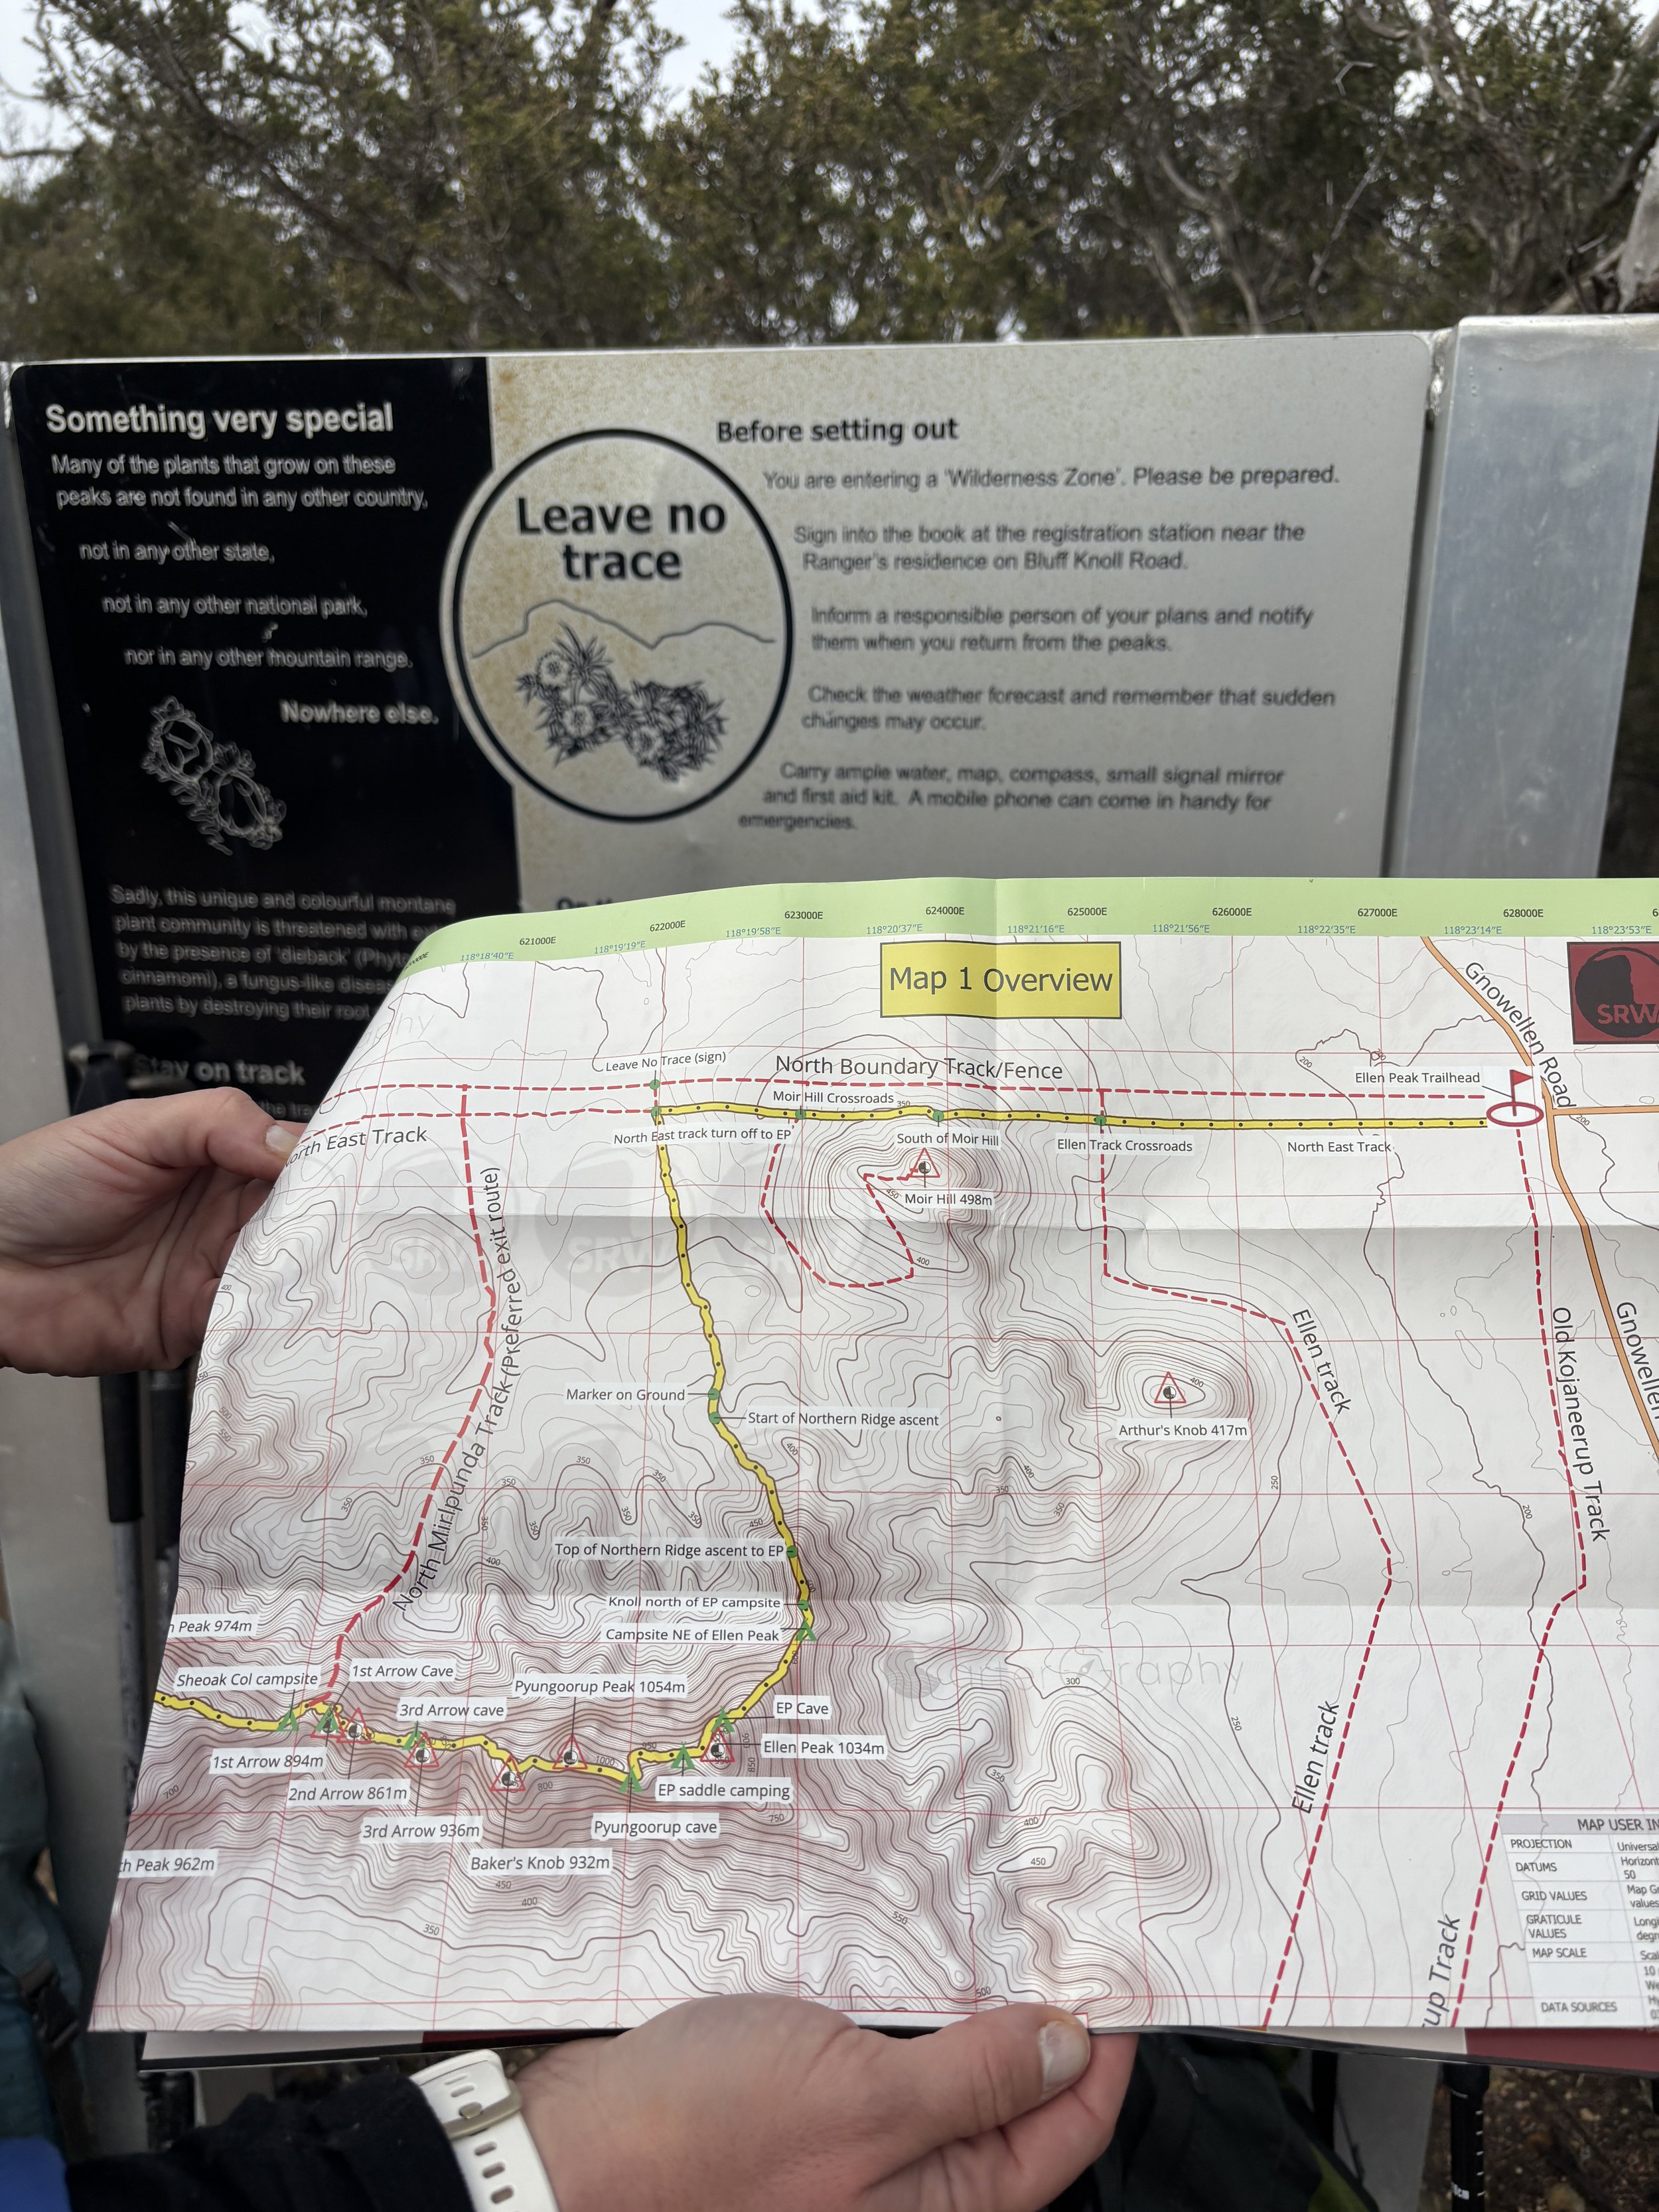
Map 1 is the overview map and works as the main reference for the ridge as a whole. It shows the full traverse in one continuous view and helps users understand the broader layout of the route. This is the map to use when you want to see where a detailed section sits within the full walk, how one stage connects to the next, or where major features such as peaks, saddles, campsites, caves, and escape routes lie in relation to the bigger picture.
Some of the route language and waypoint naming has been framed from the Ellen Peak trailhead toward Bluff Knoll. If you are travelling from Bluff Knoll toward Ellen Peak, the map sequence is still entirely usable, but some terms such as ascent and descent may need to be mentally reversed. The terrain remains the same, but the wording reflects a primary westward direction of travel from the Ellen Peak end toward Bluff Knoll.
Used properly, the numbered panel system, overlay boxes, and enlarged inlays make the map much easier to work with. They allow the full ridge to stay understandable at the whole of route level, while also giving users a practical way to zoom into the sections where closer reading is most important. Instead of trying to hold the entire ridge and all of its complexity in one single panel, the map guides the user from broad context to detailed interpretation in a clear westward sequence from Map 2 through to Map 6.
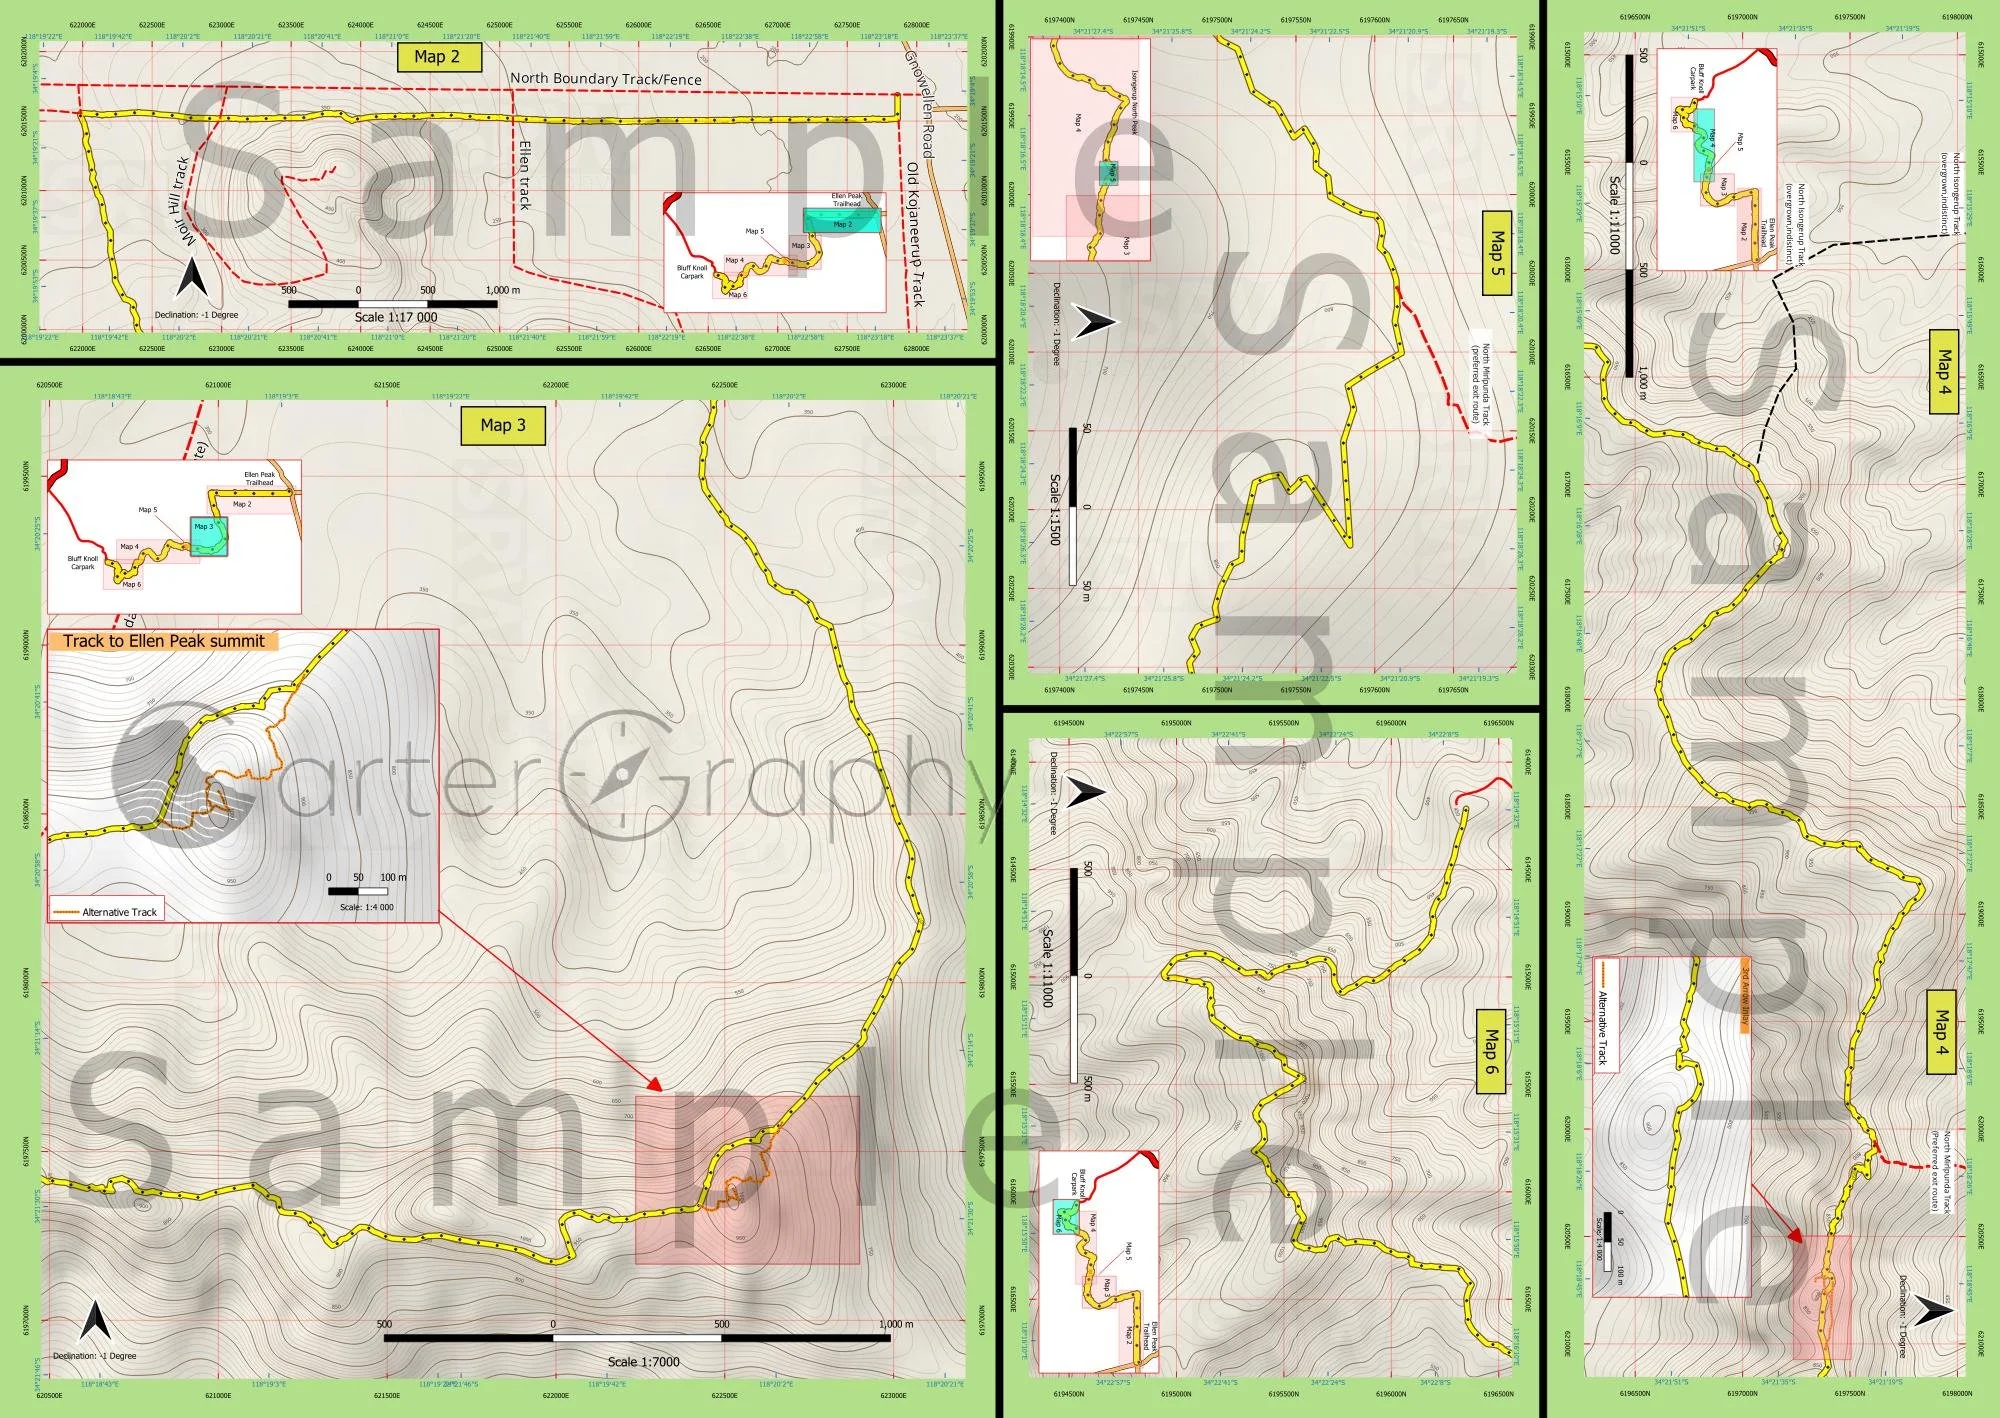
Map 2 to 6: Detailed, Scale 1:1 500 to 17
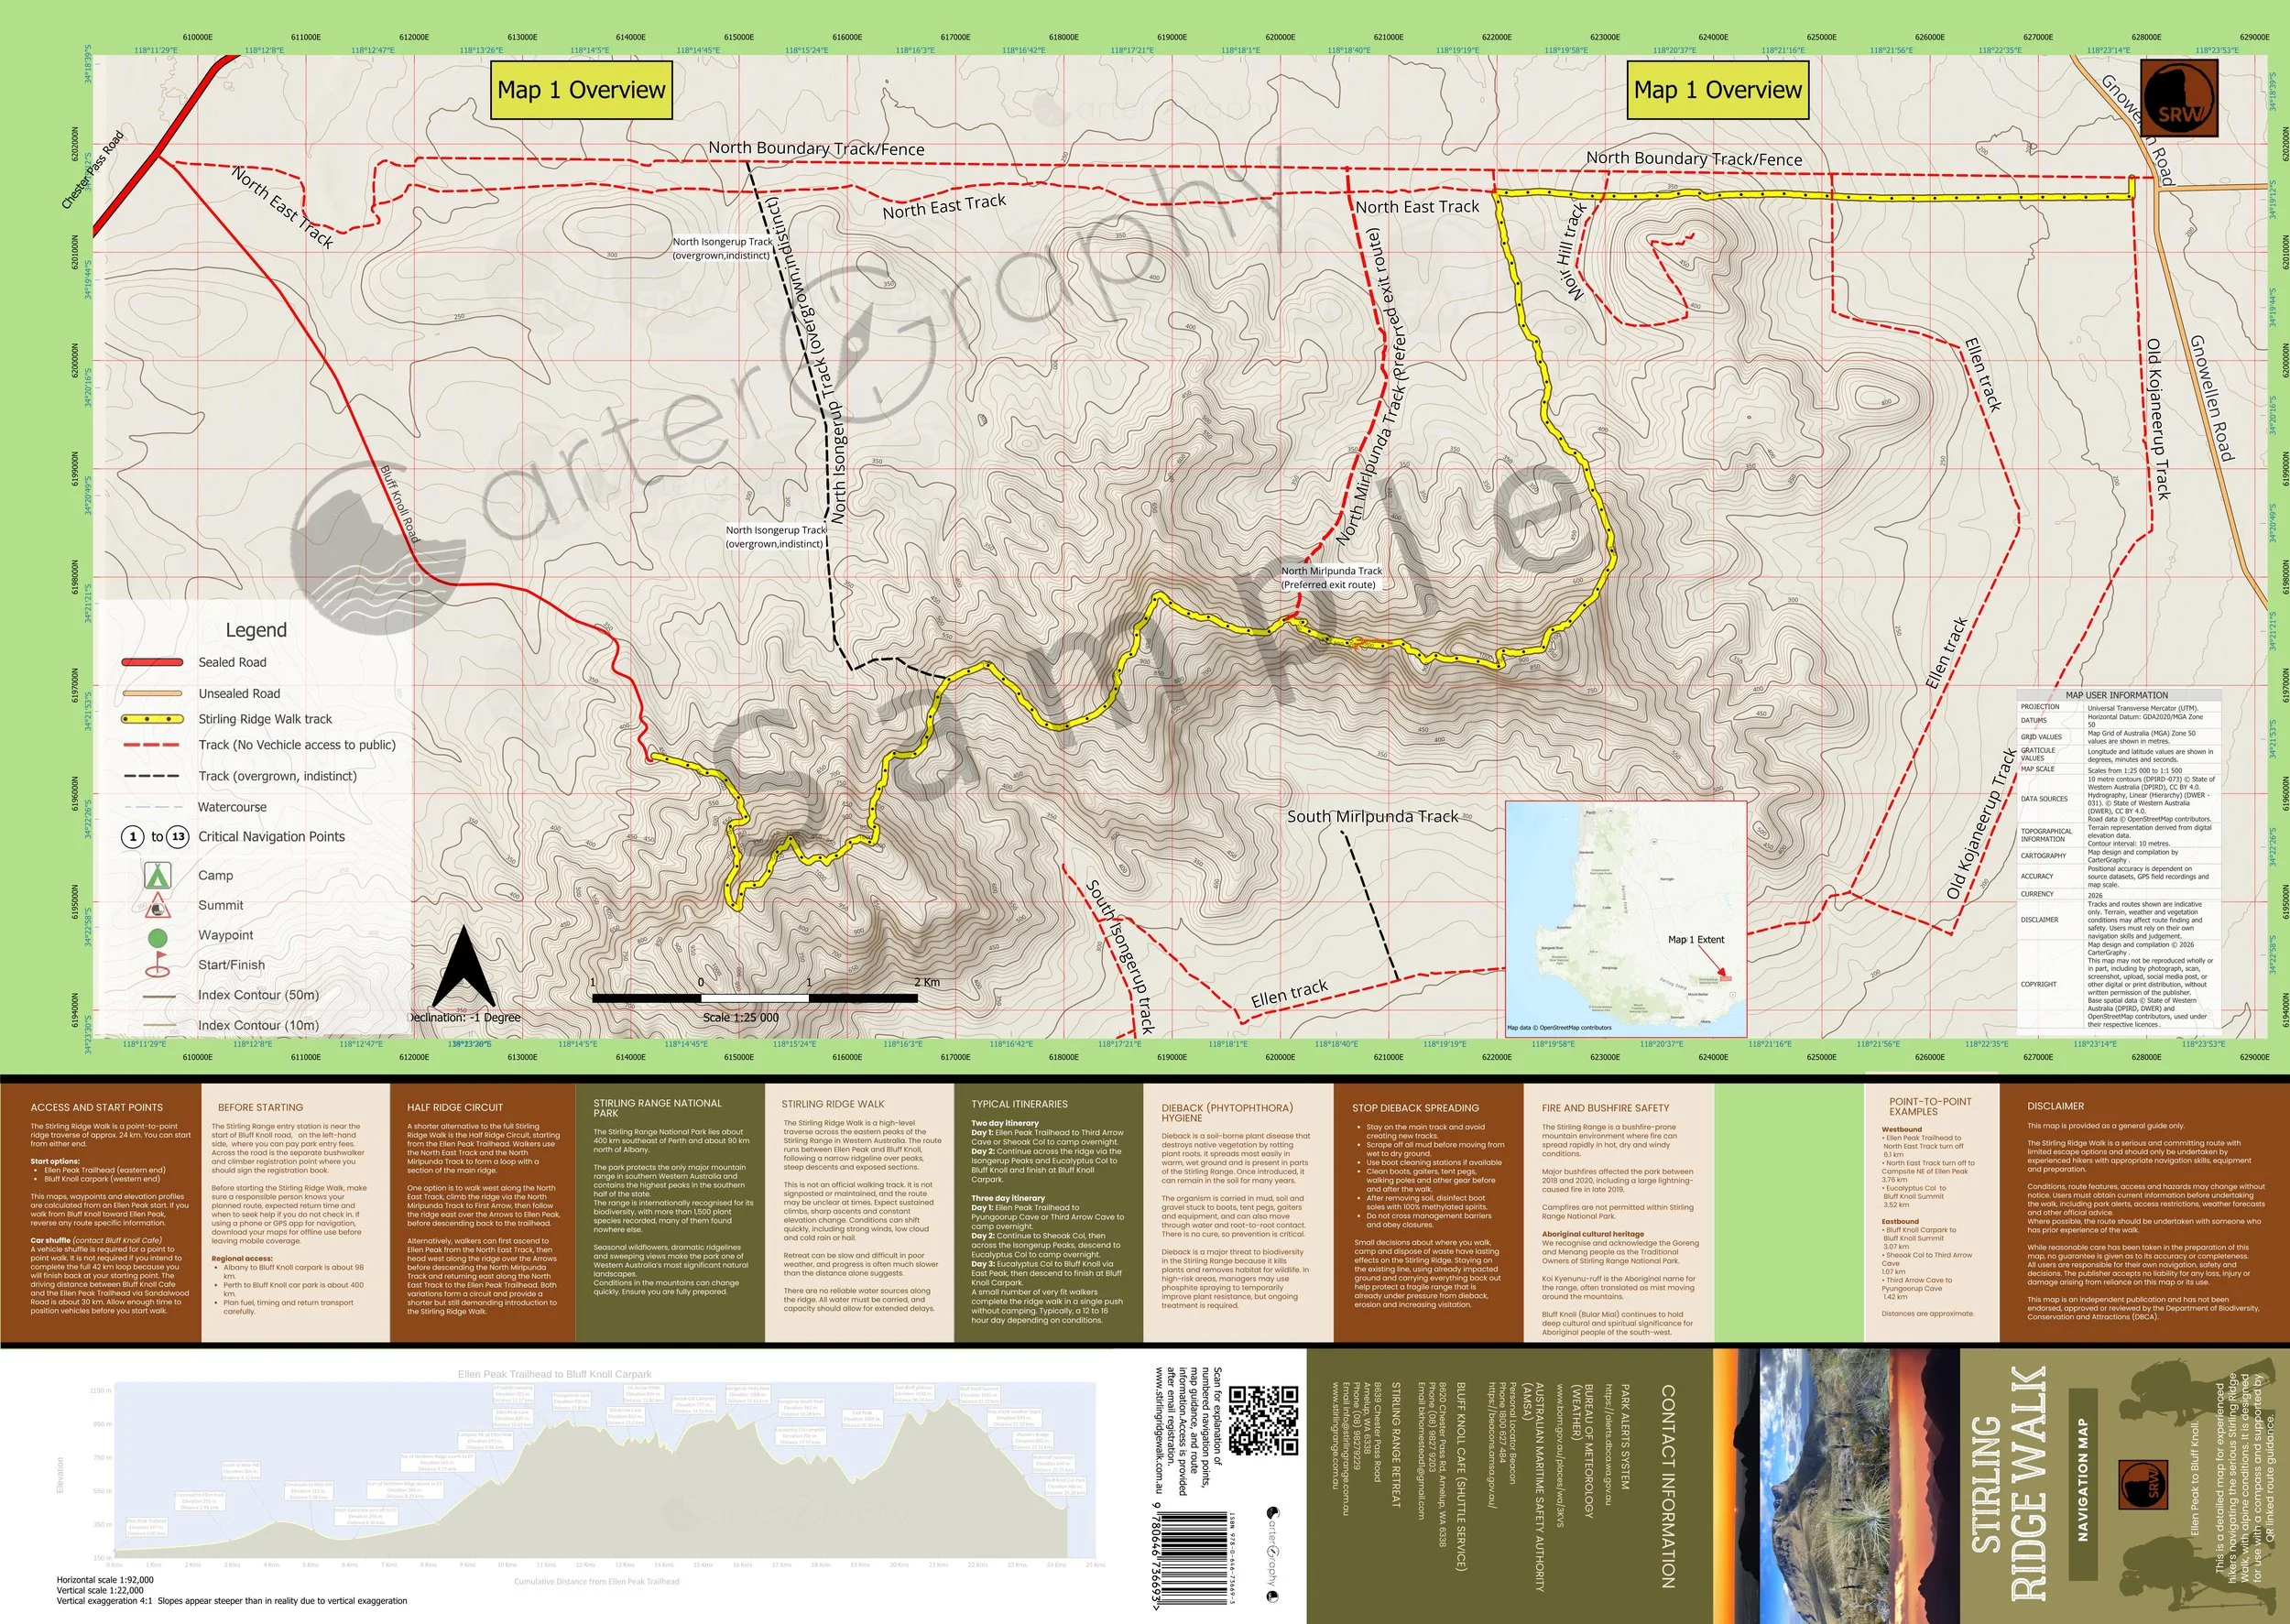
Map 1:Overview , Scale 1: 25 000
Some of these sectional maps include their own enlarged inlays where even closer terrain reading is useful.
The numbered maps are designed to help users move through the Stirling Ridge Walk in a logical sequence while still keeping the broader route in mind. Rather than treating each panel as a separate map with no relationship to the others, the numbering shows how the different sections fit together across the walk.
This layered structure allows the map to work at more than one level. The overview map provides the full ridge context. The numbered sectional maps break the route into more practical parts. Then the enlarged inlays within some of those sections provide an even closer look at terrain and route detail where that is especially helpful.
That structure is deliberate. Some parts of the Stirling Ridge Walk can be understood well enough from the broader sectional maps, while other areas benefit from a much tighter view. The Ellen Peak summit area, the Third Arrows, and the First Arrows are good examples of places where the terrain, route options, surrounding features, or escape possibilities are easier to understand when shown at a larger scale again.
Some waypoint naming and route language has been framed from the Ellen Peak trailhead toward Bluff Knoll direction, so walkers travelling from Bluff Knoll toward the Ellen Peak trailhead may need to mentally reverse terms such as ascent and descent. The terrain remains the same, but the language of movement may change depending on which way you are travelling.
Used together, these map levels allow the route to be understood both as a continuous traverse and as a series of more detailed terrain problems. That is one of the main strengths of the map. It does not force every part of the walk into one fixed level of detail. Instead, it allows the user to move from the whole ridge view, to sectional maps, and then to enlarged inlays where closer reading is needed most.
Maps 2 to 6 then follow the ridge in sequence from the Ellen Peak Trailhead and Ellen Peak end through to the Bluff Knoll carpark end. In other words, the numbering from 2 to 6 is based on travelling westward across the ridge, starting at the Ellen Peak trailhead side and moving toward Bluff Knoll. That sequence is deliberate and gives the detailed side a clear direction of travel. If you are beginning at the Ellen Peak Trailhead end, the numbered maps can generally be followed in order as you progress west along the route. If you are walking from Bluff Knoll toward the Ellen Peak Trailhead, the same maps still apply, but you will be reading them in reverse order.

Section 5. How to read the numbered panels, overlay boxes and inlays
Overlay locator boxes
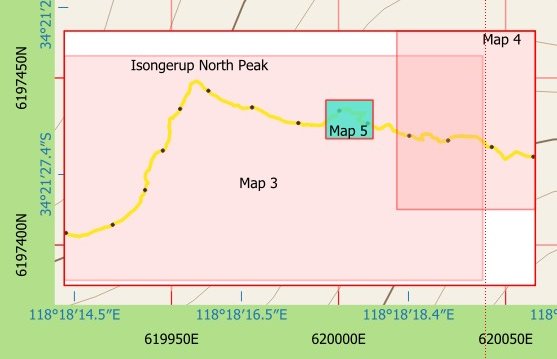
An important part of this system is the use of small overlay locator boxes. These show where each numbered detailed map sits in relation to the broader route. They act as visual index references. Rather than asking the user to guess where Map 3 or Map 5 belongs along the ridge, the overlay boxes show its position within the wider map structure. This helps tie the detailed panels back to the full traverse and makes it easier to understand how one map relates to the next.
The key to using the numbered panels well is to treat Map 1 as your orientation map and the other numbered maps as your working detail maps. In practice, that means using the overview first to understand where you are in the full traverse, then shifting to the relevant detailed panel when you need closer terrain reading for the section you are actually in. The overview gives you the whole ridge context, while the sectional maps give you the closer reading needed on the ground.
This becomes especially useful in parts of the ridge where more detail matters. A broad overview may be enough to understand where you are along the overall route, but it may not show the same level of clarity when moving through a more intricate summit area, arrows section, cave approach, or escape point. In those cases, the numbered panel gives you the closer view, while the overview helps you retain context.
Enlarged Inlays
Some of the numbered maps include their own enlarged inlays where an even tighter view is useful. These inlays are effectively a further zoom within a sectional map. Map 3 contains a 1:4,000 inlay of the alternative route up to the summit of Ellen Peak. Map 4 contains another 1:4,000 inlay showing the Third Arrows area, including the route to the caves and through the central gully. Map 5 is itself shown at 1:1,500 scale and gives very close detail through the First Arrows, including the start of the North Mirlpunda Track escape route toward the North East Track.
That means the map is designed to be read at several levels. You may begin with Map 1 to understand the whole ridge, then move to Maps 2 to 6 for detailed sectional reading, and then refer to an enlarged inlay where a section needs even closer interpretation again. The overlay boxes help you understand where each detailed map belongs in the overall sequence, while the inlays help you zoom in further within the sections where the terrain becomes more intricate.
Alternative tracks or variations are in orange. In the majority of case it is advisable to stay on the main yellow track, particularly in low visibility and deteriorating conditions.
When moving between panels, it is a good idea to pay attention to the overlapping terrain features and route continuity. Peaks, saddles, track lines, caves, campsites, and escape routes help anchor one panel to the next. The numbering gives the sequence, the overlay boxes show where each map sits, and the terrain itself provides the visual bridge between sections.
Section 6. Understanding scale, grid spacing and distance on the map
Scales and Grid Spacings
One of the most important things to understand when using this map is that it does not rely on a single scale across the entire product. Different parts of the Stirling Ridge Walk are shown at different scales depending on what that part of the route needs. Some sections are better understood from a broader overview, while others need a much closer view to make terrain, route position, and surrounding features easier to interpret.
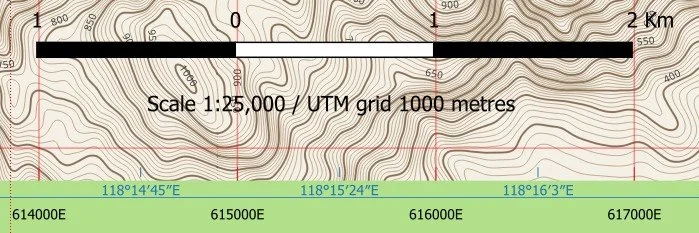
Because the map works across different scales, it is important to read distance from the panel you are actually using rather than assuming that one measurement applies across the whole map. Each panel has its own scale bar, and that scale bar relates only to that specific section. A distance measured on the 1:25,000 overview will not mean the same thing as the same paper distance measured on a more enlarged panel.
The UTM grid also helps make distance easier to judge quickly. On many map panels, once you understand the spacing of the grid, it becomes much easier to estimate how far it is between features without having to measure every section precisely. If adjacent grid lines represent 500 metres, you can quickly develop a feel for what 500 metres looks like on that panel. If they represent 1,000 metres, you can just as quickly judge a kilometre.
That is particularly useful on the ridge, because it allows for fast visual judgement. You can look at the distance between a saddle and a summit, between one cave and another feature, or between your position and the next major landmark, and get a reasonable sense of ground distance without needing to stop and do a formal calculation every time.
It is also worth remembering that movement is not always straight north south or east west. If your line of travel cuts diagonally across a square of the grid, the distance will be longer than the simple spacing of the grid lines. A diagonal across a 1 kilometre square is about 1.4 kilometres. A diagonal across a 500 metre square is about 700 metres. That gives you a quick mental guide when estimating movement across angled terrain.
Scale bars are included so that each panel can be read accurately in its own terms. On this map, the scale bars have been aligned with the UTM grid spacing so that the relationship between grid and scale is more intuitive. That makes them easier to use in the field and easier to cross check visually.
In practical use, many walkers will use the romer on their compass baseplate to measure straight line distances where the map scale matches the romer scale on the compass. That works especially well on the 1:25,000 overview. For more curved sections of route, a piece of string can often be more useful. By laying the string along the actual line of travel and then comparing that length against the scale bar, you can get a more realistic sense of the distance you will cover on the ground.
That is especially relevant on the Stirling Ridge Walk, where movement is rarely a perfectly straight line from one point to another. The route bends around summits, drops into saddles, moves through arrows, and follows the shape of the ridge. A scale bar gives you a reference, but the way you apply it matters.
Understanding scale and grid spacing is therefore not just a technical exercise. It is part of learning how to read the map confidently. The more familiar you become with what 500 metres, 1 kilometre, or a diagonal crossing actually looks like on the panel in front of you, the easier it becomes to judge distance, pace your movement, and interpret where you are in relation to the terrain around you.
This map set has primarily been designed for an Ellen Peak to Bluff Knoll traverse. It can, of course, also be used in reverse for a Bluff Knoll to Ellen Peak crossing, but users should keep in mind that some of the route descriptions and references to ascent and descent are written from east to west.
Map 1
Map 1 provides the full overview of the Stirling Ridge Walk at 1:25,000 scale. This is the broad context map, useful for understanding the overall structure of the ridge, the relationship between the major peaks and saddles, and how the full traverse fits together from the Ellen Peak trailhead through to Bluff Knoll. It is also a practical scale because many compass baseplates include a romer for 1:25,000 maps, making it easier to judge straight-line distances on the overview panel. The UTM grid spacing shown on Map 1 is 500 metres, which gives a practical balance between broad route context and usable distance estimation across the full ridge.
Map 2
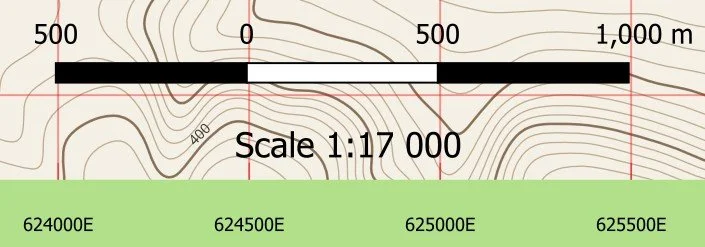
Map 2 is shown at 1:17,000 scale and begins the route in more detail from the Ellen Peak trailhead, covering the early part of the walk as the track climbs onto the ridge. At this scale, the map provides a closer working view of the route while still keeping the surrounding terrain in context. The UTM grid spacing on Map 2 is 500 metres, allowing distances to be estimated more accurately as the route begins to narrow and rise onto the main ridge.
Map 3
Map 3 is shown at 1:7,000 scale and covers the traverse around Ellen Peak, then continues along the southern side of Pyungoorup Peak, around the northern side of Baker’s Knob, and finishes on the northern side of Third Arrow at Third Arrow Cave. At this scale, the map provides a much closer view of the route, making terrain shape, track position, and route choice easier to interpret through this more complex section of the ridge. The UTM grid spacing on Map 3 is 500 metres. Map 3 also includes an inlay of the track to the Ellen Peak summit at 1:4,000 scale, providing additional detail for that specific section.

Map 4
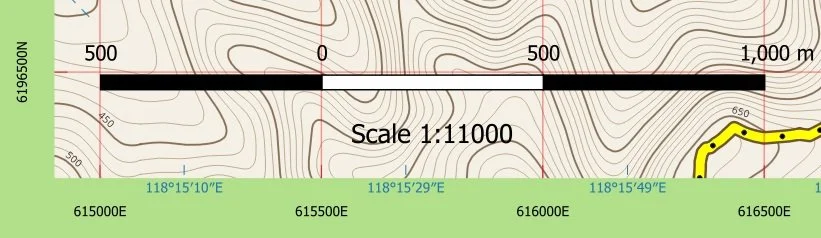
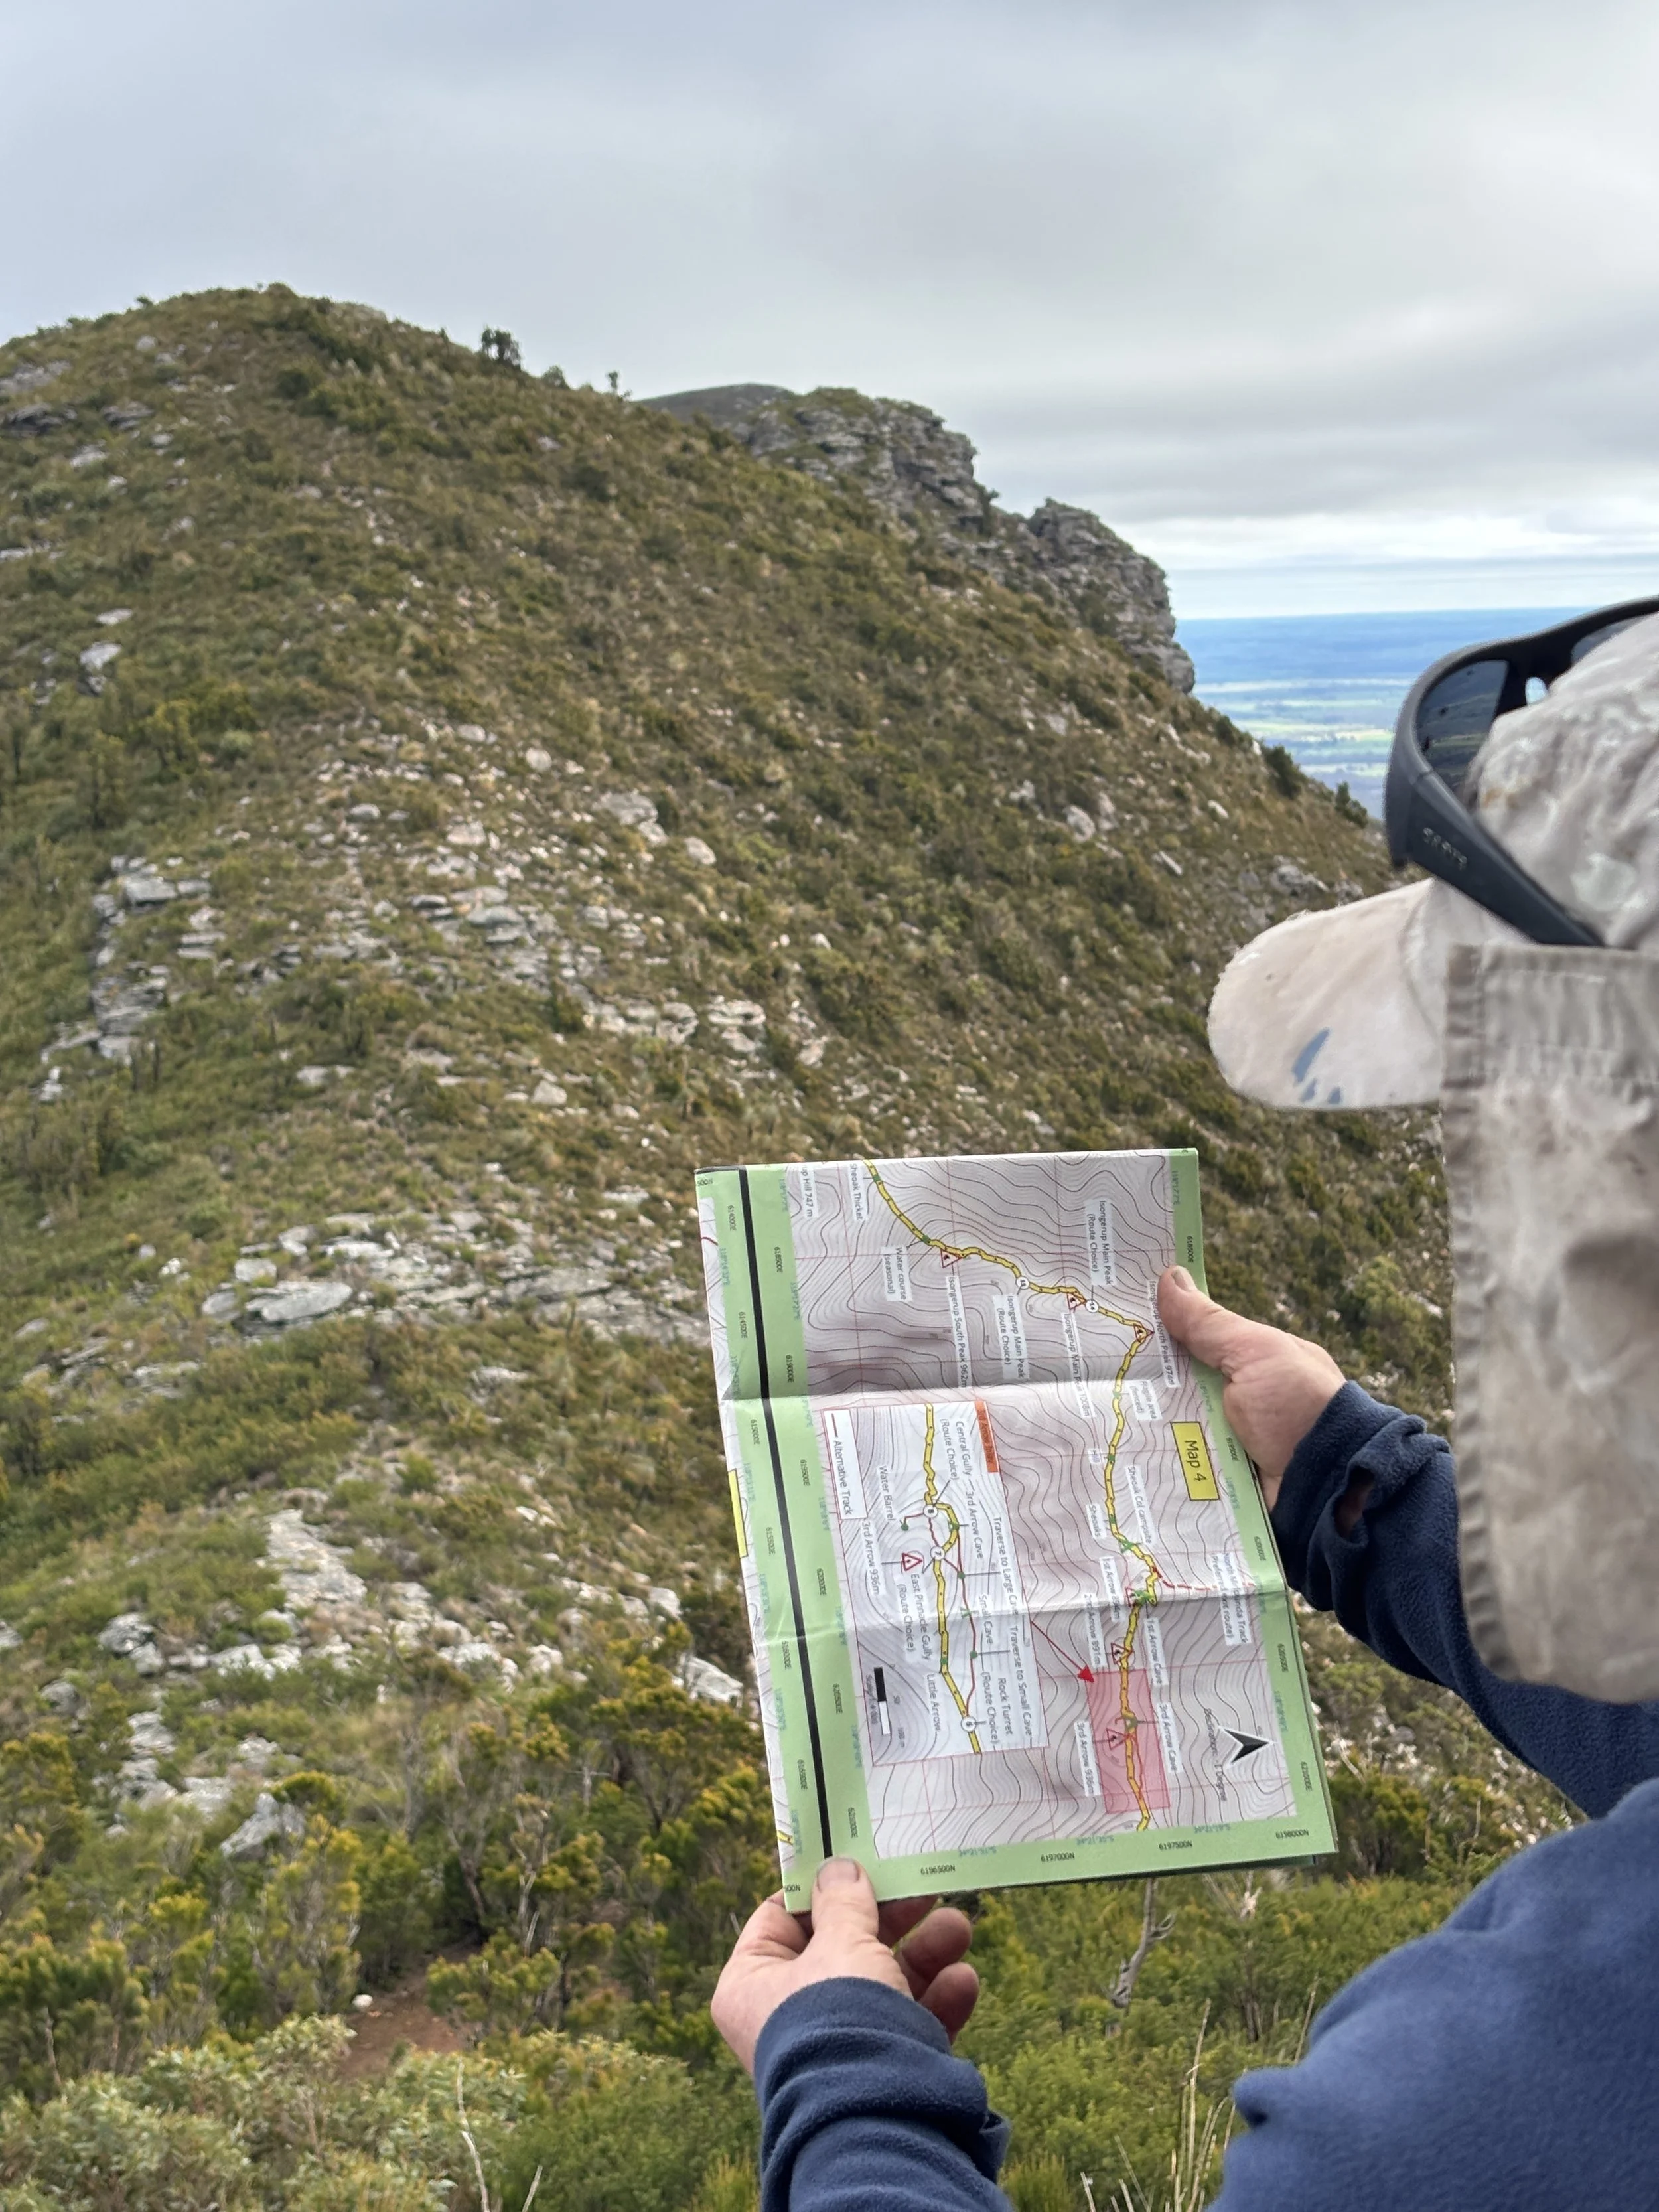
Map 4 is shown at 1:11,000 scale and continues on from Third Arrow Cave, heading west through the Isongerup Peaks to Eucalyptus Col campsite and onto the saddle before the ascent to East Peak. This panel covers a long central section of the traverse and provides a practical balance between route detail and broader ridge context. The UTM grid spacing on Map 4 is 500 metres. Map 4 also includes the Third Arrow inlay at 1:4,000 scale, providing greater detail for navigating to the two caves at Third Arrow. It also shows clearly the position of East Pinnacle, the gully between East Pinnacle and East Buttress, the route through the Central Gully, and the position of the water barrel on the southern side of the Northern Buttress.
Map 5
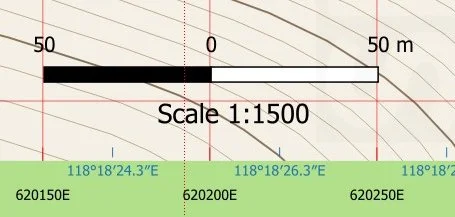
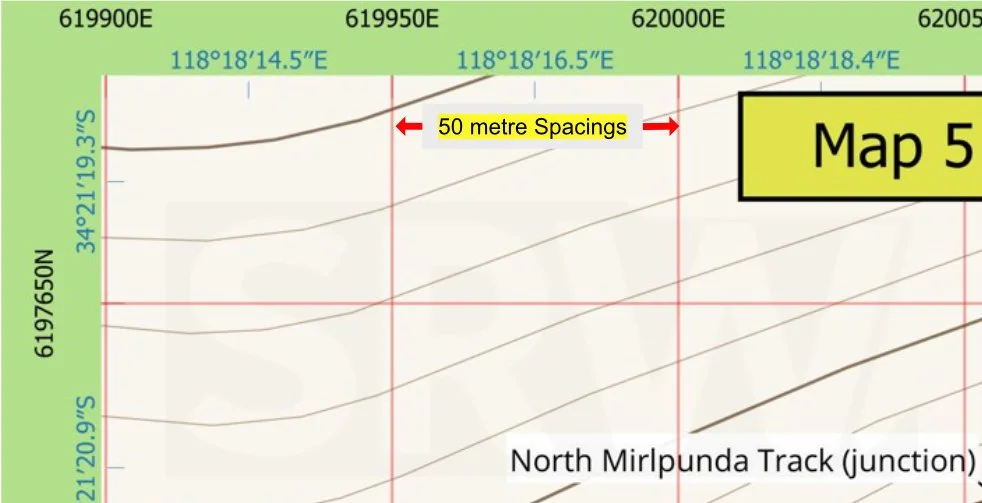
Map 5 is shown at 1:1,500 scale and provides an extremely detailed view of the difficult-to-navigate section through the First Arrows, finishing at Sheoak Col. This is the most enlarged panel in the map set and is intended to show this complex section with much greater precision, allowing close interpretation of terrain shape, track position, and surrounding features. The UTM grid spacing on Map 5 is 50 metres, giving a much finer reference for distance and position on the ground. It shows the position of First Arrow Cave, the alternative high traverse above the main track that finishes on the intermediate ridge, and the steep descent from First Arrow Cave. It also shows where the North Isongerup Track meets the main track, the maze of paths and side tracks that branch from the main line, and the route through the gully of North Rock Castle and South Rock Castle before finishing at Sheoak Col Campsite.
Map 6
Map 6 is shown at 1:11,000 scale and takes the route from the saddle before the ascent to East Peak through to Bluff Knoll car park. This final panel covers the last major section of the traverse and carries the route through to the western end of the walk. The UTM grid spacing on Map 6 is 500 metres, continuing the same practical grid spacing used across the main ridge panels.

Section 7. Understanding coordinates, grid references, zone information and photo inlays

The UTM Coordinate System
This Stirling Ridge Walk Map map uses the Universal Transverse Mercator (UTM) coordinate system, which allows locations to be described using eastings and northings measured in metres. Unlike latitude and longitude, the UTM system is designed to make map reading, distance estimation and navigation more practical.
To achieve this, the Earth is divided into a series of vertical grid zones, each covering 6 degrees of longitude. Every zone has its own independent grid, allowing coordinates to be measured accurately over a relatively small area. Rather than using one continuous coordinate system across the entire world, the UTM system resets the grid within each zone to maintain accuracy.
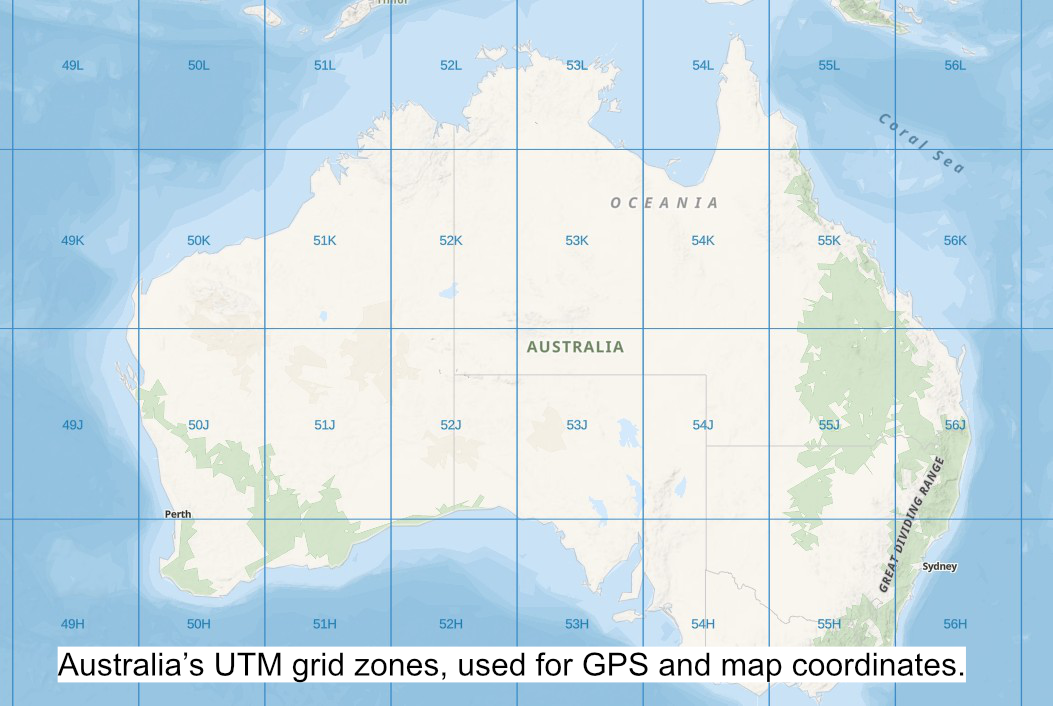
The accompanying map illustrates how Australia is divided into several UTM grid zones. Each zone is identified by a number and, when combined with a latitude band, forms a unique reference used by maps, GPS receivers and geographic information systems. Although the grid lines continue seamlessly across the landscape, the coordinate values belong to the specific zone in which they are measured.
Understanding that Australia is divided into multiple UTM grid zones is the first step in interpreting map coordinates correctly. The following section explains which zone applies to the Stirling Ridge Walk and how that information is used when reading coordinates from this map.
Understanding UTM Grid Zones
The following two images illustrate the relationship between UTM Grid Zones 50 and 51. Each UTM zone is six degrees of longitude wide and has its own independent coordinate system. Although the numerical format of UTM coordinates is identical from one zone to the next, the same easting and northing values can represent completely different locations if the wrong zone is used.
The Stirling Ridge Walk lies entirely within UTM Grid Zone 50, shown in the left-hand image. Zone 51 begins immediately to the east and covers the next six-degree band of longitude, as shown in the right-hand image. Although these zones share a common boundary, their coordinate systems are separate and are not interchangeable.
For this reason, a complete UTM coordinate reference always requires both the grid zone and the easting and northing values. The grid zone identifies which coordinate system is being used, while the easting and northing specify the precise location within that zone.
Throughout this website and on the accompanying map, all coordinates are referenced using GDA2020 / MGA Zone 50, ensuring they correspond directly with the Stirling Ridge Walk and can be entered correctly into compatible GPS devices and mapping applications. Photographs may include location coordinates in a format using the Geographic Coordinate System (GCS) and expressed in Degrees, Minutes and Seconds (DMS) format.
Why the UTM Grid Zone Matters
The accompanying images demonstrate why a complete UTM coordinate reference must always include the grid zone as well as the easting and northing values.
The point shown on the attached image are referenced as:
50H 615961E 6197745N and 51H 615961E 6197745N respectively.
50H 615961E 6197745N identifies a location near the North Isongerup Track within UTM/MGA Zone 50, the grid zone used throughout the Stirling Ridge Walk map. The number 50 identifies the UTM zone, while the letter H identifies the latitude band in which the location occurs. Together they identify the correct coordinate framework before the easting and northing values are applied.
51H 615961E 6197745N in the image on the right uses exactly the same easting and northing values but changes the grid zone from 50H to 51H. Although the numerical coordinates remain identical, the location is shifted approximately six degrees of longitude to the east, placing the point well offshore in the Southern Ocean. This demonstrates that a UTM coordinate is incomplete unless the correct grid zone is specified.
The Stirling Ridge Walk map is referenced to GDA2020 / MGA Zone 50H, and all red grid lines shown on the map use this coordinate framework. When entering coordinates into a GPS receiver, smartphone application or mapping software, the correct datum and grid zone must also be selected. Using the wrong coordinate system or grid zone can result in a location being plotted many hundreds of kilometres from its true position.
The example above highlights an important principle of map reading. A coordinate is not simply a pair of numbers. It is a complete reference consisting of the grid zone, datum, easting and northing. Understanding this relationship helps ensure that positions are communicated accurately and interpreted correctly.
Understanding the Photograph Compass Overlay
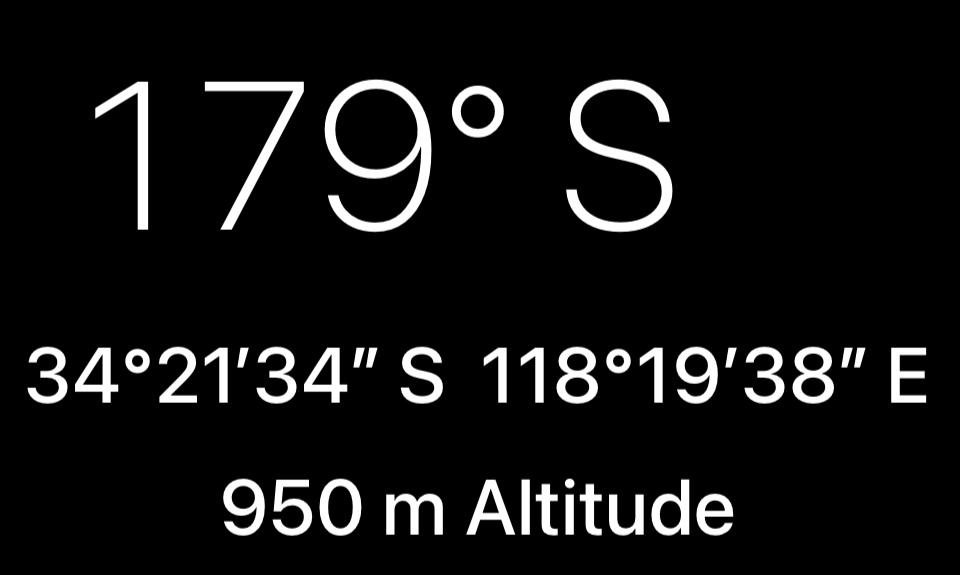
Many of the annotated photographs throughout this guide include an information overlay showing the camera bearing, geographic coordinates, and altitude at the point where the photograph was taken.
The large value at the top (for example, 179° S) indicates the compass bearing, or the approximate direction the camera was facing when the photograph was captured. This helps relate the photograph to the surrounding terrain and to the accompanying map.
The second line displays the photograph's location using the Geographic Coordinate System (GCS), expressed in Degrees, Minutes and Seconds (DMS) format. Latitude identifies the position north or south of the Equator, while longitude identifies the position east or west of the Prime Meridian. These coordinates are recognised internationally and are commonly used by GPS receivers, smartphones and online mapping applications. This coordinate system is also included on the map but the grid lines are not shown.
The final line records the altitude, expressed in metres above mean sea level (AMSL). This indicates the elevation at which the photograph was taken and helps place the image within the surrounding terrain.
Unlike the annotated photographs, the printed Stirling Ridge Walk map uses the Universal Transverse Mercator (UTM) coordinate system referenced to GDA2020 / MGA Zone 50H. The photograph overlay is provided as supplementary information to help identify the location and viewing direction of each image, while all navigation throughout this guide should be undertaken using the UTM grid shown on the printed map.
Understanding the Map Grid
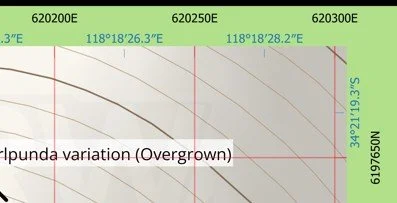
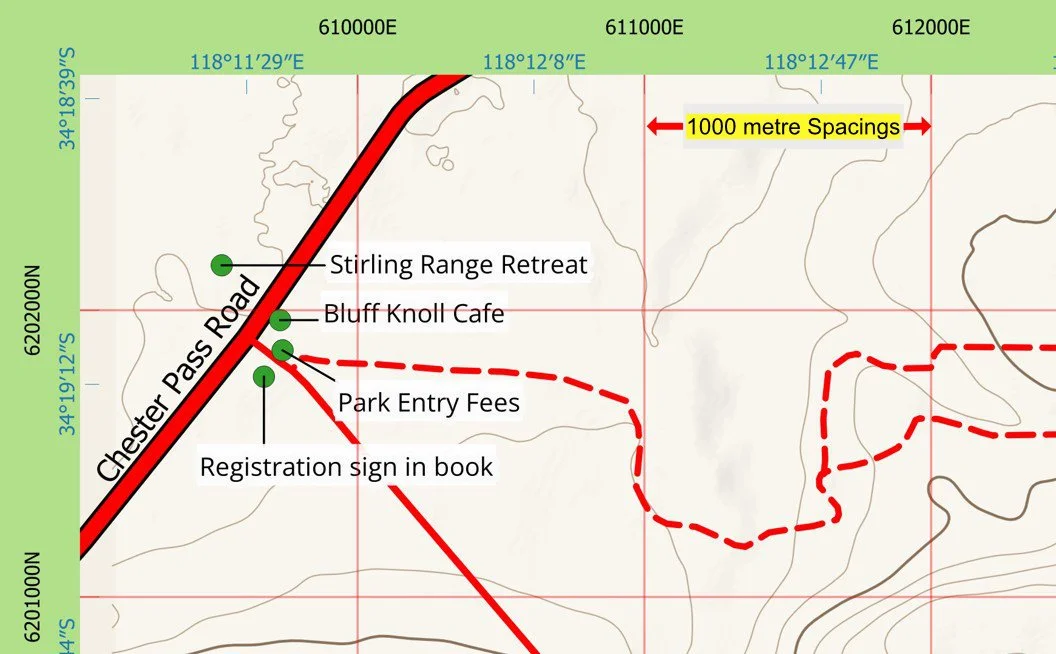
This map uses the MGA/UTM grid system, where all distances are measured in metres. Unlike latitude and longitude, which use degrees to describe locations, the MGA/UTM grid provides a simple way of measuring distance and identifying positions on the map.
The numbers along the top of the map are eastings, while the numbers along the sides are northings. Together they allow any position on the map to be identified using grid coordinates.
Eastings increase as you move east across the map. For example, the distance between 610000E and 611000E is 1,000 metres (1 kilometre). The next grid line, 612000E, is another kilometre farther east.
Northings increase as you move north. For example, the distance between 6201000N and 6202000N is also 1,000 metres (1 kilometre).
This means each large grid square represents an area approximately 1 kilometre × 1 kilometre, making it easy to estimate distance, judge progress and describe locations.
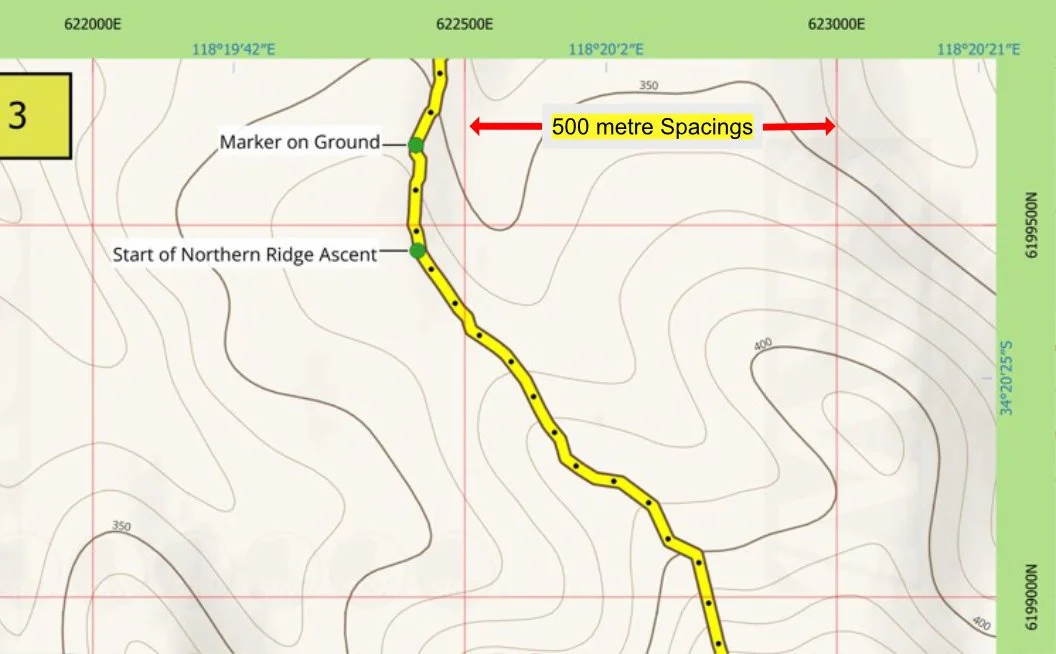
The three examples below show how the same grid can be subdivided for greater precision.
1000 metre spacing identifies the main kilometre grid squares.
500 metre spacing divides each kilometre square into two equal sections.
50 metre spacing provides much finer detail, allowing individual features to be located far more accurately.
The easting and northing numbers contain different numbers of digits because they measure different reference distances.
Eastings are measured within a single MGA/UTM zone and are typically around 600,000 metres in southwest Western Australia.
Northings measure distance from the equator within the UTM grid system. Around the Stirling Range these values are approximately 6,200,000 metres, which is why northings contain seven digits.
The extra digit does not make northings more accurate. It simply reflects the larger distance being measured.
When quoting a grid reference, always read the easting first, followed by the northing.
The blue latitude and longitude labels around the map provide an additional geographic reference system used by GPS receivers, smartphones and many mapping applications. For measuring distance and describing positions on this map, however, the red UTM grid is generally much simpler because it is based directly on metres.
Section 8. Why the SRW is different
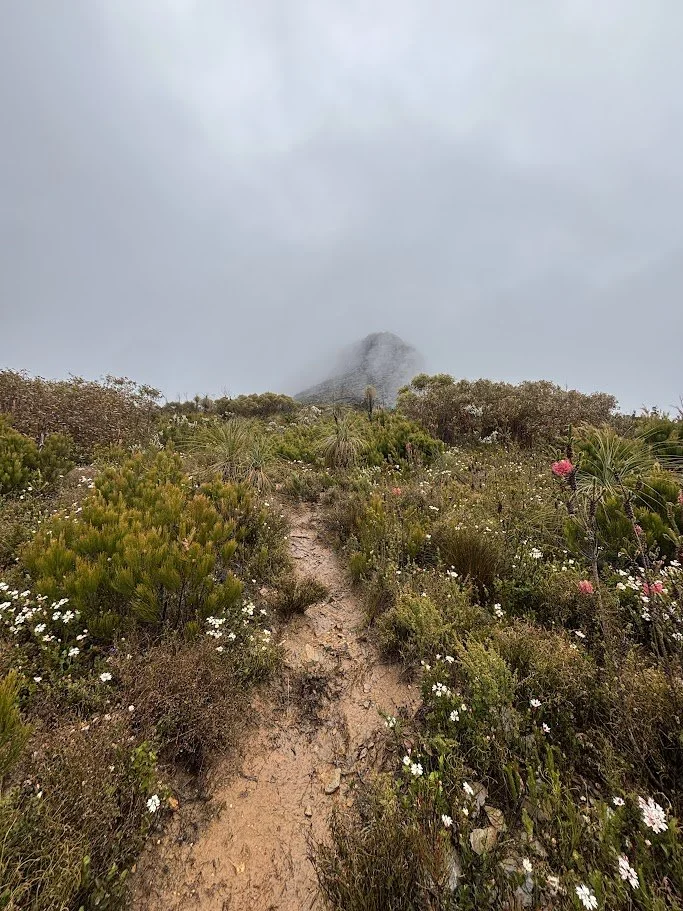
The Stirling Ridge Walk is not a marked track with a neat, benched trail and regular signs. It is a narrow, committing ridgeline where the track is often just a faint track through bush, a line of worn rock, or nothing at all. In good weather the route usually feels obvious, but there are many places where tracks split, cairns lead nowhere and the intuitive, just follow the ridge, idea is simply wrong.
On either side of the ridge the ground drops away steeply into loose, vegetated slopes and cliff bands. Once you drift off the main line, it is very easy to find yourself side hilling above gullies or being funneled down slopes that are hard to reverse. What would be a harmless wrong turn on a valley walk can, up here, mean serious scrambling to get back, or committing yourself to terrain that does not allow an easy retreat.
Weather magnifies all of this. Cloud can drop in minutes, turning an obvious skyline into a grey wall where every saddle looks the same. Wind, rain and fatigue also change behaviour. People stop wanting to pause. They stop wanting to unfold a map. They start making small compromises, cutting corners, and following whatever looks like the easiest line in front of their boots.
It is also worth being blunt about the role of visibility. In clear weather, the ridge is often forgiving. Even with average navigation skills, many parties can muddle through a few wrong turns because the big shapes are visible and the correct line can be re-discovered by looking up, relocating obvious peaks, and adjusting back onto the ridge or track. Good visibility buys you time, options, and the ability to correct errors before they become serious.
Poor visibility removes all of that. When the cloud closes in, the ridge stops being a skyline and becomes a maze. Spur lines that are clearly distinct in daylight start to feel identical. Gullies and side ridges pull you off course without you noticing. A small drift can become a full commitment to the wrong feature, and by the time the mistake is obvious you are often deeper into steeper ground, colder, and more stressed. That is when people who were coping comfortably in fine weather suddenly discover they cannot navigate at all without visual anchors.
This is why the most dangerous navigation moments are not always about lack of intelligence or lack of effort. They are about losing the one thing that was quietly doing most of the work for you: the ability to see where you are. In cloud, you need a different skill set. You need the discipline to stop, confirm position, and navigate deliberately using map, compass, and confirmed bearings rather than hope and momentum. If the group does not have that skill, then the correct decision is often not to keep pushing, but to slow right down, regain certainty, or wait for a break in visibility from a safe position.
A lot of this guidance can feel overblown on paper, especially if every previous trip has been in clear weather. In good visibility the ridge often feels readable. You can see the big shapes, relocate quickly after a wrong turn, and recover without much drama. The experience of moving along the Stirling Ridge Walk in clear conditions versus poor visibility is almost unquantifiable.
Unless you have been up there in a full whiteout, with the wind bashing your face, everything wet, cold and miserable, and progress reduced to a few metres of torch beam and guesswork, a lot of the cautions here simply will not match your lived experience. It can feel like someone is describing a different mountain.
The problem is that you never have full certainty about what the ridge will deliver on the day. Conditions can change quickly, and the line that felt obvious an hour ago can disappear into cloud. That is why the navigational side of this walk matters so much. It is not about being clever. It is about being prepared for the day when visibility does the one thing that turns the ridge from a hike into a navigation problem: it vanishes.
For some people, navigation is average and the plan is essentially to follow the blue dot on their electronic device. They have never used a compass, they have a practiced system for confirming position, and in clear weather they can still get away with it. If that is the reality in your group and the weather comes in, there is often no point in continuing. Turning back or stopping early is not failure. It is a good decision made at the right time.
For others, solid navigation skills change what is possible. They can keep making safe progress in average visibility because they are not relying purely on sight and a phone screen. They can use terrain, bearings, pacing, relocation, and deliberate checks to keep certainty high enough to move without gambling. That does not make them immune to bad conditions, but it does mean the group has more options than simply hoping for a clear view.
The simplest way to hold it in your mind is this. Good visibility hides weak navigation. Poor visibility exposes it. And because you cannot guarantee which version of the ridge you will get, the navigation advice is written for the worst day, not the best one.
Section 9. Why carry a printed map?
It took me three or four years of walking the Stirling Ridge before I felt like I really knew the terrain. I’d lose track of which saddle came next, confuse one knoll with another, or forget exactly where the sharp turns were. What changed wasn’t another lap of the ridge, it was sitting down with a set of printed maps, each one tailored to a specific stage of the walk, with my own notes, labels, and decision points marked clearly.
There’s something about seeing the track laid out in front of you, on paper, that makes it easier to remember. Printed maps let you study the sequence of features before and after a trip. You can trace the ridgeline, mark where you camped, note where you hesitated, and sketch in corrections for next time. Those physical marks, the ones you make yourself to reinforce memory in a way that zooming on a phone never quite manages to do.
Over time, this habit builds terrain awareness. You stop relying on the map to tell you what’s next and start using it to confirm what you already suspect. That shift from checking to anticipating is a sign that you’re beginning to carry the map in your head, not just your pack.
This is especially useful if you're planning to walk the Stirling Ridge more than once. Each return trip becomes a chance to sharpen your mental picture of the route, and each printed map becomes a record of what you learned. Digital tools can help along the way, but it’s the act of committing it to paper and working with it before, during, and after the walk that really speeds up the process.
Section 10. Understanding the map legend

Sealed Roads
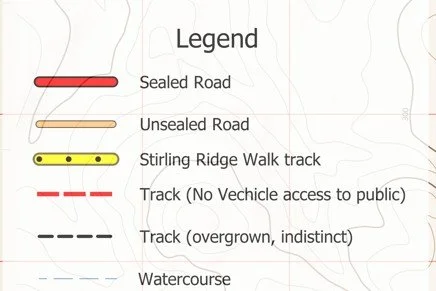
The sealed roads shown on the map are Chester Pass Road and Bluff Knoll Road. Chester Pass Road is the main road through the Stirling Range, while Bluff Knoll Road provides access to the Bluff Knoll carpark. See attached for navigation to both Bluff Knoll carpark and Ellen Peak Trailhead
Unsealed Roads
The unsealed roads shown on the map are Gnowellen Road and Kuch Road. Kuch Road runs perpendicular to Gnowellen Road near the Ellen Peak Trailhead. Although Kuch Road is not labelled on the map, it is represented as an unsealed road and is just south of an informal parking area immediately outside the Stirling Range National Park boundary. Many walkers choose to leave their vehicles here before commencing the Stirling Ridge Walk, particularly when arranging a vehicle shuttle for the traverse. Gnowellen Road provide vehicle access to the Ellen Peak side of the range via Sandalwood Road. Conditions may vary depending on weather and maintenance, so always drive with care.
Stirling Ridge Walk Track
The yellow line with black dots identifies the main Stirling Ridge Walk route. It represents the recommended walking route across the ridge and forms the primary focus of the map. Some inlays have an additional “Alternative Track” or “Variation” that are marked as an orange line with black dots.
Track (No Vehicle Access to Public)
These red dashed lines represent management tracks, boundary access routes and historic vehicle tracks that are not open to public vehicle access. They are included to provide additional geographic context and should not be interpreted as public vehicle access roads.
Track (Overgrown, Indistinct)
The black dashed line represents generally disused tracks that are now overgrown or difficult to follow on the ground. Although shown for reference, their condition may vary considerably and it should not be relied upon as a defined walking route.
Watercourses
Watercourses represent natural drainage lines and creeks throughout the Stirling Range. Many are seasonal and should not be relied upon as a source of drinking water. On this map they are included primarily as terrain features that can assist with navigation and confirming your location.
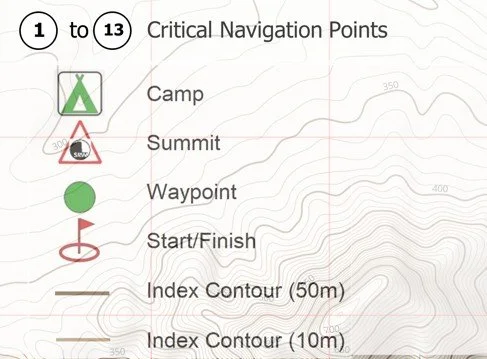
Critical Navigation Points
The fifteen numbered Critical Navigation Points identify locations where careful route finding or navigation decisions are required. Each point corresponds with the detailed explanations, photographs and navigation advice provided throughout this website, helping users understand the terrain before reaching these important locations. Access to a password protected page is provided to map purchasers through email request.
Camps
The camp symbol identifies commonly used camping locations along the route. These are provided as reference points only and should not be interpreted as designated campgrounds or locations where facilities or reliable water are available. The quality, exposure and size of these camping areas vary considerably.
Summits
The summit symbol identifies the highest point of each named peak along the Stirling Ridge Walk. These symbols provide useful reference points when interpreting both the map and the surrounding landscape. Some peaks are not officially named so have been reference d with altitude and proximity to other waypoints. The main track does not go to every summit and additional tracks to these summits are not included.
Waypoints
Waypoints are reference locations positioned throughout the map to assist with navigation and orientation. They provide convenient reference points when describing locations, estimating progress or identifying nearby terrain features.
Start / Finish
The Stirling Ridge Walk can be completed in either direction. For this reason, both the Ellen Peak Trailhead and the Bluff Knoll Carpark are shown as Start/Finish locations. The symbol identifies the two recognised trailheads from which most walkers begin or end the traverse. The Half Ridge Circuit is not explicitly marked on the map.
Index Contours (50 metres)
Every fifth contour line is drawn slightly heavier and numbered, than the surrounding contours. These index contours make it easier to visualise the overall shape of the landscape and estimate changes in elevation without having to count every contour line.
Contour Interval (10 metres)
The map uses a 10 metre contour interval, meaning the change in elevation between adjacent contour lines is 10 metres. The spacing between contour lines provides a visual indication of the terrain, with closely spaced contours representing steeper slopes and wider spacing indicating gentler terrain.

Section 11. Understanding the exit routes and management tracks
Escape Routes
One of the practical features shown on the Stirling Ridge Walk map is the location of the recognised exit/escape routes from the ridge. These are included to help walkers understand where it is possible to leave the main route if deteriorating weather, injury, fatigue, equipment failure or other unforeseen circumstances make it unsafe or impractical to continue.
It is important to understand that not all escape routes are alike. Although both examples shown descend to the North Boundary Track/Fence, they differ considerably in their condition, difficulty and suitability.
The North Mirlpunda Track is the more known and most commonly used exit/escape route on the Stirling Ridge Walk. It descends from the First Arrows area towards the North Boundary Track/Fence and forms part of what is commonly referred to as the, “Half Ridge Walk”. The route is generally well defined across the lower plains, where it is relatively straightforward to follow. However, closer to the ridge, the track branches into several different lines, making it increasingly difficult to determine the correct route without careful navigation.
The North Isongerup Track is a very different proposition. Although it also provides access from the ridge to the North Boundary Track/Fence, it is rarely used and should not be considered an equivalent alternative to the North Mirlpunda Track. Sections of the track are often overgrown, washed out or poorly defined, making navigation slower and considerably more demanding. Walkers should not assume that its presence on the map indicates an easy or convenient exit.
The purpose of showing both routes is not to encourage their use, but to improve situational awareness. Understanding where these escape routes leave the ridge, and recognising the significant differences between them, allows walkers to make better informed decisions should circumstances change.
Ideally, escape routes remain just that, routes you never need to use. However, on a remote and exposed traverse such as the Stirling Ridge Walk, knowing where they are, and understanding their limitations, forms an important part of safe trip planning and sound decision making.
Management Tracks and Boundary Access Routes
Other than the escape routes already discussed, the Stirling Ridge Walk map also identifies a number of management tracks, boundary access routes and historic tracks that are not open to public vehicle access. These routes are included to provide additional geographic context and to help walker’s better understand the broader layout of the Stirling Range.
The following tracks are shown on the map:
North Boundary Track/Fence
North East Track
Moir Hill Track
South Mirlpunda Track
South Isongerup Track
Ellen Track
Old Kojaneerup Track
These routes vary considerably in their purpose, condition and accessibility. Some are management or boundary access routes, while others are historic tracks that remain useful as geographic reference features. Their inclusion on the map should not be interpreted as indicating public vehicle access or that they are suitable walking routes.
The Old Kojaneerup Track is only followed for approximately 200 metres south of the Ellen Peak Trailhead before turning right in an westerly direction.
The South Mirlpunda Track can be seen from several locations along the ridge when looking south. Although it is shown on the map to help users understand the surrounding terrain, it should not be regarded as an escape route from the Stirling Ridge Walk. There is no established route between the ridge and the South Mirlpunda Track, and descending the steep southern slopes in an attempt to reach it is not recommended.
The South Isongerup Track is also shown on the map because it forms part of the broader track network and provides useful geographic context. However, there is no established route between the northern terminus of the South Isongerup Track and Moongoongoonderup Hill on the Stirling Ridge Walk.
Ellen Track to South Isongerup Track makes an interesting day walk, offering a different perspective of the ridge from the southern side. This can be accessed from the North Boundary Track/Fence or North East Track.
These tracks are included on the map to improve the walker’s understanding of the surrounding landscape and track network.