Section 7. Plotting a bearing onto a map
Transferring Field Observations
A bearing taken in the field becomes most useful when it is transferred onto your map. By plotting the bearing from a known landscape feature, you create a bearing line that narrows down your possible location. When combined with a second bearing from another known feature, these bearing lines intersect to reveal your position. This process is known as resection and is explained in the section 9.
Plotting a Bearing on a map to an unknown feature
Identify your known position on the map from which the bearing was taken. The map does not need to be oriented to the landscape.
Convert the magnetic bearing to a grid bearing by applying the appropriate magnetic declination, unless your compass has already been adjusted for the local magnetic declination.
Check that the correct grid bearing is set at the bearing index.
Place one long edge of the compass on the map so that it passes through your known position.
Rotate the entire compass until the orienting lines are parallel with the map's north–south grid lines and the orienting arrow points towards Grid North.
Keeping the compass in this position, draw a line from your known position along the edge of the baseplate in the direction indicated by the Direction of Travel arrow.
The unknown landscape feature must lie somewhere along this line. Follow the line across the map and compare the mapped terrain with what you observed in the field. For a mountain or peak, its position, contours, elevation and surrounding terrain can often be used to determine which feature you were looking at.
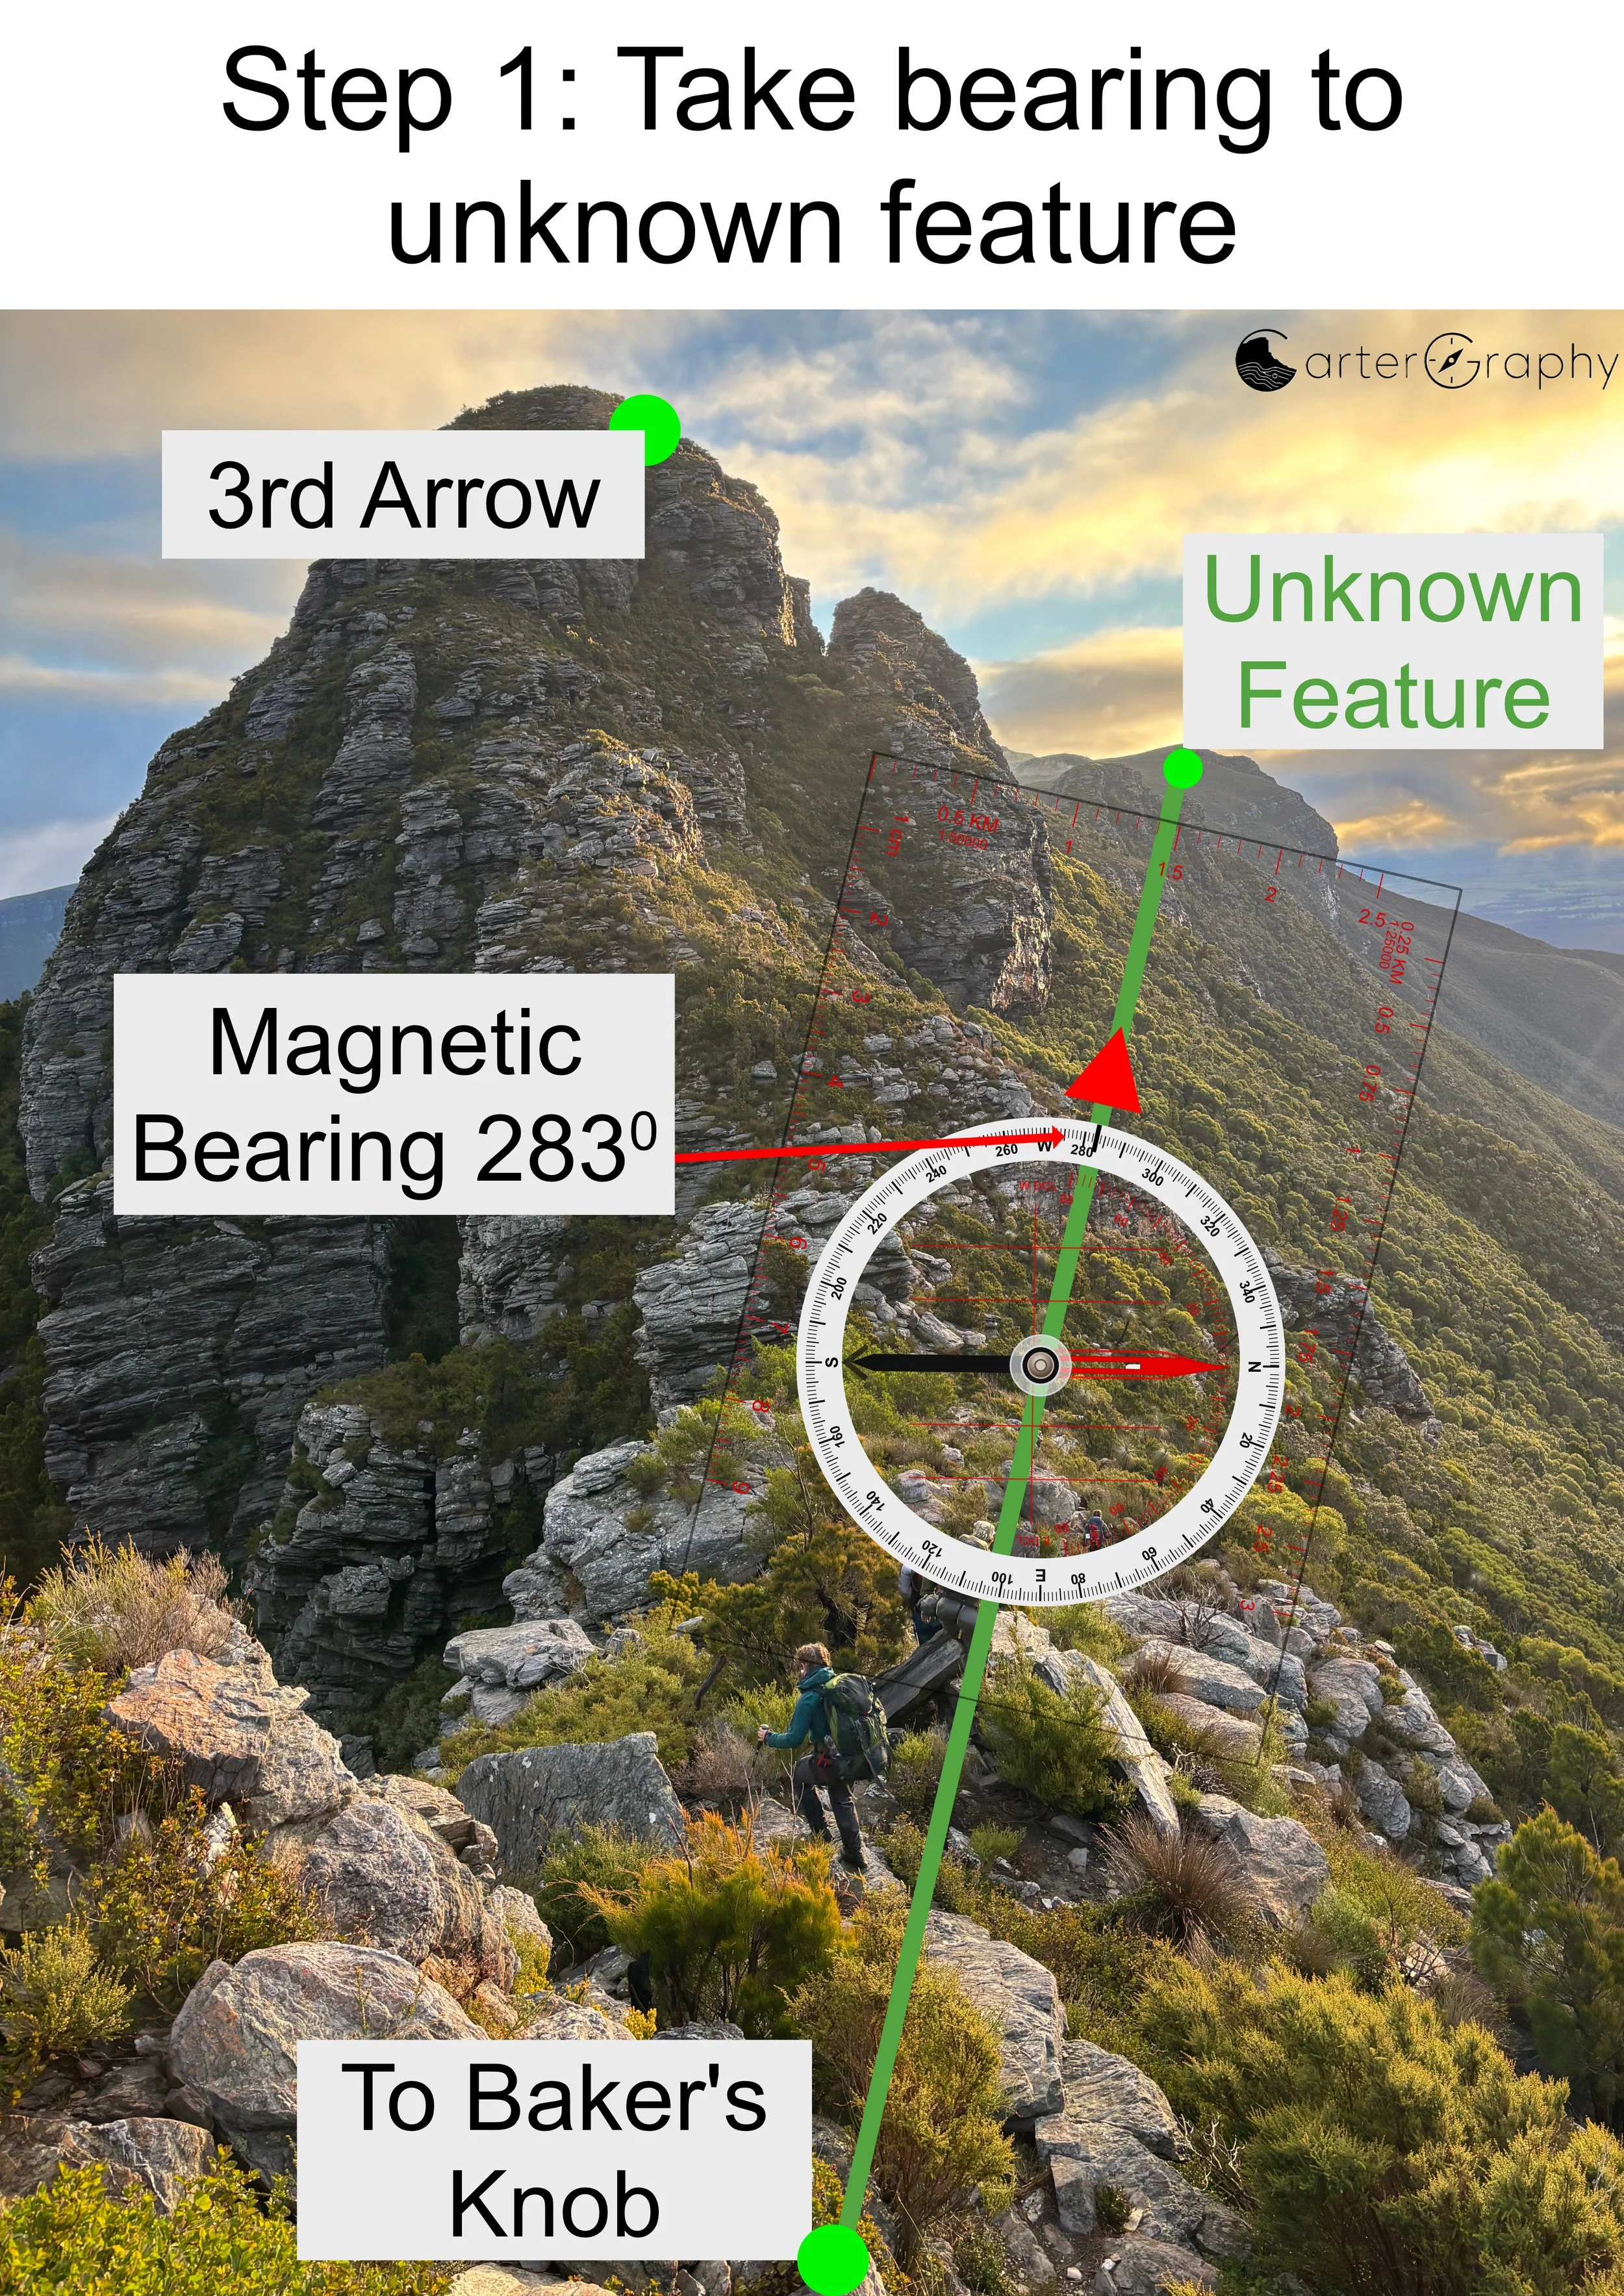
Step 1: Take the Bearing
From your known position, point the Direction of Travel arrow directly at the unidentified feature. Rotate the bezel until the magnetic needle is correctly aligned with the orienting arrow — Red in the Shed. Read and record the magnetic bearing.
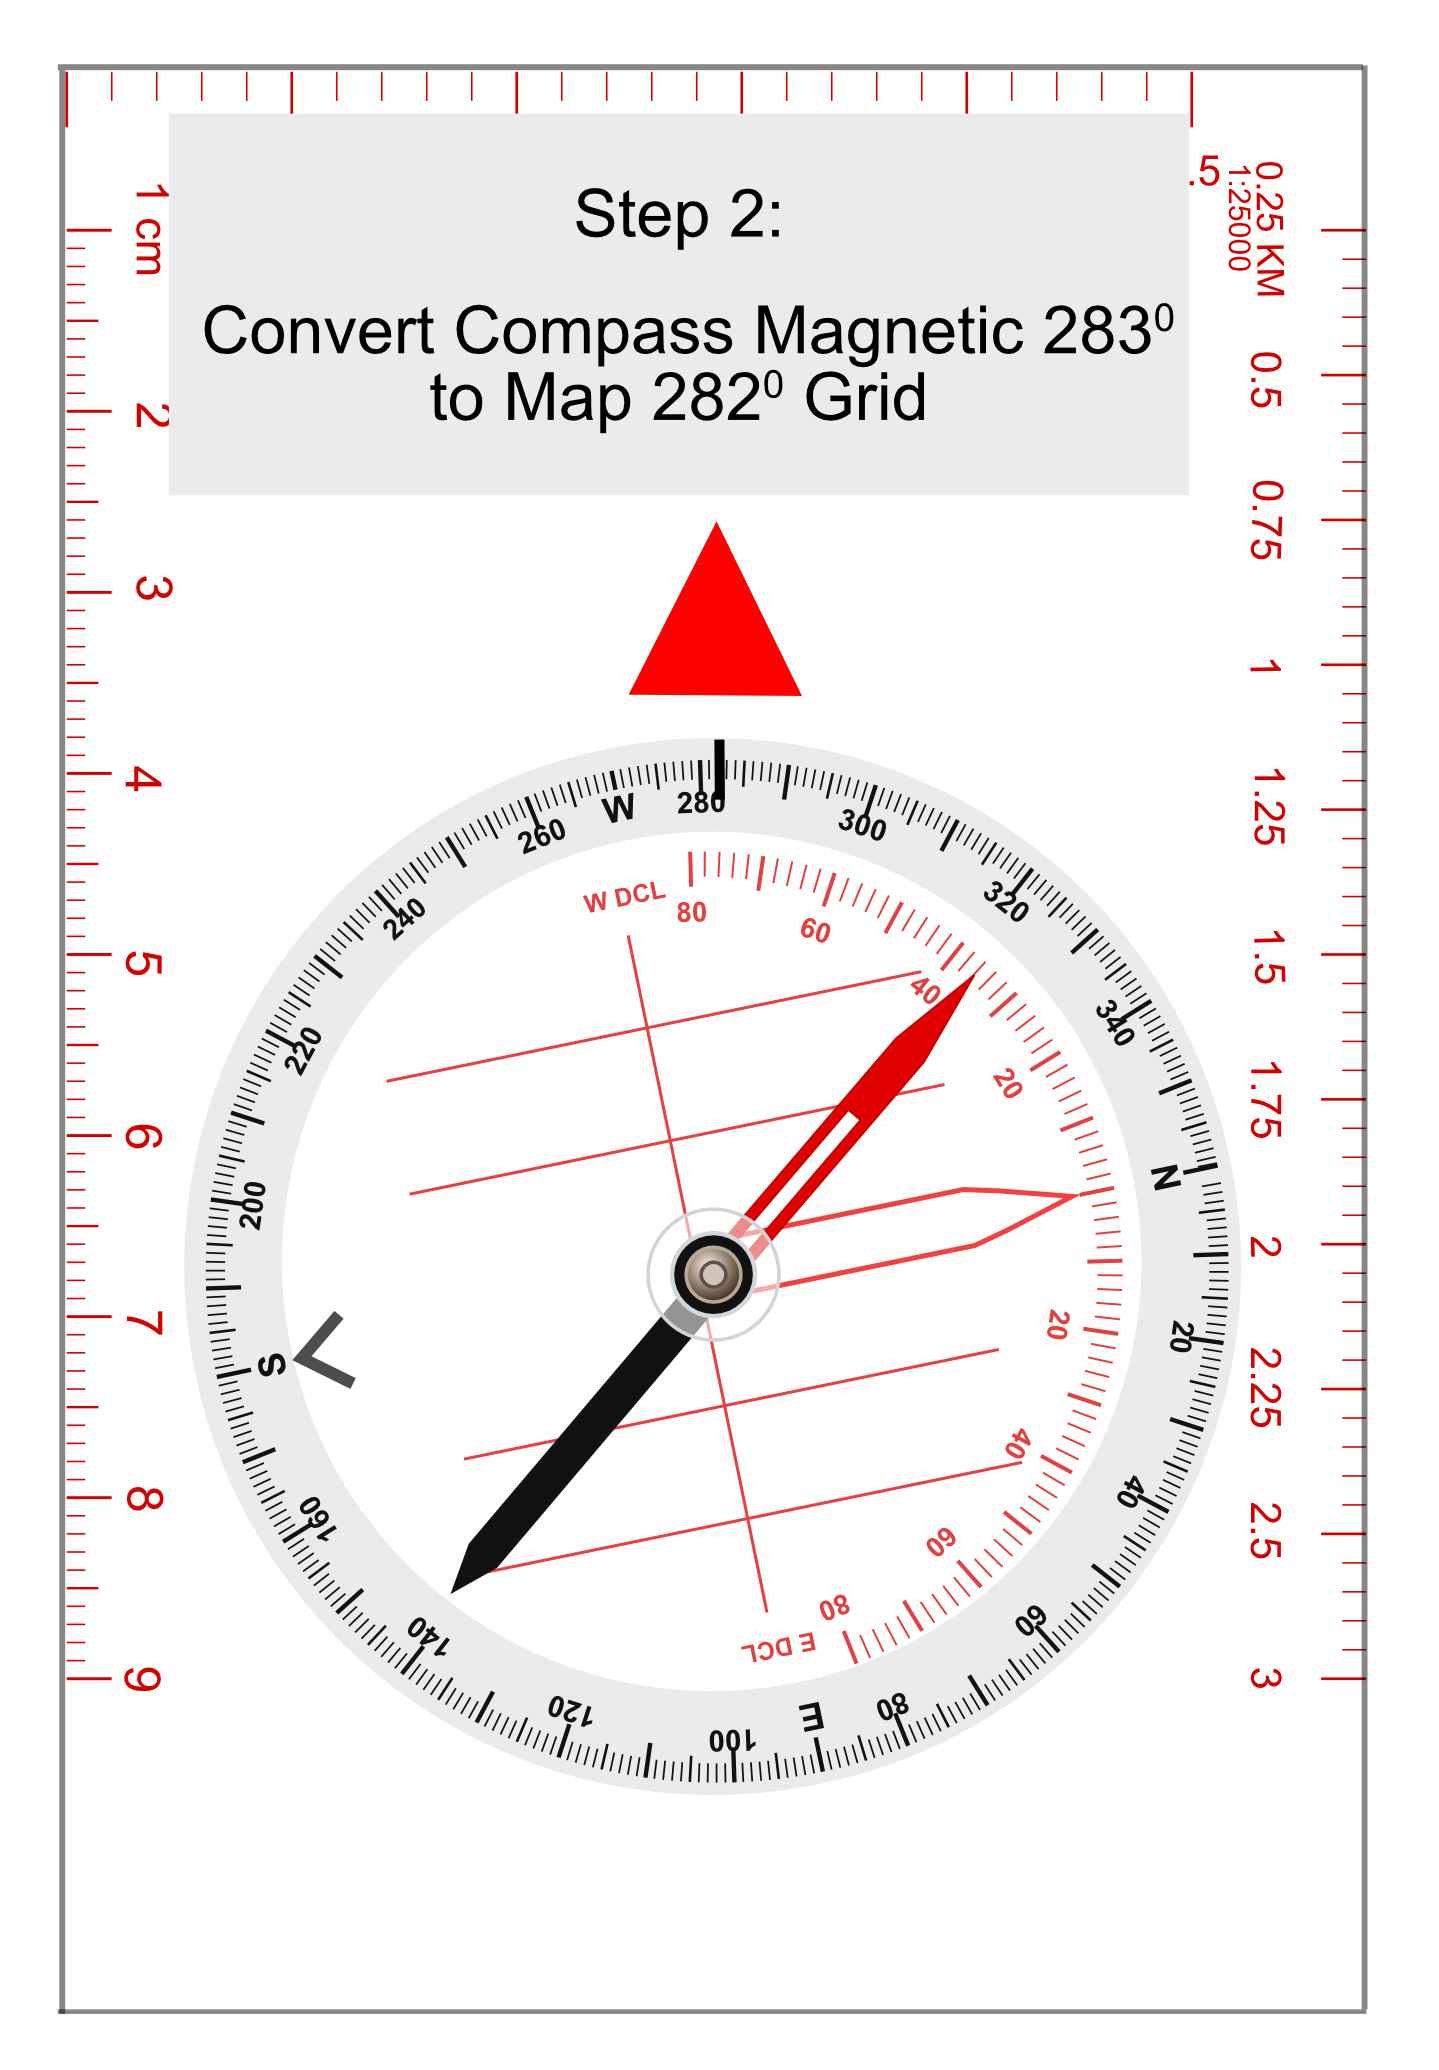
Step 2 : Convert to a Grid Bearing
Before plotting the bearing on the map, convert the magnetic bearing to a grid bearing by applying the appropriate magnetic declination, unless your compass has already been adjusted for declination.
Set this grid bearing at the compass bearing index.
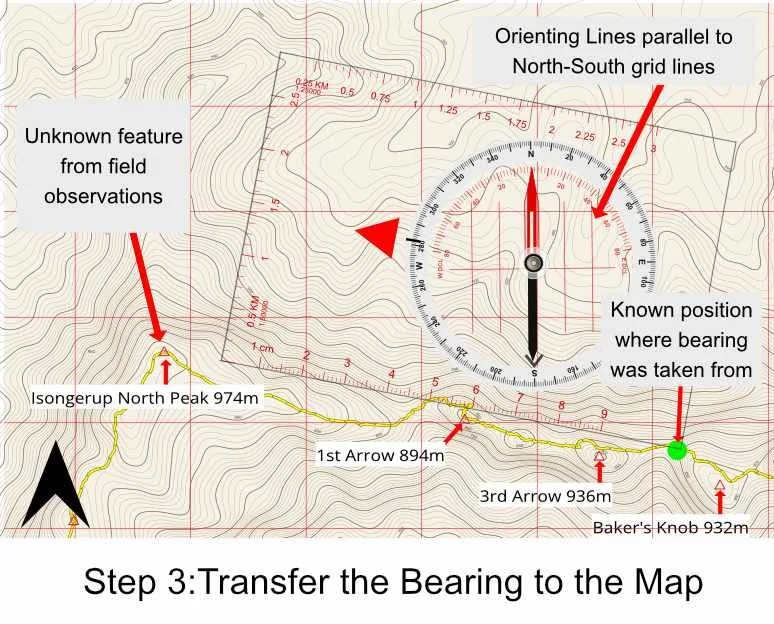
Step 3: Transfer the Bearing to the Map
Locate your known position on the map and place the long edge of the compass through it.
Rotate the entire compass until the orienting lines are parallel with the north–south grid lines and the orienting arrow points towards Grid North. The Direction of Travel arrow should now point away from your known position in the direction of the unknown feature.
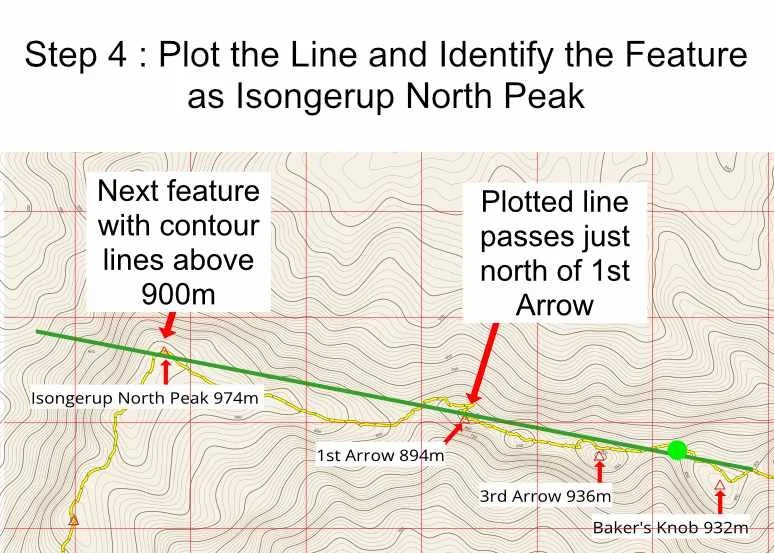
Step 4 : Plot the Line and Identify the Feature
Draw a line from your known position along the edge of the compass in the direction of the Direction of Travel arrow.
The feature observed in the landscape must lie somewhere along this line. Follow the line across the map and compare the contours, summit positions, elevations and surrounding terrain with what you observed in the field.
In this example, the plotted bearing allows the distant feature to be identified as Isongerup North Peak.